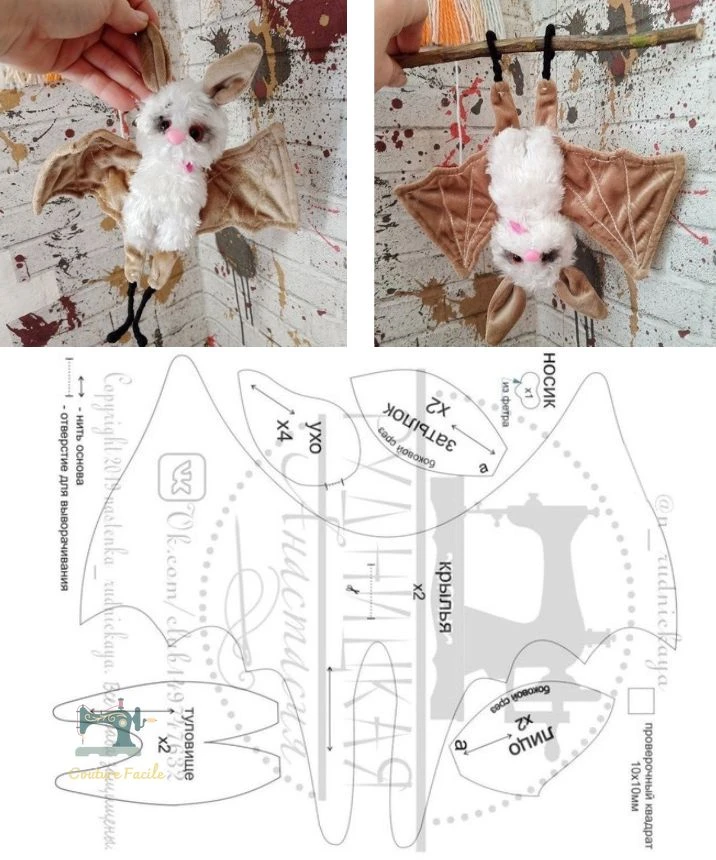
Are you looking for a delightful sewing project? Look no further! This adorable hanging bat plushie is a fun and creative way to add a touch of whimsy to your home, especially as Halloween approaches. Plus, it’s a fantastic opportunity to practice your sewing skills.
Materials Needed
To create your own hanging bat plushie, you’ll need the following materials:
Main Fabric: Choose between Minky, velvet, or felt for the body and wings. These fabrics are soft and easy to work with.
Wing Lining: You can use a contrasting fabric or quilted fabric for the inner part of the wings to make them pop.
Stuffing: Polyester fiberfill or cotton batting for giving the bat its plushy shape.
Matching Thread: Ensure your thread matches your main fabric for a seamless look.
Scissors, Needles, and Pins: Basic sewing tools for cutting and assembling your plushie.
Sewing Machine (optional): While you can sew by hand, a machine will make the process quicker!
Decorative Accessories: Buttons or embroidery thread for the eyes, and a ribbon or hook for hanging the plushie.
Steps to Sew Your Bat Plushie
Here’s a simple step-by-step guide to creating your bat plushie:
Step 1: Prepare the Wings
- Assemble the two pieces of the wing (outer and lining) with the right sides facing each other.
- Sew around the edges, leaving a small opening to turn the fabric right side out.
- Turn the wings inside out and close the opening with an invisible stitch.
- Add decorative details to the wings, such as forming ribbing with visible stitching.
Step 2: Sew the Body
- Place the two body pieces together with the right sides facing.
- Leave an opening in the bottom to insert the stuffing later.
- Attach the wings to each side of the body before filling it with stuffing.
- Stuff the body with fiberfill until filled to your desired firmness, then close the opening.
Step 3: Add Ears and Nose
- For each ear, sew two pieces together, flip them inside out and then attach them to the top of the head.
- Take the pink or contrasting fabric for the nose and place it at the center of the face.
Step 4: Final Touches and Suspension
- Decorate the face by adding button eyes or embroidered features to give your bat character.
- Attach a ribbon or hook on top for hanging, making it possible for your bat to dangle gracefully.
- Optionally, you can add little legs so that your bat can cling to a branch or string.
Tips for Personalization
- Experiment with contrasting colors for the wings and body to create a more vivid design.
- Use black thread for outlining the wings to simulate veins for a more realistic look.
- The hanging bat plushie can be a charming decoration for a child’s room, or a playful accessory for Halloween festivities.
Creating your own hanging bat plushie can be a delightful experience, bringing a smile to anyone who sees it. Enjoy the process, and let your creativity soar as you craft this whimsical piece! Happy sewing! 🦇🌙