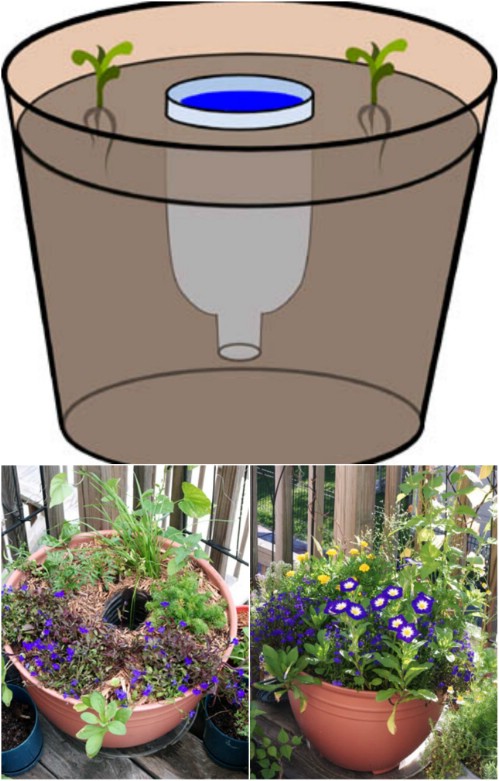
Creating a water reservoir from plastic bottles is a simple and practical DIY project that can help provide a steady water supply for your plants, especially during hot weather or when you’re away. Here’s how to do it:
Materials Needed:
- Plastic bottles (empty and clean)
- Sharp knife or scissors
- Watering can or hose
- Soil or growing medium
- Plants
Instructions:
- Prepare the Bottles: Start by collecting several empty plastic bottles. They can be any size, depending on the amount of water you want to store. Make sure they are clean and dry before use.
- Cut the Bottles: Use a sharp knife or scissors to carefully cut the bottoms off the plastic bottles. Cut them as close to the bottom as possible, creating a wide opening.
- Arrange the Bottles: Dig a hole in the soil of your plant bed or container large enough to accommodate the bottles. Arrange the bottles upside down in the hole, with the open ends facing downwards.
- Fill with Water: Fill each bottle with water using a watering can or hose. The water will slowly seep out of the bottles and into the soil, providing a steady supply of moisture to the roots of your plants.
- Cover with Soil: Once all the bottles are filled with water and arranged in the hole, cover them with soil or growing medium. Make sure the bottles are securely in place and the soil covers them completely.
- Plant Your Plants: Plant your desired plants in the soil above the bottles. Make sure to water them thoroughly after planting to help them establish roots.
- Monitor and Refill: Check the water level in the bottles regularly, especially during hot weather or dry periods. Refill the bottles as needed to ensure a continuous water supply for your plants.
By creating a plastic bottle water reservoir, you can help conserve water and ensure your plants stay hydrated, even during times of drought or when you’re unable to water them regularly. Plus, it’s an excellent way to repurpose plastic bottles and reduce waste.
