Finished size: 13×18 cm
Follow these steps to make your open wide pouch:
Materials Needed:
- 17 pieces of two types of square fabric with sides measuring 5.5 cm
- Lining fabric
- 23 cm zipper
- Piping (optional)
Instructions:
- Cut 17 pieces of fabric into two types of squares, each with sides measuring 5.5 cm.
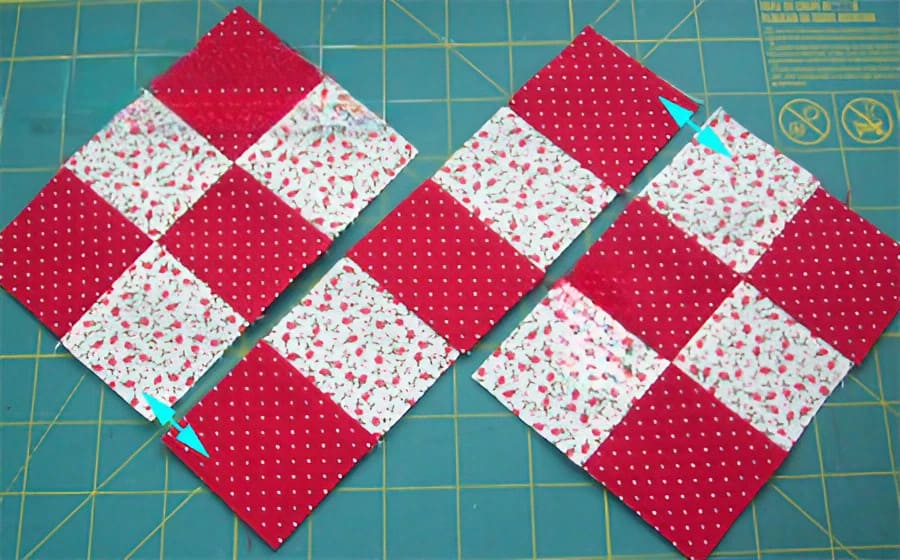
- Piece together 5 groups as shown below, pressing the seam allowance towards the dark fabric. Then, piece together 4 groups of 3 pieces each to form 2 groups.
- Piece together again as shown.
- Once the quilting side of the pouch is finished, trim the right angles of the ends to a curved shape.
- Cut a piece of lining fabric according to the shape of the quilting surface, fold it in half, sew the two side edges together, and set it aside.
- Then cut the interfacing fabric according to the quilting surface. Sew the quilting surface and the interfacing fabric sparsely together, and press a few threads appropriately in the middle area.
- Fold the quilted side and the interfacing fabric over and sew the two side edges together.
- Insert the lining into the shell and sew around the edge of the opening together.
- Cut a strip of piping 3 cm in width and sew it along the front edge of the mouth of the pouch with a seam allowance of 0.7 cm.
- Turn the piping strip inside out, fold in the edges, and sew with a hand sewing needle.
- Finally, install the zipper. Cut two pieces of fabric that are 2 seams wider than the zipper and 5 cm long. Sew them together at the ends of the zipper.
- Press the remaining folded edges of the fabric piece, then fold it inward to cover the zipper head. Fold it inward according to the length of the zipper to be extended.
- Crimp the thread at both ends, and the finished zipper will be 23 cm in length.
- The opening of this pouch is curved, so the zipper should be easier to sew by hand. Place the right end of the zipper to the right side of the pouch, aligning the edge of the opening with the center of the zipper teeth.
- Hand-sewn zippers should be sewn with a backstitch or a half backstitch to increase their robustness. Here, we are using a half backstitch, with a small step (about 0.2 cm) back on the front side and a large step forward (about 0.5 cm) on the back side.
- Sew from right to left with the front facing out and the back facing in, keeping the edge of the opening and the teeth of the zipper aligned as you sew.
- On the other side of the zipper, do not sew the remaining 2 cm of the head and tail, so that it naturally conforms to the folded curve of the front and back of the pouch.
And there you have it! Now you have a lovely open wide pouch ready for use. Enjoy your sewing project!