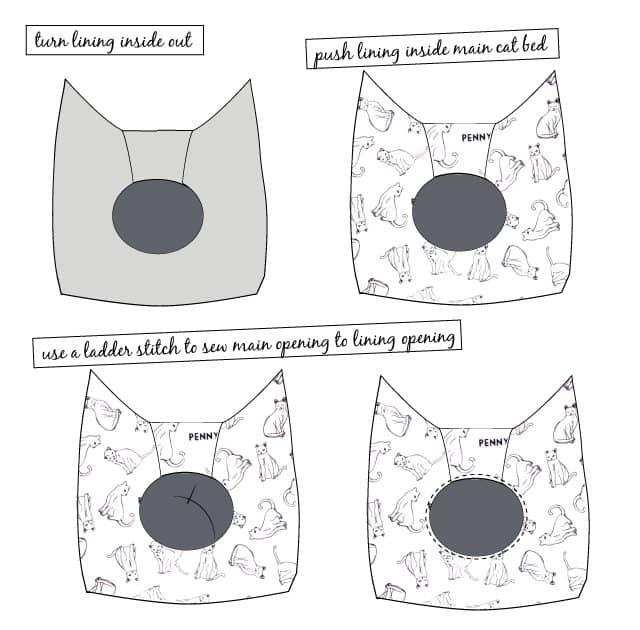
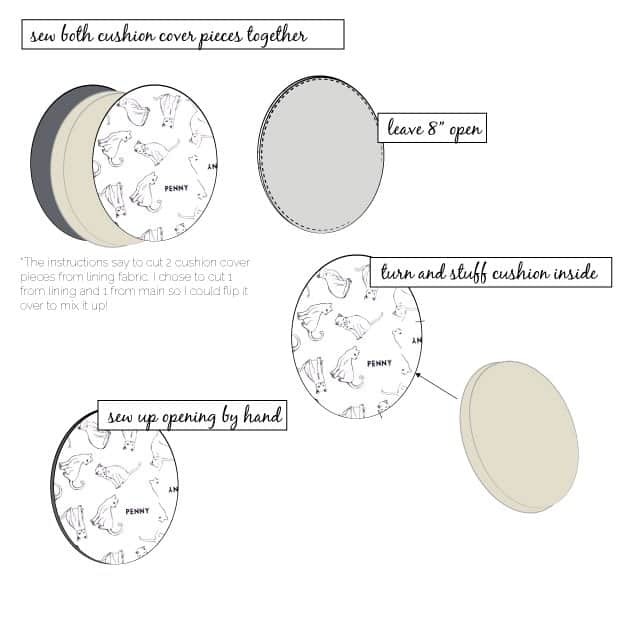
Here are the sewing instructions for the cat bed:
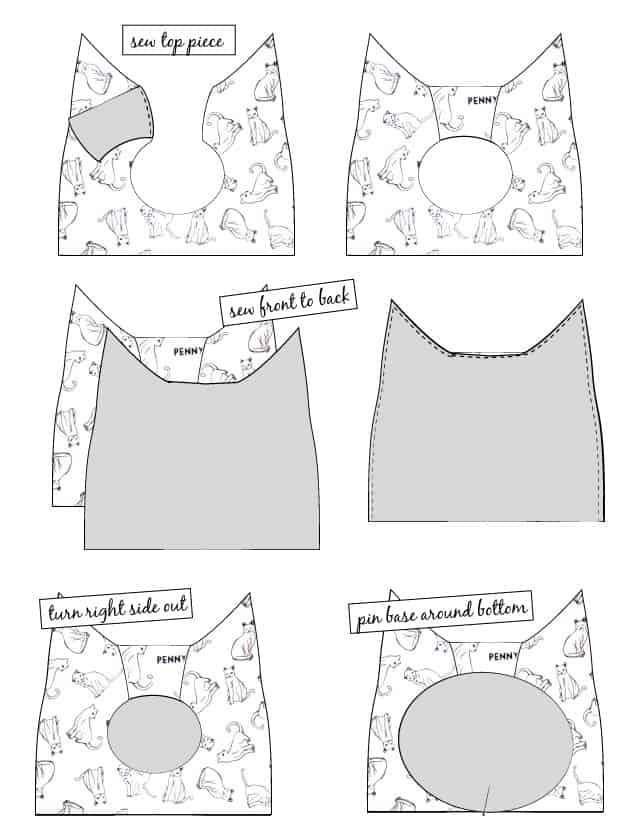
Sew the top piece in the center of the front. This piece is slightly contoured so that the top protrudes a bit, and it also gives you the option to use 2 fabrics. I think that could be a fun little accent.
Sew the front to the back along the sides and the top of the pattern. Use a 1/4-inch seam allowance. Cut the upper corners of the “ears” but do not cut the seam allowance. Press and turn.
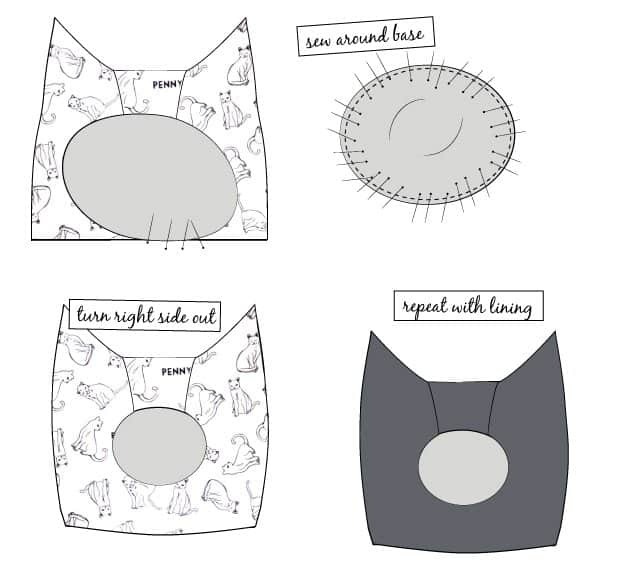
CAT BED BASE Pin the base piece around the bottom of the cat bed, with right sides together. You’ll need to turn and pin as you go. To make this part easier, make a reinforcing stitch on the bottom edge of your base and around the bottom of the cat bed, and pull threads as needed. Also, mark the base with pins to divide it into quadrants, then match the sides to the sides of the cat bed piece.
Once you’ve pinned all around, the cat bed will be inside out. Stitch around the base. Turn right side out.
Repeat with the lining fabric.
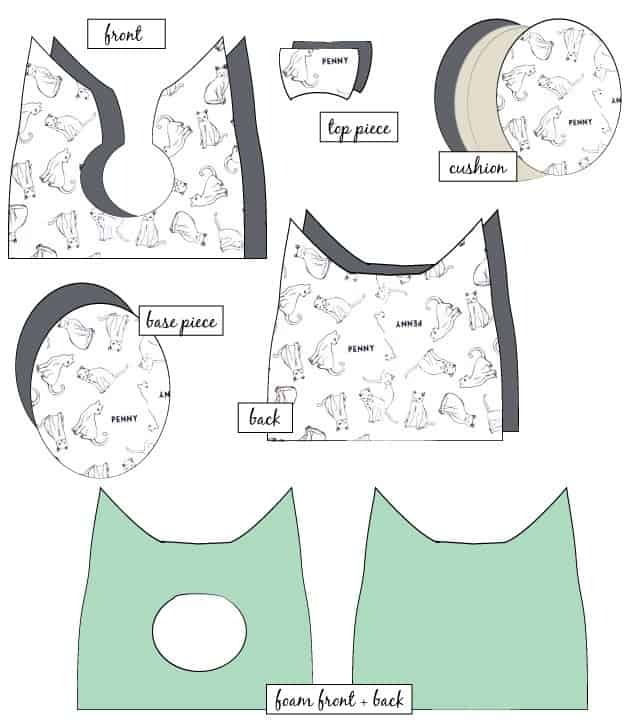
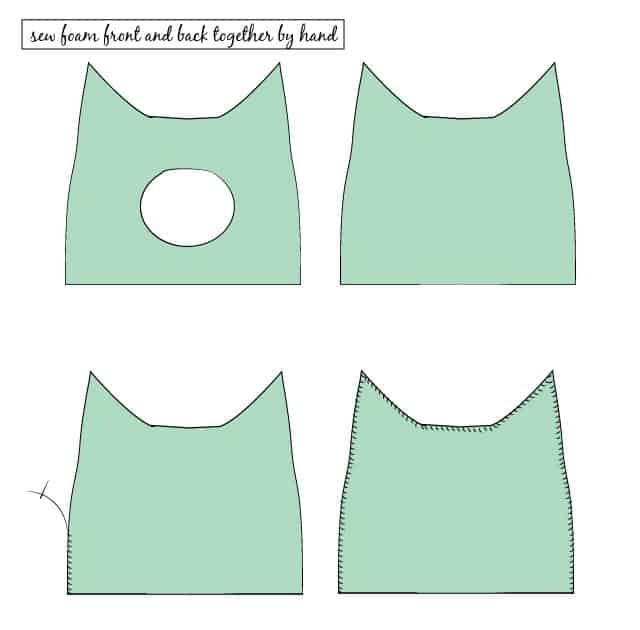
ASSEMBLE THE CAT BED Now, take the foam pieces. Sew together the front and back foam around the edges. Since your foam is 1/2 inch thick, the best way to do this is with a quick hand blanket stitch.
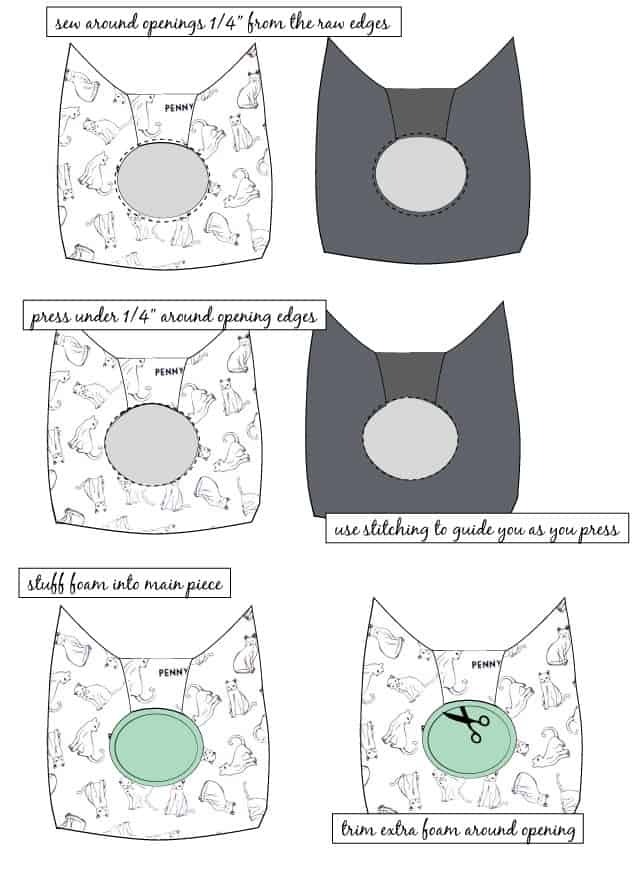
Sew around the door opening 1/4 inch from the raw edge of the fabric on both main and lining pieces of the cat bed. Use a normal stitch length (2.5 mm). Use this stitching to help you insert 1/4 inch of fabric underneath to create a clean edge. Press along the edge as you go and gently pull on the threads if needed.
Insert the foam inside. The foam pieces are shorter than the cat bed, so they’ll fit inside. It’ll be a snug fit (and it should be!). The foam doesn’t even have a contoured center piece on the top of the front piece. If you need to cut the foam around this area to get the right size, go for it!
