As any sewing enthusiast knows, a sewing machine is more than just a tool; it’s an essential part of our creative journey. Whether you’re crafting garments, home decor, or playful accessories, safeguarding your sewing companion is crucial to ensuring it stays in top shape. But why settle for a plain old cover when you can add a personal flair to your sewing space? Enter the charming world of custom sewing machine bags and covers!
Why You Need a Custom Cover
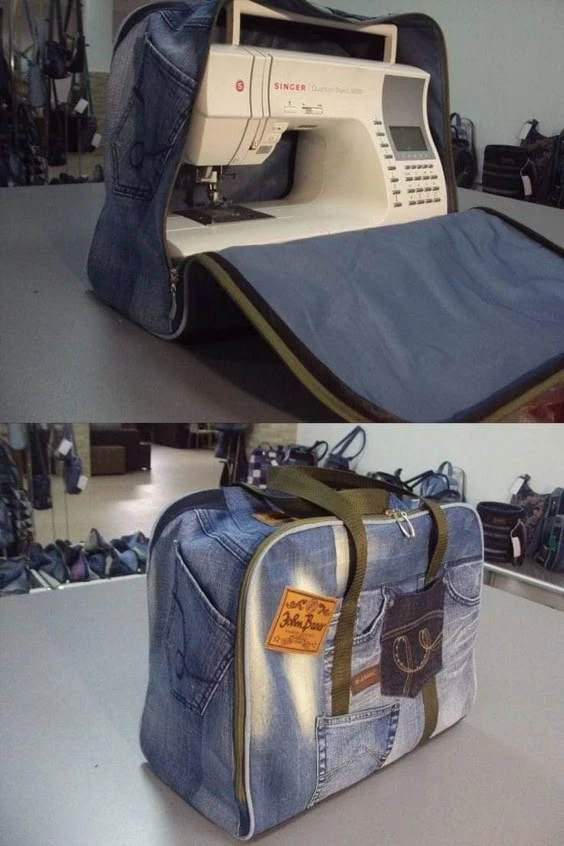
Sewing machines can be sensitive to dust, spills, and even accidental bumps. A well-fitted cover not only protects your machine but also reflects your unique style. Adorable sewing machine bags and covers can transform your workspace from mundane to magical, creating a warm and inviting atmosphere as you stitch away.
Benefits of DIY Sewing Machine Covers
Personalization: Custom covers allow you to express your personality. You can choose fabrics that speak to you—floral patterns, bright colors, or even quirky prints that spark joy every time you see them.
Organization: Many sewing machine bags come with extra pockets for your sewing essentials, keeping everything organized and within reach. No more searching for that missing pair of scissors or spools of thread!
Easy to Make: Even if you’re a beginner, creating a sewing machine cover is a fun and straightforward project. With just a few materials and basic sewing skills, you can craft something beautiful and functional.
Perfect Gift: Know a fellow sewing enthusiast? A handmade sewing machine cover makes for a thoughtful and delightful gift that shows you care.
Getting Started: Materials and Steps
To embark on your sewing machine cover adventure, you’ll need a few materials:
Fabric: Choose your favorite cotton or canvas fabric for durability.
Interfacing: This adds structure and sturdiness to your cover.
Thread: Pick a color that complements your fabric.
Sewing Machine & Basic Tools: Remember to have your trusty sewing machine ready alongside scissors, pins, and a measuring tape.
Simple Steps to Create Your Cover
Measure Your Machine: Start by measuring the dimensions of your sewing machine to ensure a perfect fit.
Cut Your Fabric: Cut your selected fabric into the appropriate shapes, allowing for seam allowances.
Assemble: Begin sewing the pieces together according to your design, adding pockets or embellishments as desired.
Finish Up: Once everything is stitched, give it a good press, and voilà! You have a delightful cover ready to protect your sewing machine.
Get Creative!
This project is all about letting your imagination run wild! You can customize your design with appliqué, embroidery, or even patches that showcase your sewing passions. The possibilities are endless!
Join the Community
Whether you’re a seasoned pro or just starting, there’s a vibrant community of sewing enthusiasts out there ready to inspire you. Share your creations, seek advice, and connect with others who share your passion for all things sewing!
Conclusion
Incorporating a stylish cover for your sewing machine isn’t just a practical move; it’s about celebrating your love for sewing. So gather your materials, clear some space, and let the creativity flow! Your sewing machine will thank you, and you’ll enjoy a more personalized, organized, and stylish sewing space.
Happy sewing! 🧵✨