Materials needed:
- Black felt or fabric
- Elastic band
- Scissors
- Glue or sewing kit
- Measuring tape or ruler
Instructions:
- Measure your dog’s head circumference. This will help you determine the size of the hat and the length of the elastic band needed.
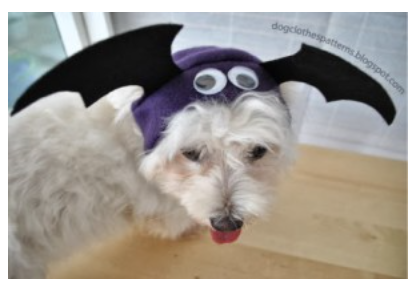
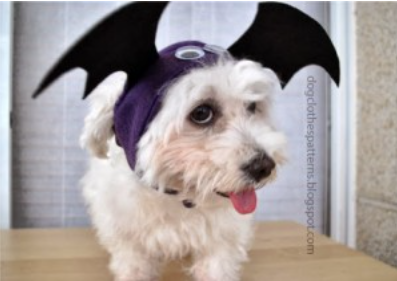
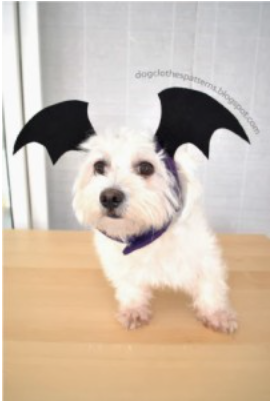
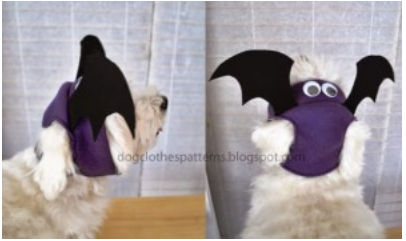
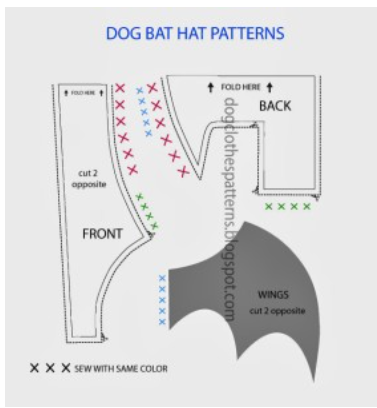
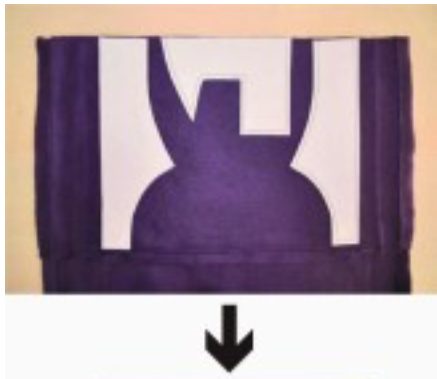
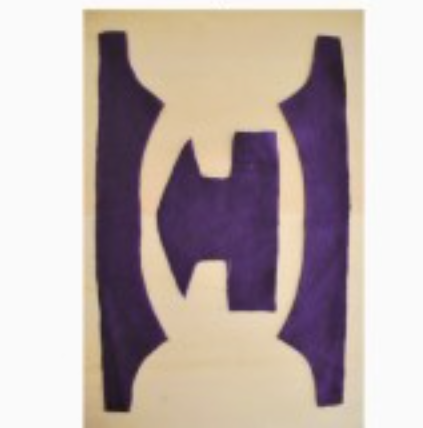
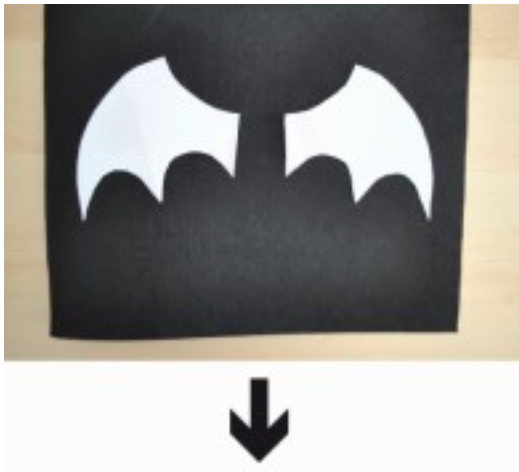
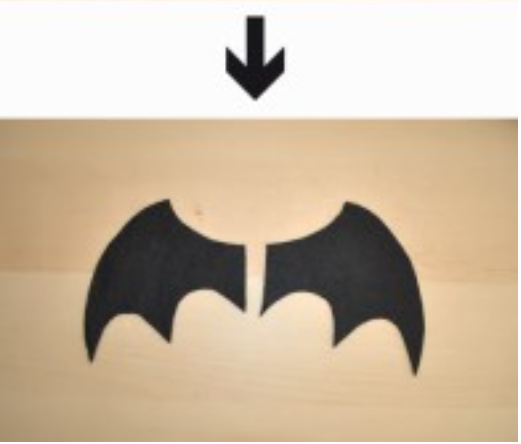
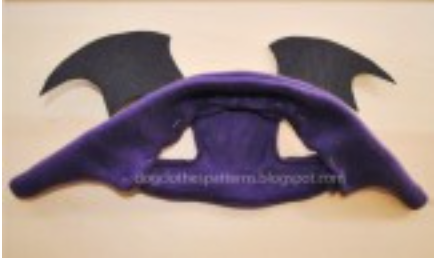
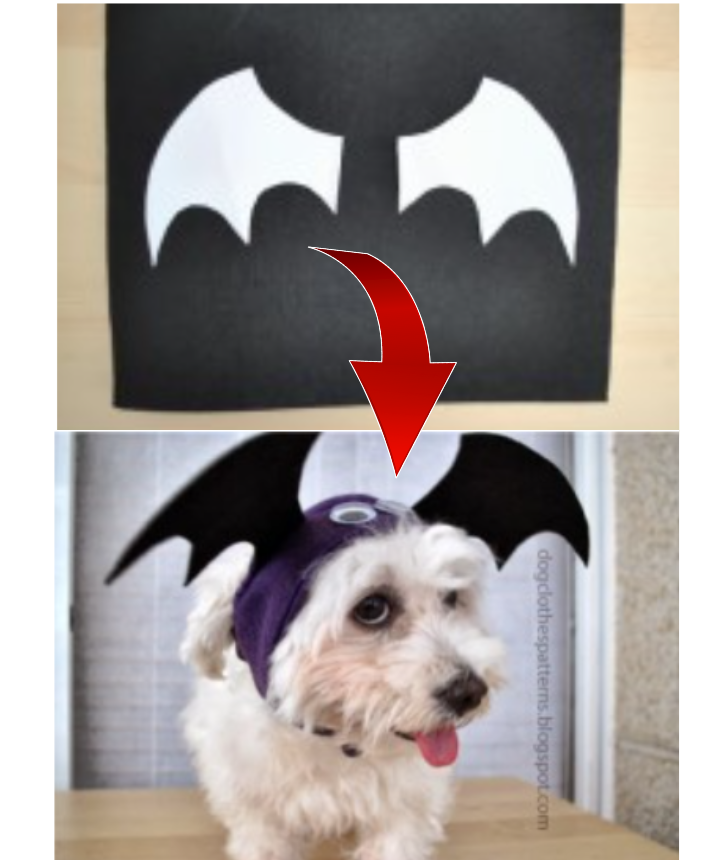
- Cut out four bat wing shapes from the black felt. You can find a template online or draw them freehand. The wings should be large enough to cover your dog’s ears when worn as a hat.
- Cut two small slits near the bottom edge of each wing, making sure they’re wide enough to fit the elastic band through.
- Measure and cut the elastic band to fit your dog’s head comfortably. Leave a little extra length for tying or sewing the ends together.
- Thread the elastic band through the slits on each pair of wings, ensuring they’re evenly spaced apart.
- Secure the ends of the elastic band together by tying a knot or sewing them together. Make sure the elastic band is snug enough to keep the hat in place on your dog’s head without being too tight.
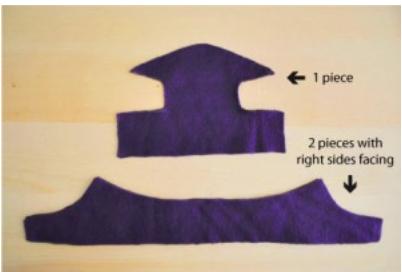
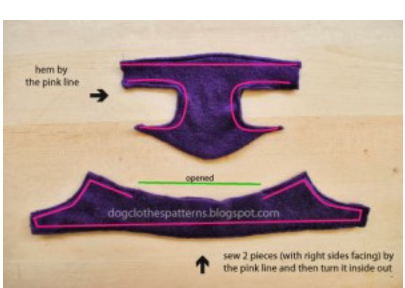
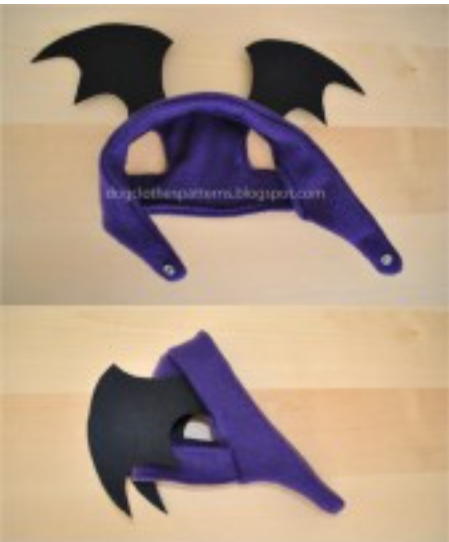
- Take two of the bat wing shapes and glue or sew them together along the edges, leaving the bottom open. Repeat with the other two wing shapes.
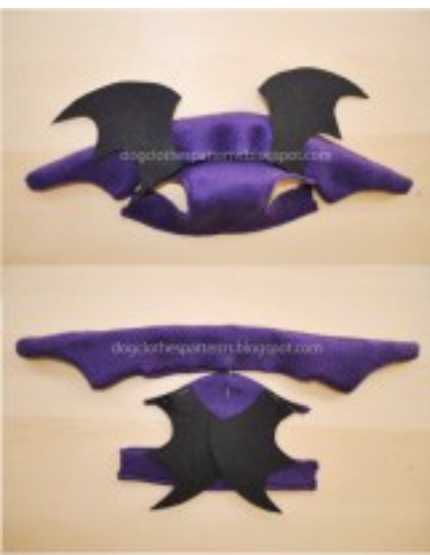
- Attach the wings to the elastic band by gluing or sewing the bottom edges of each pair of wings to the elastic band. Make sure they’re securely attached and evenly positioned on either side of the band.
- Once the wings are attached, your bat wing hat is ready to be worn by your furry friend! Simply place the hat on your dog’s head with the wings positioned on either side, and they’ll be ready to show off their spooky new look.
Feel free to customize the hat by adding extra decorations like glitter, sequins, or googly eyes for a fun and festive touch.