Introduction: If you’re looking for an eco-friendly and budget-friendly way to carry your groceries or belongings, turn an old t-shirt into a reusable and stylish bag! In this tutorial, I’ll show you step by step how to create your own bag using just a t-shirt and some basic tools. It’s an easy and enjoyable project, perfect for both sewing beginners and those looking to give their old clothes a new life. So grab your t-shirt and follow along to discover how to make your own custom reusable bag.
Step 1: Gather What You’ll Need For this project, you’ll need:
- A t-shirt (it doesn’t need to be heavy-duty thick cotton, but avoid fabrics that are too lightweight)
- A ruler
- A pen
- Scissors or a rotary cutter
- A cutting mat (optional but very helpful)
*Note: The size of the t-shirt will determine the size of the bag. If you only have a large t-shirt and want a smaller bag, then check out the alternate instructions in Steps 2 and 3.
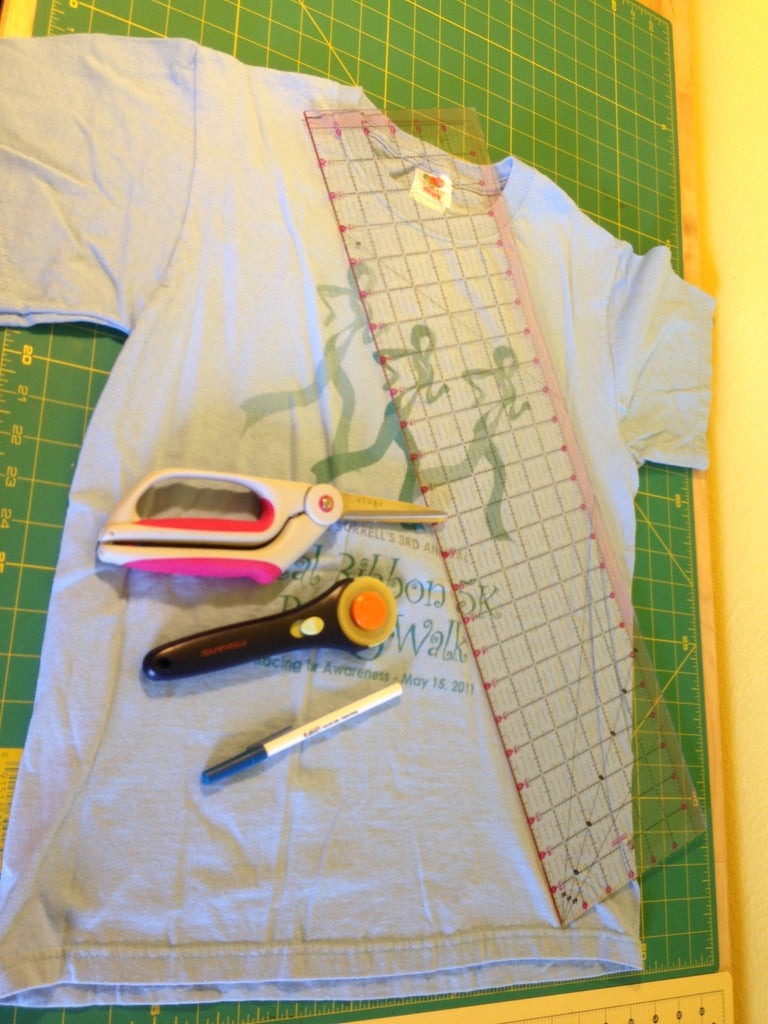
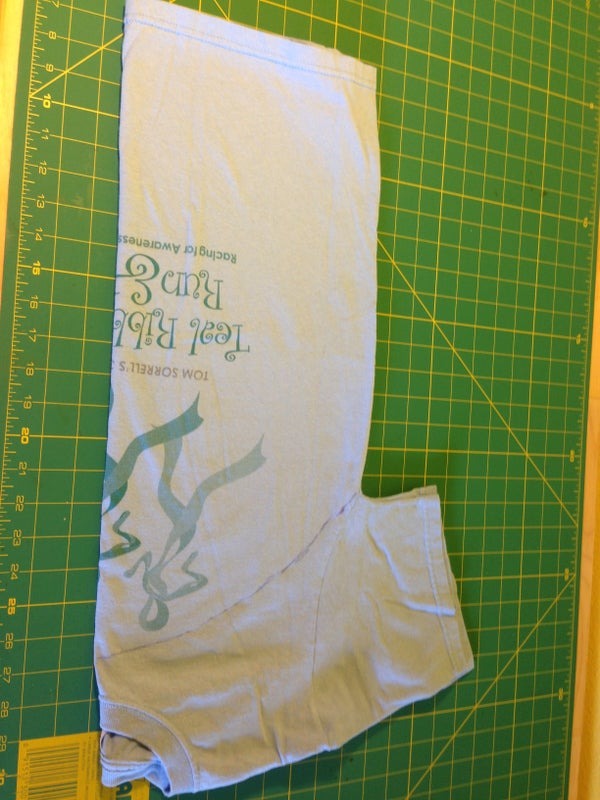
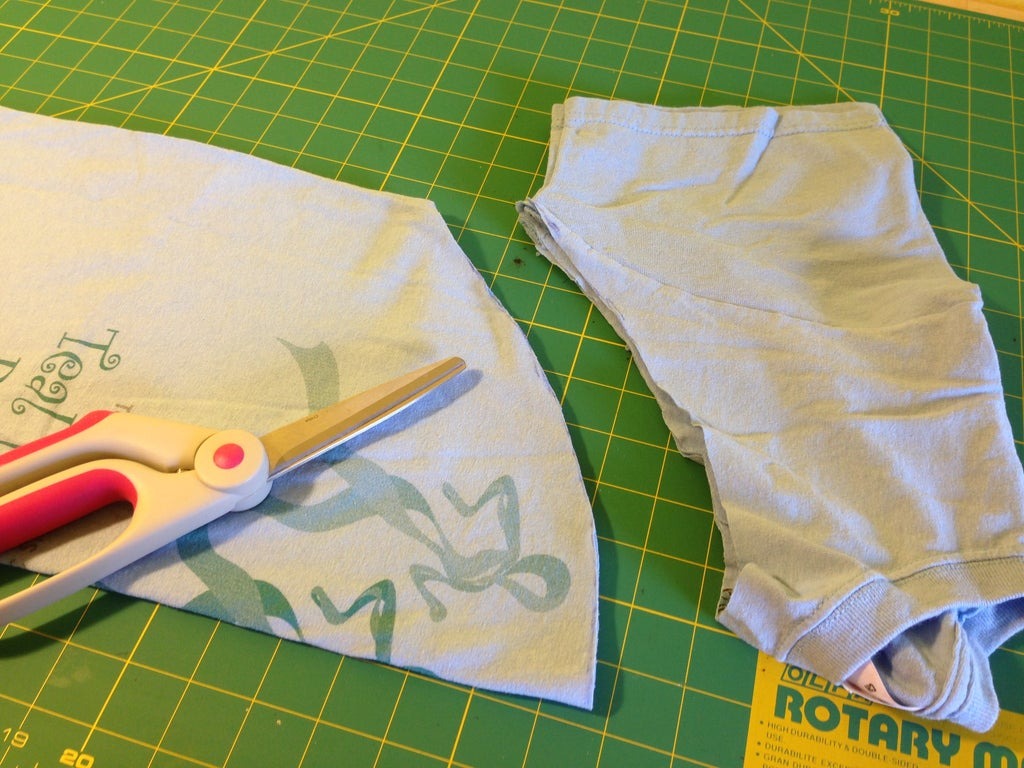
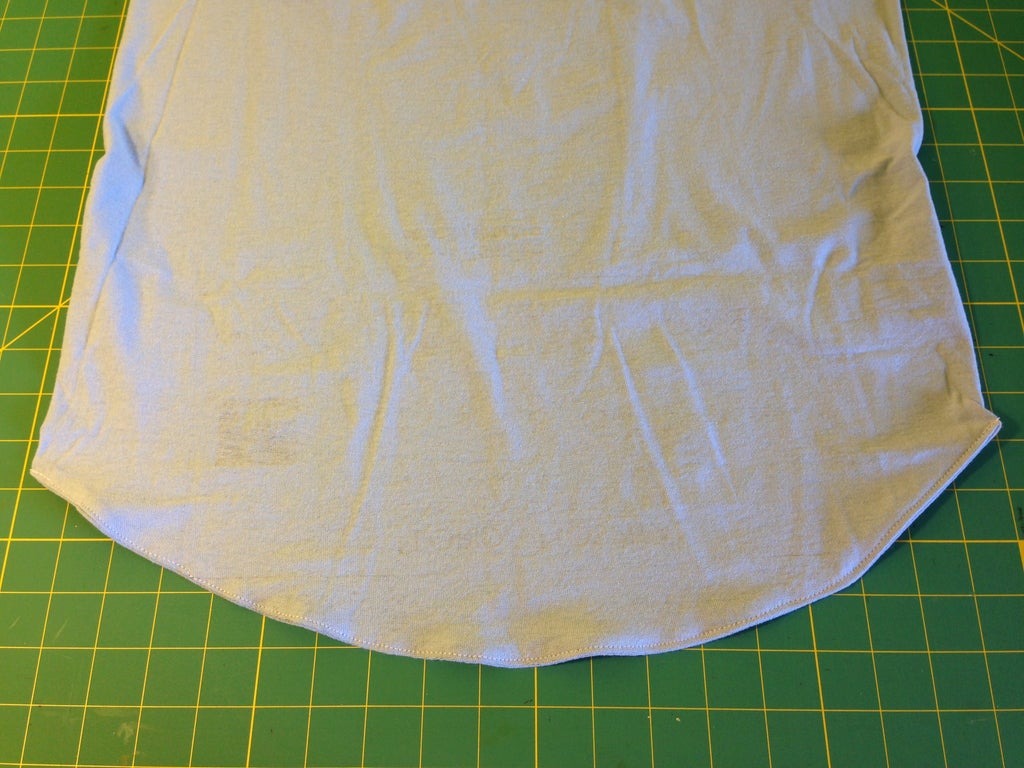
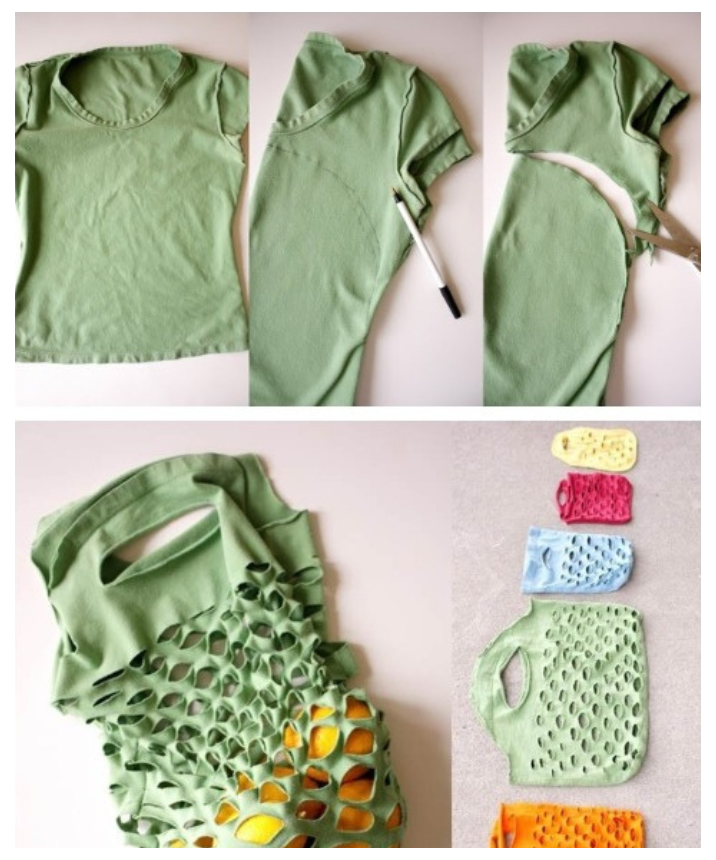
Step 2: Make the First Cut We’ll be using the hem of the t-shirt as the top of the bag in this project, so we’ll need to cut away the top of the shirt to become the bottom of the bag. Here’s how:
- With the shirt right side out (words showing), fold the shirt in half lengthwise.
- Draw an arc and cut off the neck and sleeves.
Note: If you want the words of the t-shirt to be visible on the outside of the bag, simply reverse my instructions.
Alternate instructions for a smaller bag (sorry, no pictures, but it’s easy to do): Instead of cutting off the sleeves and neck, trace a rectangle slightly smaller than the size of the bag you want (because remember, it will stretch). Place one edge of the rectangle on the bottom hem and another edge along one of the folded sides (to minimize sewing).
*Don’t throw away the fabric scraps you cut off, you can turn them into a fun dog toy that will keep your furry friend entertained for hours!
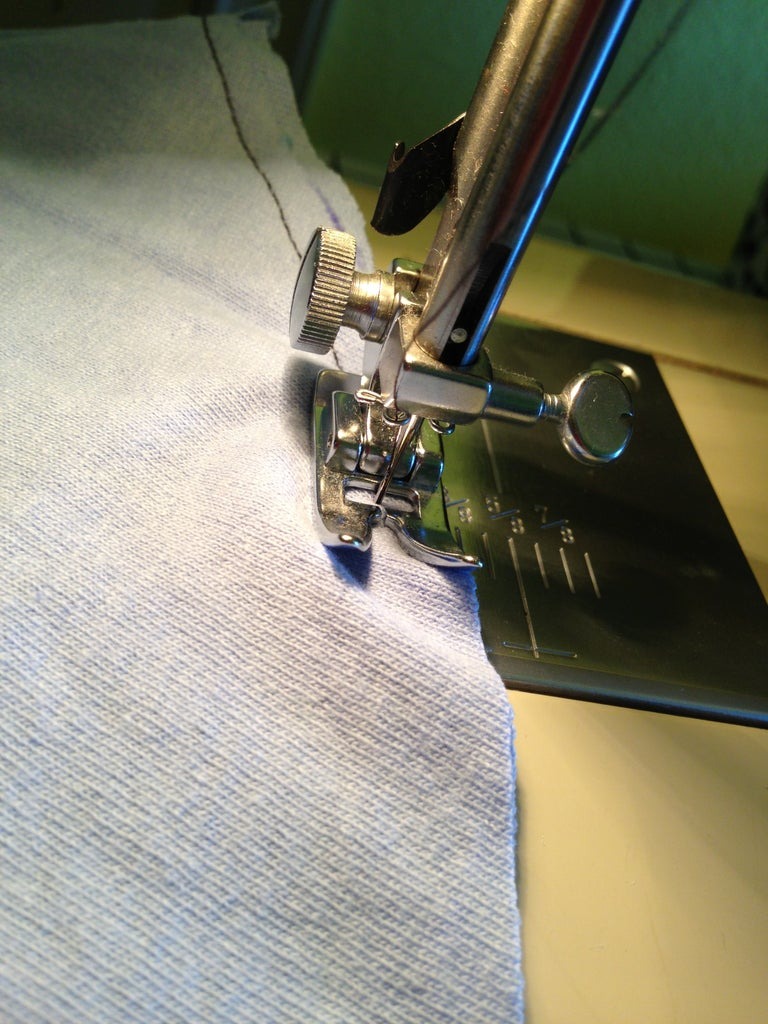
Step 3: The Only Sewing Step! Here comes the only sewing step – and it’s almost a French seam! Ooo la la!
- Pin the curved part that you just cut and sew it shut using the presser foot as your seam allowance.
- Turn the shirt inside out (words on the inside now), and top-stitch it down.
Alternate instructions for a smaller bag (sorry, no pictures, but it’s easy to do): You will have one extra edge to sew – the side seam.
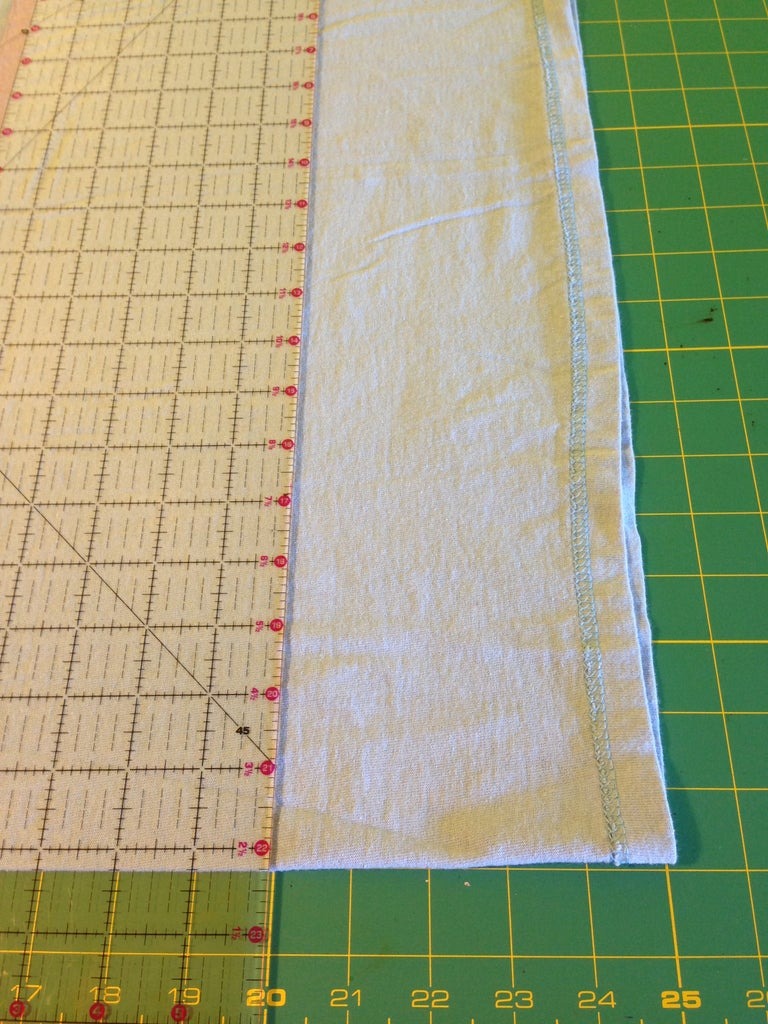
Step 4: Make the Handle Flip the shirt around so that the hem is at the top and measure about 2 – 2.5 inches down from the hem to cut a long slit for the handle. You can cut the handle to be as long or short as you want.
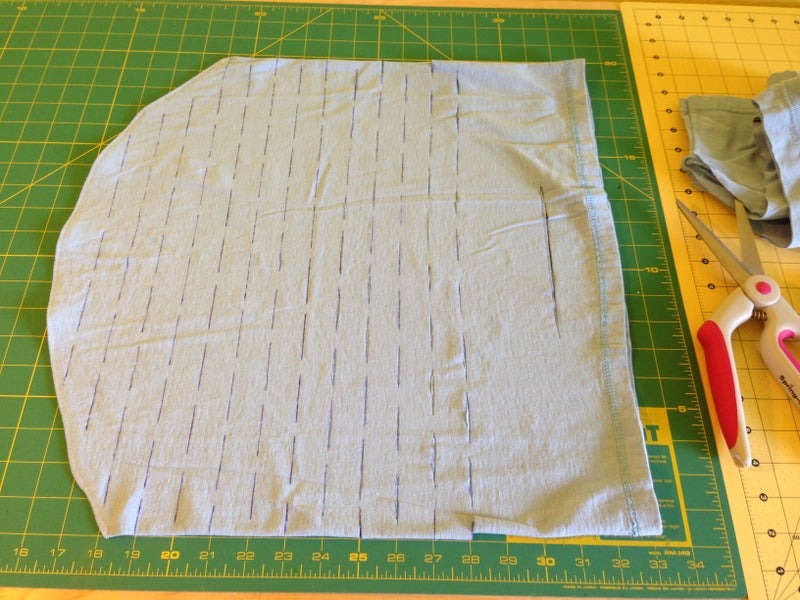
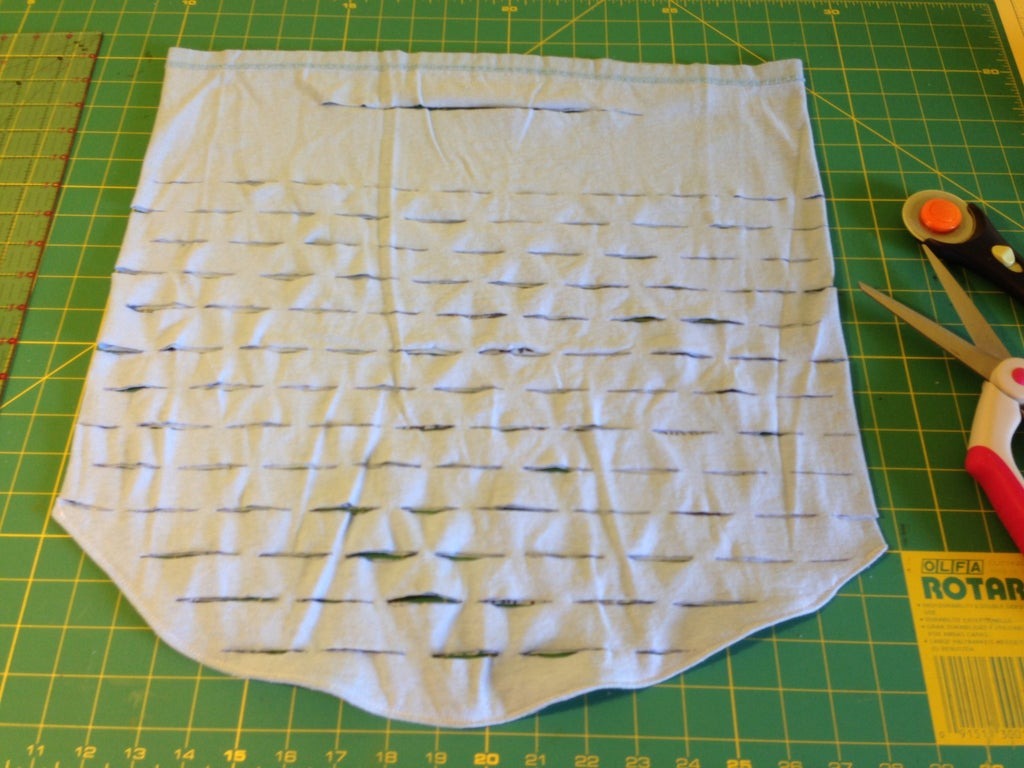
Step 5: More Cutting Here’s where the fun begins.
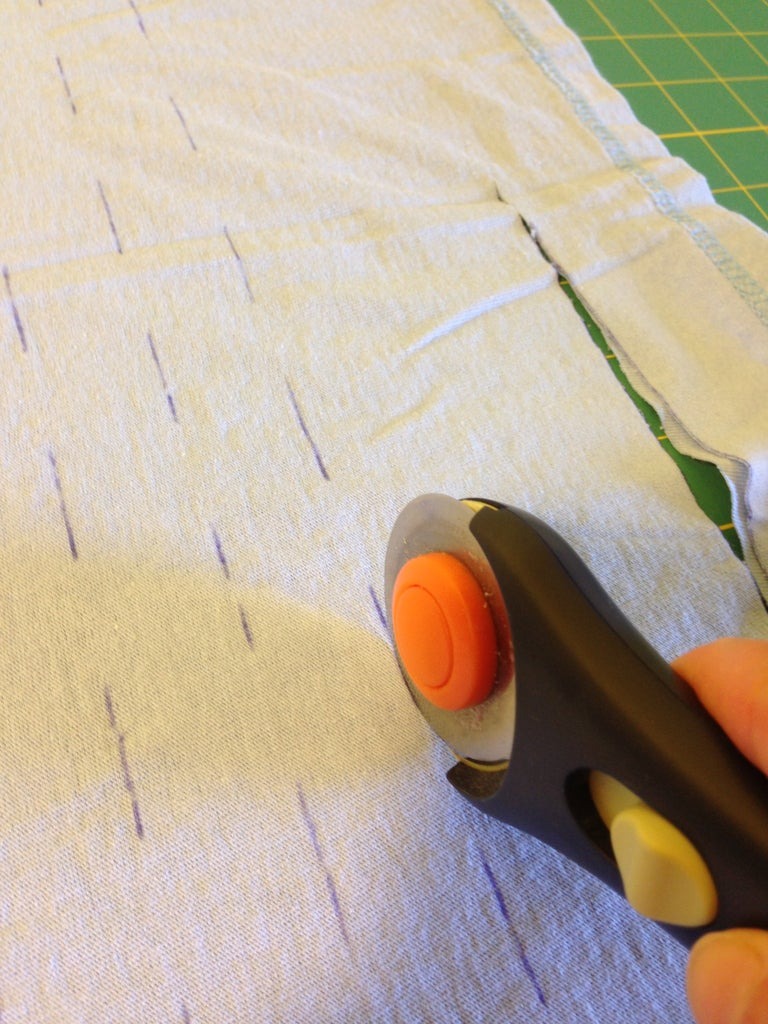
- You can either measure out your cuts or just start making slits in the shirt – this is a very forgiving project. Since I wanted to write instructions, I used a ruler and basically followed these guidelines:
- Start about 4 to 5 inches below the hem, draw 1.5 to 2-inch lines with about half an inch of space in between the lines.
- Some of mine were right on the edge, so I made them about half the length of a regular line.
- Space the rows 3/4 to an inch apart.
- Try to stagger the lines in each row to make the bag pull apart more easily for a better market bag effect.
- You will be cutting through both layers of the bag at once, so you can either use scissors to cut the lines or use a rotary cutter. I found the rotary cutter made it much easier and quicker.
*No brainer, but thought I’d mention it anyway… if you sewed up one of the side seams, make sure you don’t cut thru it!
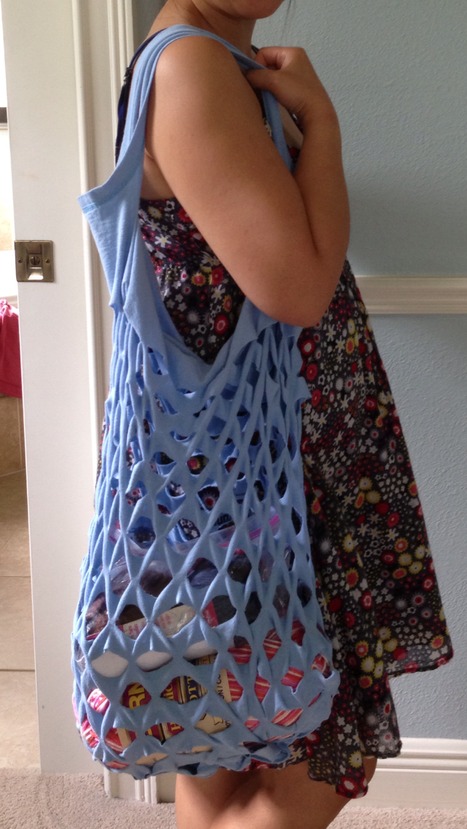
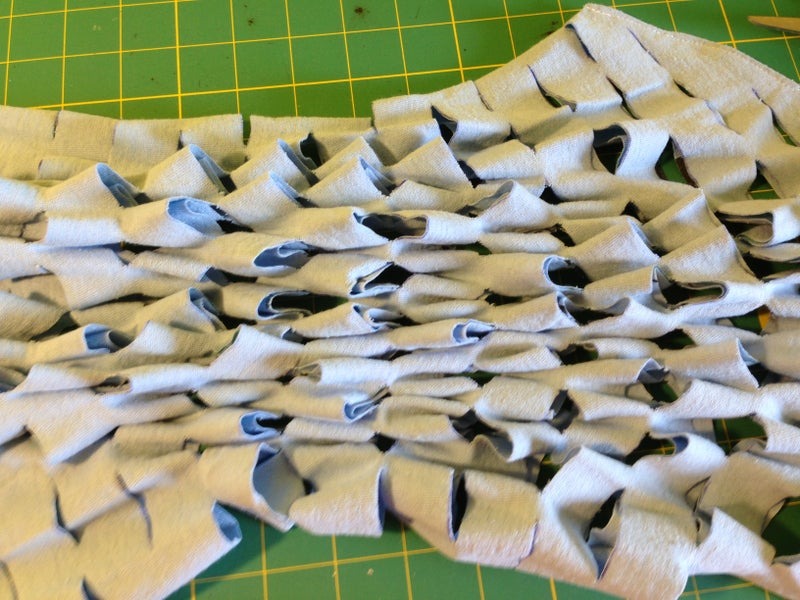
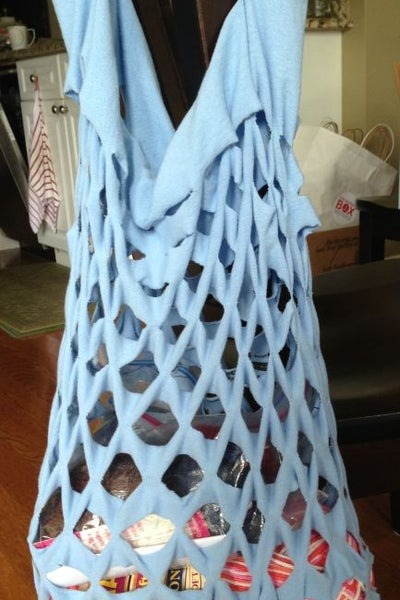
Step 6: Stretch and Use! Stretch the shirt lengthwise to help the fabric fray a bit. If you have time, it’s even better if you wash and dry the bag. It’s now ready for a trip to the market… or in my case, a crochet meetup event 😉