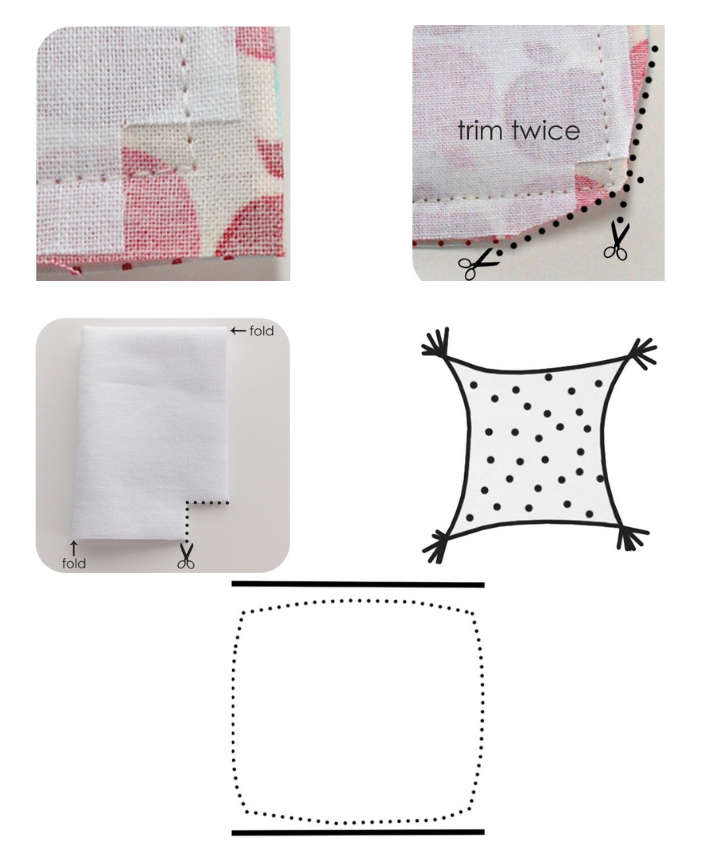
Here are some tips you might try to help keep your corners squared off nicely, and your squares looking square.
- Trim away the corners of interfacings and/or interlinings: I cut little squares out of the interfacing when making things with corners like the Checkbook Wallet or Business Card wallet. Any little bit of bulk you can get rid of in the corner helps.
- When you do this, the part trimmed away should extend past the seam allowance some.
- The fastest way to do this is to fold your piece in half or fourths and then just cut out the corner going through all layers at once.
- Cut twice across corners: Rather than trimming once diagonally across each corner, I trim twice to get rid of even more fabric in the allowance. When trimming, make sure not to cut right up against your stitching, or the thread won’t have anything to hold onto, and your corner will end up with a hole.
- Taper the corners: You know how many pillows end up with that not-so-square shape? Like this:
- Some of this can be minimized by not sewing a literal square. As you approach the corners, begin to turn in toward the center to taper the corners.
- The smaller and flatter whatever it is you are sewing, the more subtle you should be with this technique. So for pillows, you can taper more, but for something small and flat, like a coaster, you might want to just taper the corners a few stitches.
- If I were sewing a pillow, here is what the general outline of my stitching would look like:
- Sew one or two stitches across the corner: Rather than pivoting at the corner, stop and sew one or two stitches diagonally across the corner. Your stitching will look like this:
- Gently poke out the corners: Insert your scissor tips and gently push the corners out. Go slow and take it easy. I’ve pushed my scissor tips through the corner more than once and made a real mess of the corner. If you poke through, you may need to resew the corner. If it is a small hole, it can sometimes be patched using a slip stitch.
- Iron it into shape: As the last step for making the corners look nice and square, warm up my iron and press them really well. Then while the fabric is still warm and pliable, gently pull and massage it until it comes out level with the corner.
- If the corner is still flaring out some, use my scissor tips to tuck it into a neat square. Then let the piece cool so it will hold the shape.
Following these tips will help you achieve well-defined corners and squares for your sewing projects.
