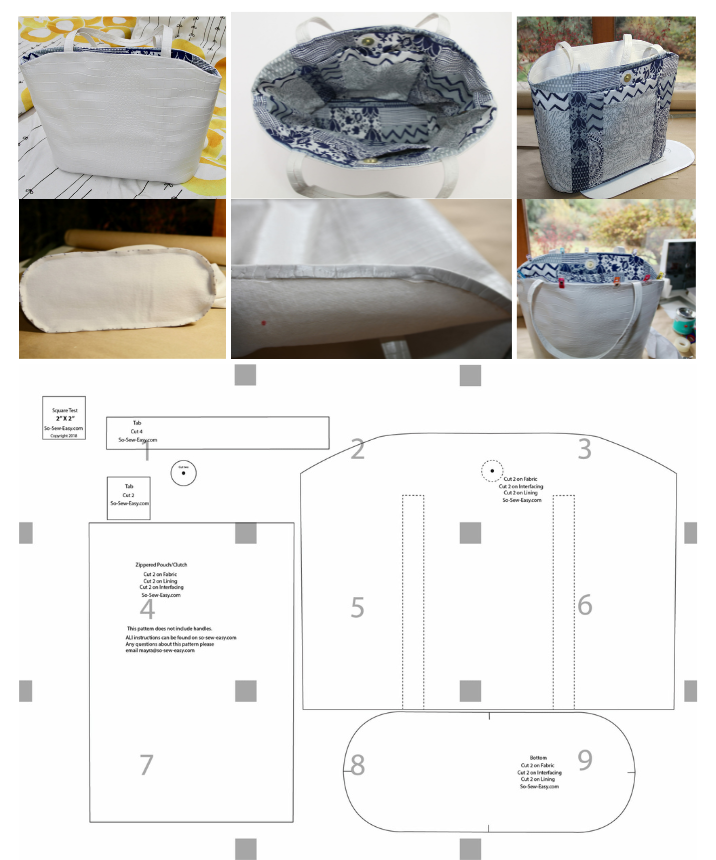
Materials:
- One yard of vinyl
- One yard of lining fabric
- One yard of sew-in interfacing
- Matching thread
- One 12.5 mm (1/2 inch) metal snap closure
- Vinyl glue
- Quilting clips, metal wire clips, or easel clips
- DOWNLOAD THE FREE PATTERN
Handle Preparation:
- Cut two fabric strips measuring 44″ (112 cm) by 1 1/2″ (4 cm) wide.
- Draw three lines spaced 3/8″ (1 cm) apart; use the first and third as fold lines.
- Bring the edges of the handle to the center, applying glue.
Attaching Handles to Vinyl:
- Mark the sewing/gluing lines of the handles using your pattern.
- Apply glue to the back of the vinyl along the area indicated as the sewing line on your pattern.
- Attach the strap to the glued area.
Fabric Sewing:
- Mark the middle of the front and back of the bag.
- Assemble the sides at 3/8″ (1 cm), leaving a 6″ (15 cm) gap to turn the fabric right side out.
- Glue the round vinyl pieces onto the lining.
Snap Button Placement:
- Glue the round vinyl pieces onto the lining.
- Open a hole in the middle and attach the snap button using an appropriate tool.
Vinyl and Stabilizer Sewing:
- Assemble the sides at 3/8″ (1 cm).
- Sew the bottom at 3/8″ (1 cm). This step might be tricky for beginners, so make sure to carefully read the tips provided in this article.
- Cut another piece for the bottom, removing the seam allowance, and glue it to the back of the vinyl bottom part.
Final Assembly of the Bag:
- Turn and glue the edge of the bag at 3/8″ (1 cm).
- Use quilting clips, metal wire clips, or easel clips to hold the layers together.
- Apply glue to the vinyl layer, limiting the amount to 3/8″ (1 cm), then press the fabric/interfacing over it.
Drying and Finishing:
- Let the reversible vinyl and fabric tote bag dry for at least an hour before topstitching.
- Finally, close the hole in the fabric using a running stitch with a needle and thread.
