Here’s a simplified version of the tutorial, with measurements in centimeters:
Materials needed:
1/3 meter of fleece (1/4 meter may be sufficient) 1/4 – 1/3 meter of sherpa/faux fur Sewing machine, matching thread, scissors, paper and pencil for the pattern, sewing needle Estimated time: Approximately 1 and a half hours for the first hat, 45 minutes for each subsequent hat.
Instructions:
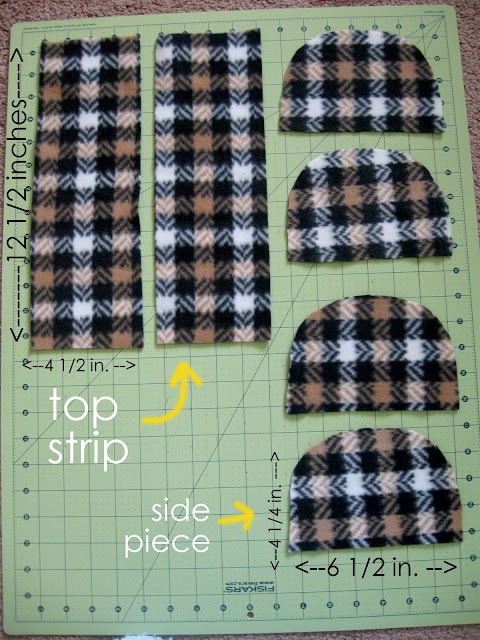
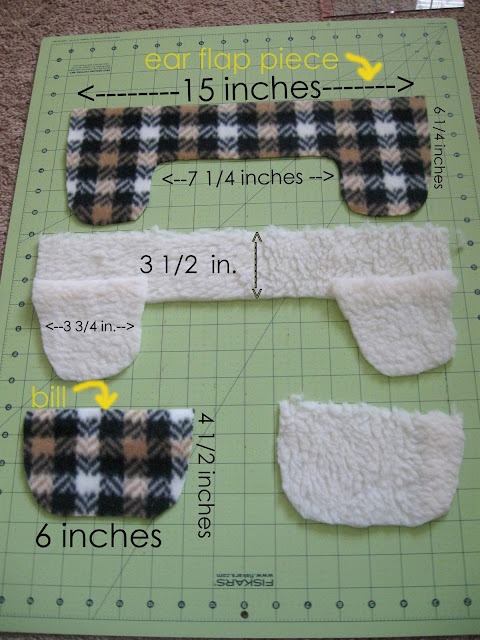
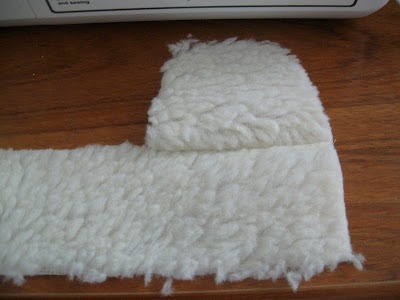
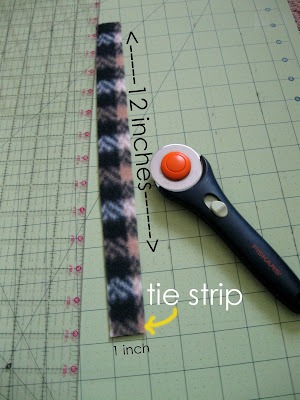
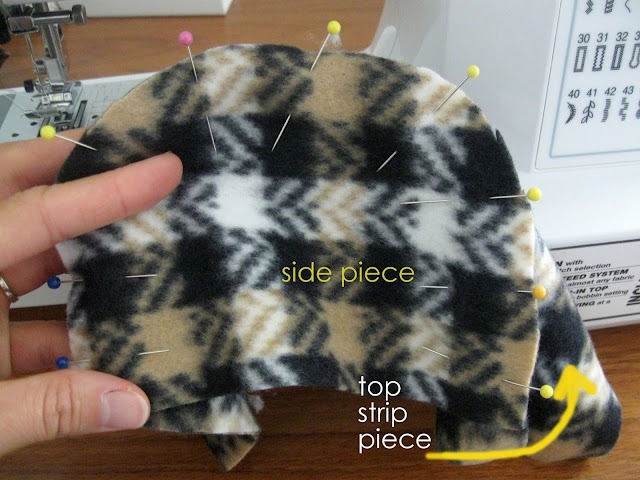
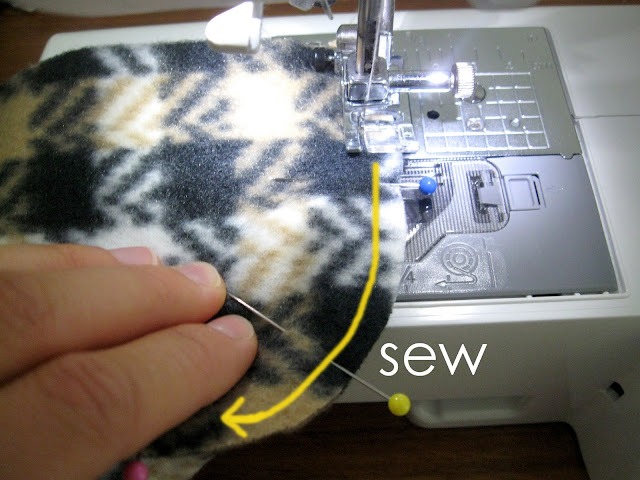
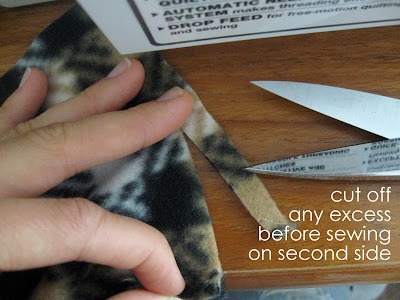
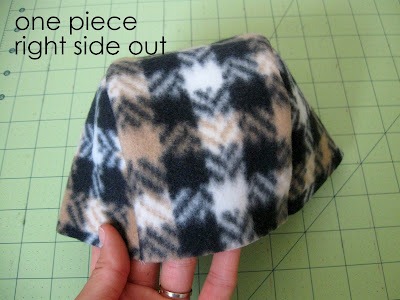
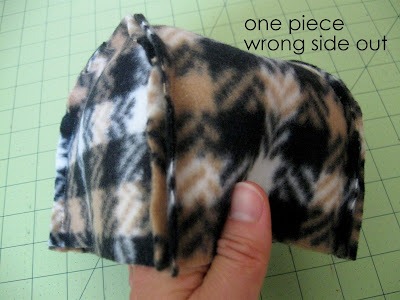
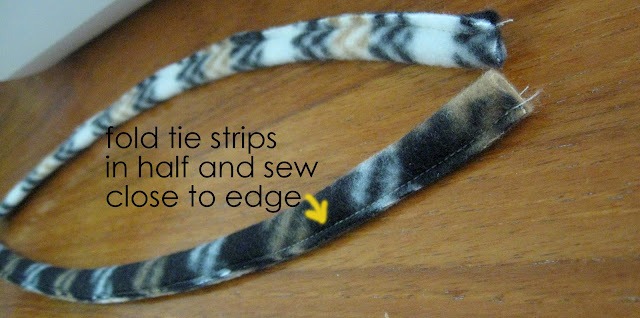
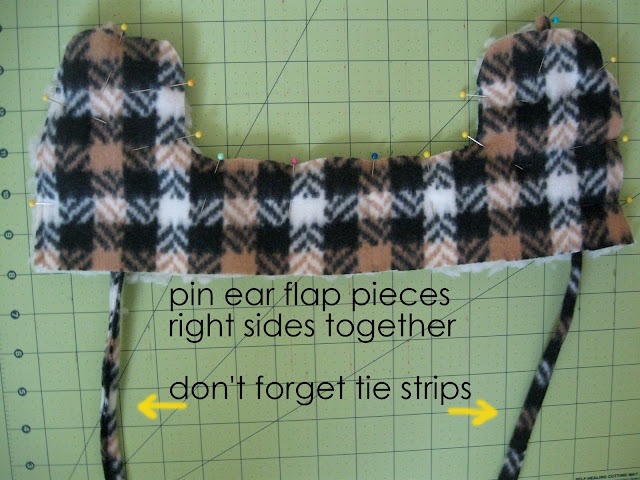
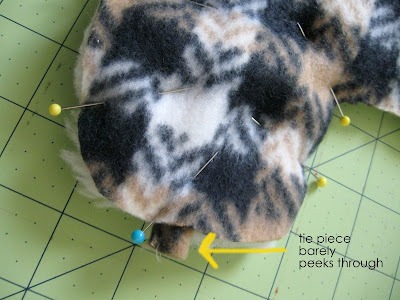
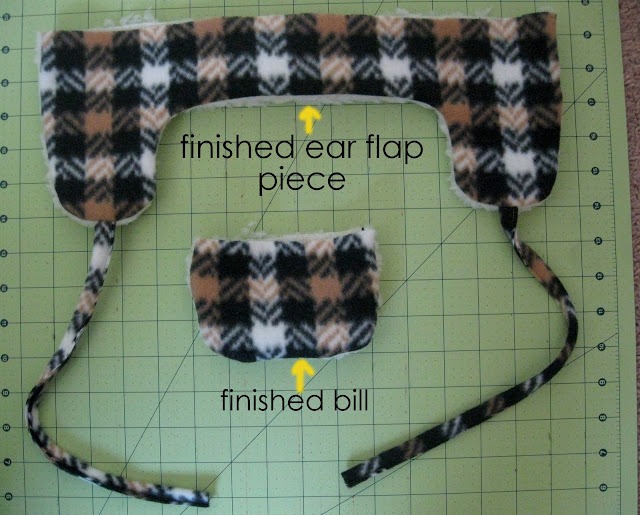
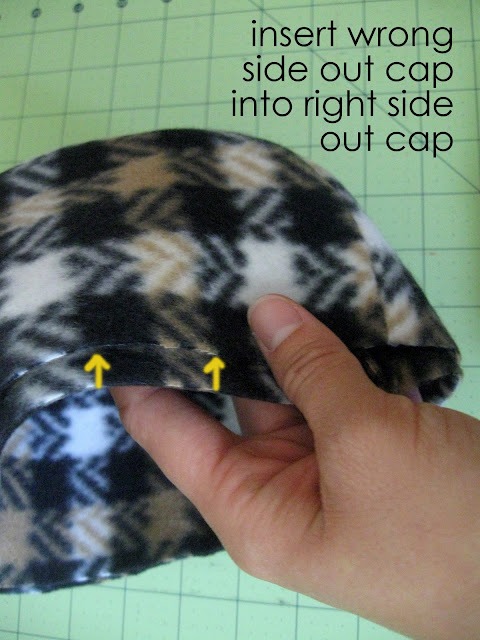
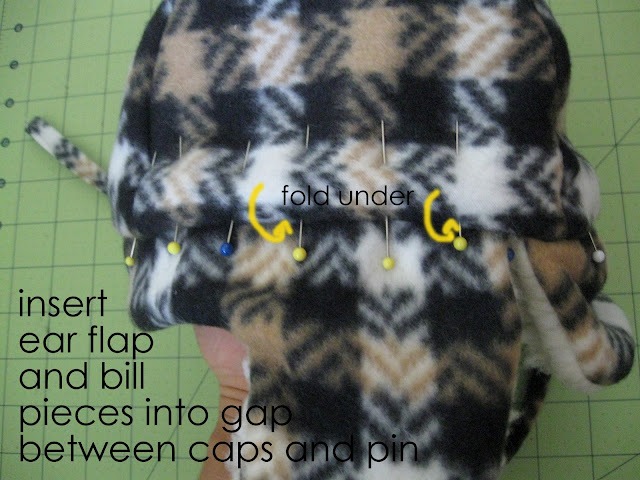
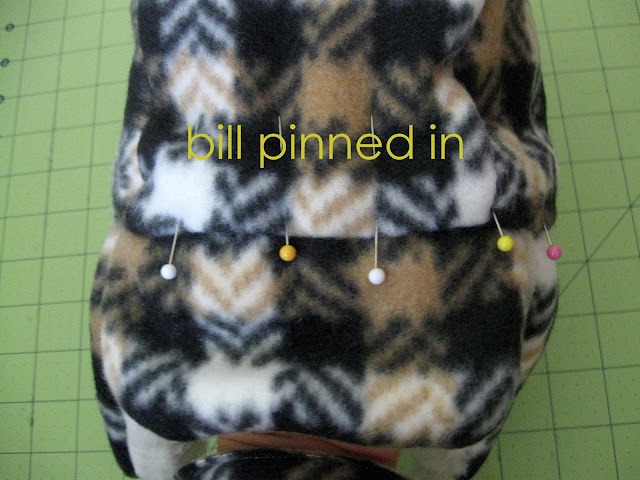
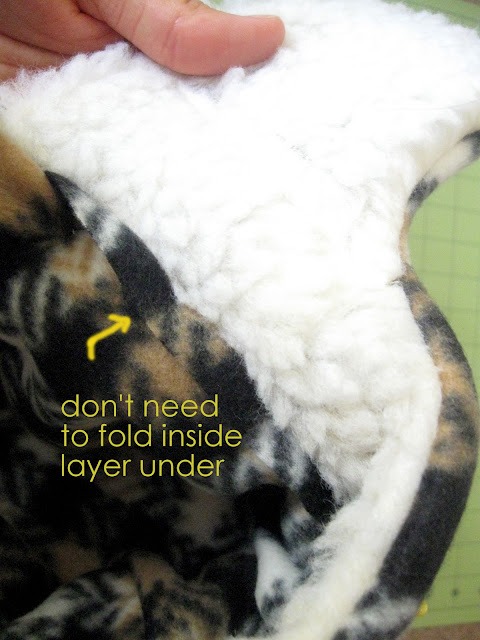
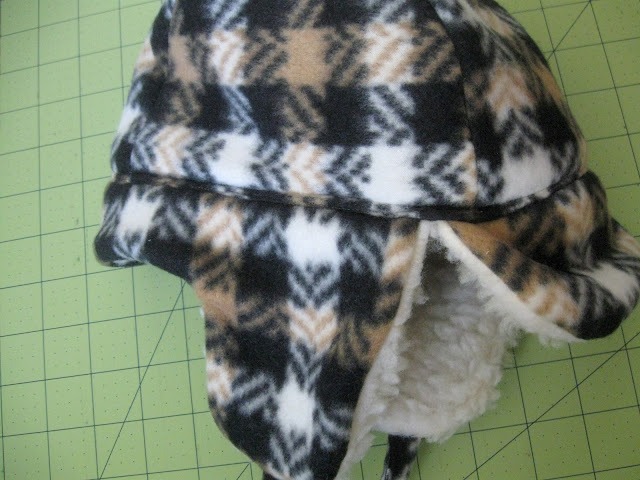
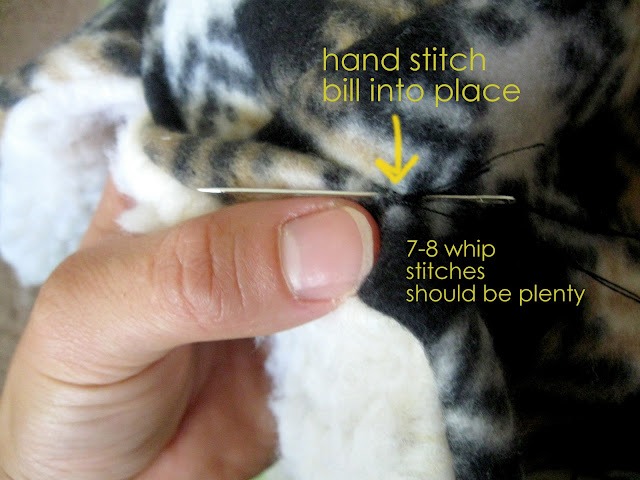
Measure the circumference of the child’s head at the forehead. Add 1 to 2 centimeters for fabric elasticity. Cut the pattern pieces for the crown (double them), ear flaps, visor, and ties. Assemble the crown pieces by sewing the side pieces to the top piece. Sew the ties and assemble the ear flap and visor pieces. Assemble all pieces together by placing the ear flaps and visor between the two layers of the crown. Pin carefully. Fold the crown layer right side out under the crown for a clean finish. Stitch, taking all layers evenly. One stitch is sufficient if done carefully. Secure the visor in place with hidden stitches, taking only the top layer of the crown and the fleece side of the visor. Attach the ear flaps at the top of the head. Sizing Instructions:
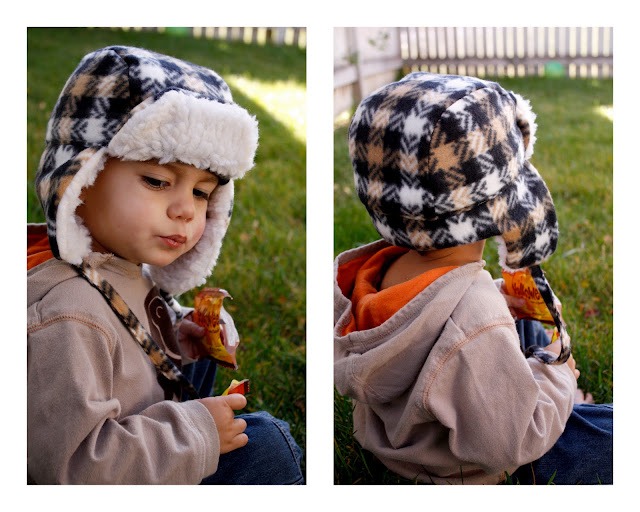
Measure the circumference of the child’s head at the forehead. For the width of the top band of the crown, use 11.5 cm. For the width of the side piece, use 16.5 cm (x2 for front and back). Subtract 0.5 cm from each seam for each fabric piece. This gives a finished head circumference of 18.5 cm. Adjust the dimensions of the ear flaps and visor accordingly. There you have it! You now have a fleece lumberjack hat for your child. Have fun sewing!