Your furry feline friends are going to adore this adorable fish cat house! As you start putting it together, it’s almost like your cats can sense that something special is being made just for them. My cat, Tommy, couldn’t resist exploring the new house even before it was fully assembled! While the fishy cat house might seem a little eccentric and whimsical, that’s what makes it so charming. You have the freedom to customize the pattern and create a cozy home for your kitties, whether it’s shaped like a fish or not. The full pattern is available for download so you can get started right away. The finished cat house will measure approximately 25 inches long, 9 1/2 inches tall, and 12 inches wide.
When I searched online, I found the same old fish-shaped cat houses that didn’t quite meet my expectations. So, I decided to design my own. While it may not be perfect, I’m pleased with how it turned out. This project can be a bit challenging, especially when you reach the final stages and have to maneuver this large object around your sewing machine. But if you’re up for the challenge, let’s dive in!
Step 1: Gather Your Materials
For the outer material of the fish cat house, I used thick fabric that I had purchased previously as a remnant. For the fins, I used a different type of thick fabric that I found at a discounted price. If you have extra fabric lying around, this project is a great way to put it to good use. For the outer material, opt for something sturdy like upholstery fabric, denim, or broadcloth. As for the lining material, choose something soft like fleece.
Materials:
- Thick fabric for the outer house (1 to 1 1/4 yards)
- Fleece or other soft material for the inner lining
- About a yard of thick fusible interfacing or stabilizer
- 1/2 inch thick foam (one yard)
- Sewing machine
- Iron and other sewing supplies
- Fabric glue (for attaching the eyes and brows, although sewing is an option)
Pattern: You can download the pattern pieces in the next step. You have the option to download a PDF pattern file containing all the pieces or download each piece individually as JPGs. If printing the JPG pattern pieces, ensure that the size is not adjusted; print them as they are. If you choose to print the PDF with all the pattern pieces, simply select “File” and print it out.
Step 2: Prepare the Pattern Pieces
Now it’s time to cut out all the fabric and necessary extras. Carefully follow the instructions provided on the pattern pieces. Some pieces will require you to fold the fabric before cutting, while others may need to be traced to create a full piece.
Step 3: Iron on the Stabilizer & Prepare Foam
Once all your pattern pieces are cut out, it’s time to prepare the pieces that require fusible interfacing or stabilizer. Make sure the stabilizer is slightly smaller than your fabric pieces. Sandwich the stabilizer between the outer and inner lining fabrics and carefully steam it in place using an iron. Trim any excess stabilizer.
For the pieces that require foam, layer the outer fabric, foam, and inner lining fabric, pinning them together along the edges.
Step 4: Sewing the First Pieces Together
Next, sew the foam piece along the edges, either using a serger or a zigzag stitch to create a neat edge. Then, attach one of the side pieces to the foam piece, ensuring that the soft lining sides are facing up. Use pins to keep the layers aligned while sewing. Trim any excess fabric.
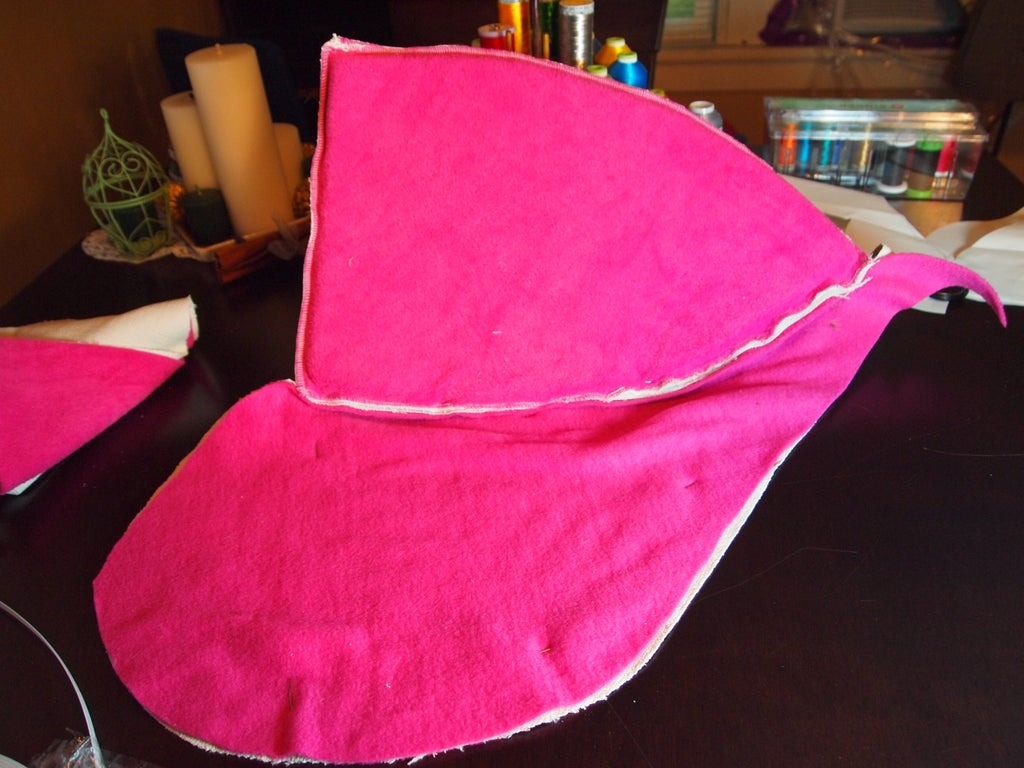
Step 5: Sewing on the Fins
Sew the fins together, leaving an opening to turn them right side out. Once stuffed, sew the openings closed. For the back fin, consider sewing it onto the main body piece as you assemble the cat house.
Step 6: Sew the Top Piece to the Rest of the House
Pin the top piece to one of the side pieces, ensuring that the soft sides are facing up. Sew along the edge, leaving an opening near the tail area for attaching the tail fin. Repeat the process for the other side piece.
Step 7: Fish Face and Mouth
Trace and cut out the mouth pattern on the fish face piece. Attach the eyes and eyebrows using fabric glue or by sewing them on. Cut two strips of fabric for the mouth and sew them onto the fish face piece, leaving an opening for stuffing. Attach the mouth fabric, ensuring a secure seam.
Step 8: Sewing the Face to the Body
Pin the face piece to the top of the body piece, sewing along the top edge. Then, attach the head piece to the side pieces, leaving an opening at the bottom for turning the cat house right side out. Finish by sewing the bottom edge of the face piece to the foam base.
And there you have it – your fish cat house is complete! Congratulations on completing this fun and creative project for your beloved feline companions. If you have any questions or suggestions, feel free to reach out. Enjoy!