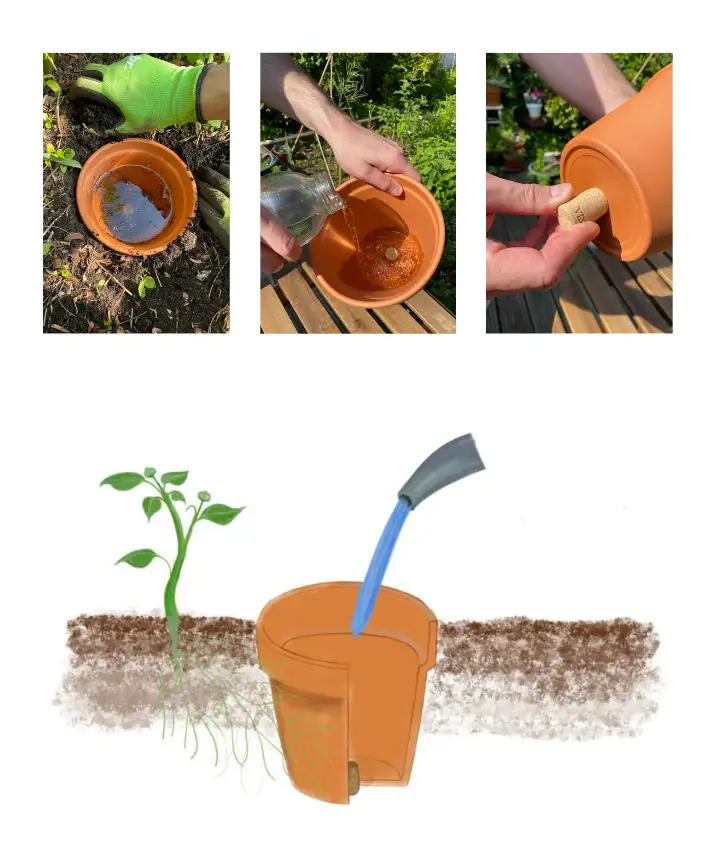
An Olla is a traditional watering vessel that can make garden watering efficient and almost effortless. Here’s a simple guide on how to make your own Olla for a garden irrigation system:
Materials Needed:
- Clay Pot or Vase: Choose a porous clay pot or vase with a lid.
- Cork or Rubber Stopper: To seal the top opening of the pot.
- Waterproof Sealant or Clay: To seal any additional openings.
- Fine Grit Sandpaper: For smoothing the edges.
- Water-Based Paint (Optional): For decoration.
Steps:
- Select the Clay Pot:
- Choose a clay pot or vase with a lid. The size can vary based on your garden’s needs.
- Seal the Bottom Opening:
- Seal the bottom hole of the pot using a waterproof sealant or clay. Ensure it’s watertight.
- Smooth Edges:
- Use fine grit sandpaper to smooth any rough edges around the sealed area.
- Create a Lid:
- If the pot doesn’t have a lid, create one using clay. Ensure it fits snugly.
- Seal Additional Openings:
- Check for any other openings, such as extra holes or gaps. Seal them securely.
- Decorate (Optional):
- If desired, paint the Olla with water-based paint for decoration. Allow it to dry.
- Insert the Cork or Rubber Stopper:
- Insert a cork or rubber stopper into the top opening. This will be the fill and ventilation point.
How to Use:
- Bury the Olla:
- Bury the Olla in the soil, leaving the top with the cork exposed above the ground.
- Fill with Water:
- Remove the cork and fill the Olla with water. The porous clay allows water to slowly seep into the soil.
- Replace the Cork:
- Replace the cork to prevent evaporation and keep debris out.
- Efficient Irrigation:
- The Olla provides a consistent and slow release of water directly to plant roots, promoting efficient irrigation.
Tips:
- Bury multiple Ollas strategically based on the watering needs of different plants.
- Monitor the water level in the Olla and refill as needed.
By making your own Olla, you can create a simple and effective irrigation system that conserves water and keeps your garden well-hydrated.”
