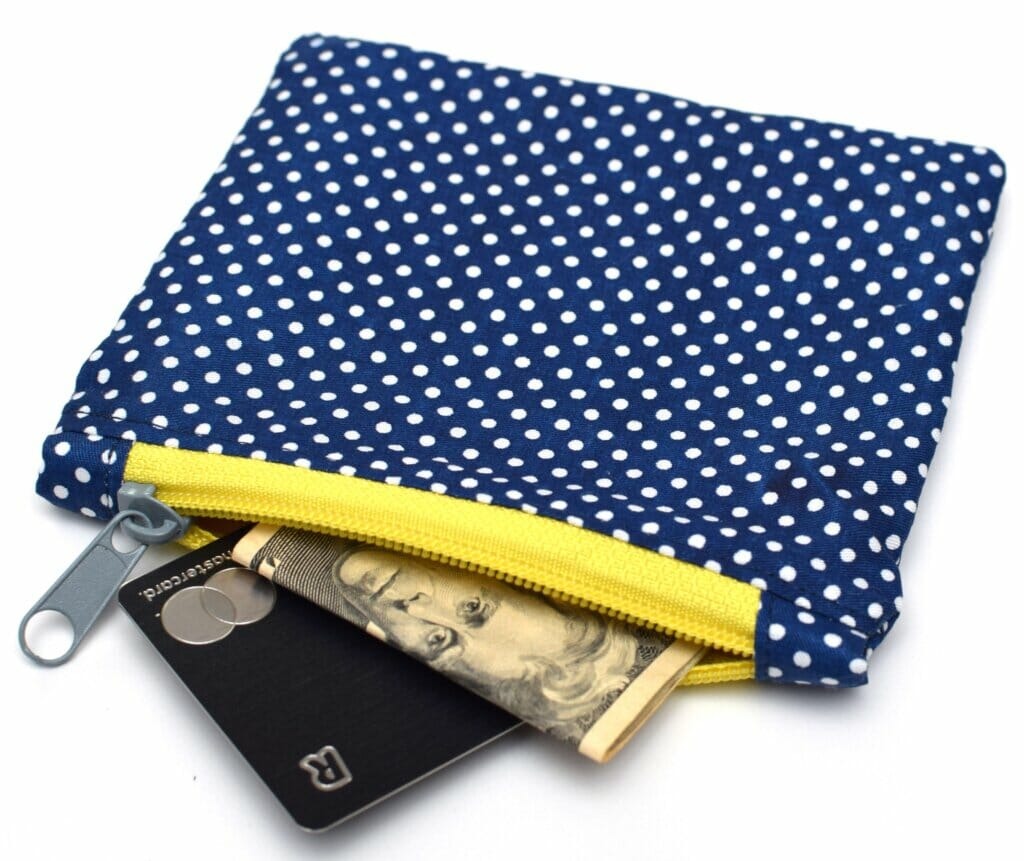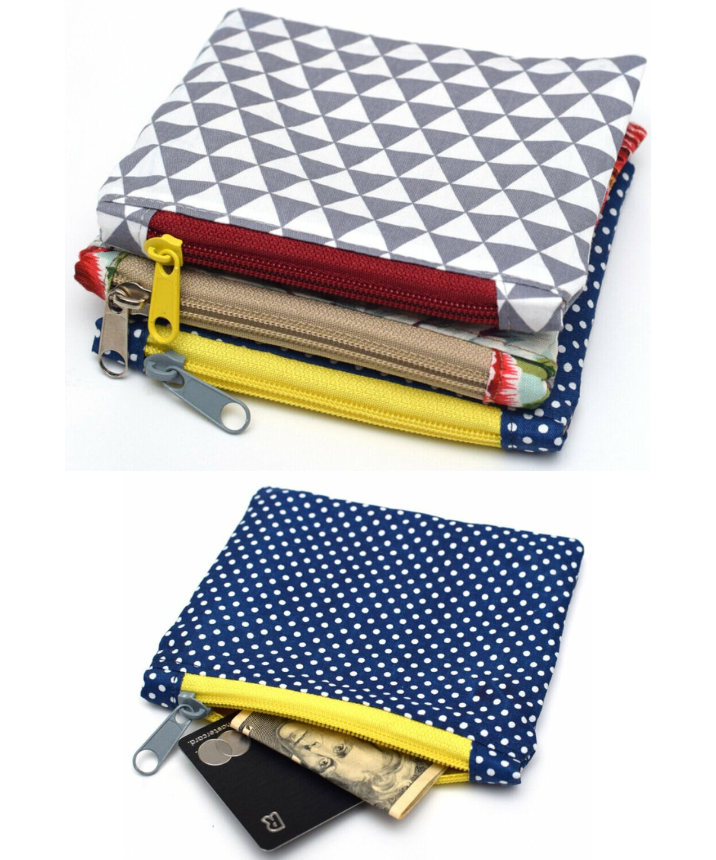
Zippered pouches are not only practical but also a great sewing project for both beginners and experienced sewists. Follow this step-by-step guide to create a lined zippered pouch with ease.
Materials Needed:
- 1 Fat Quarter of Fabric for Bag Outside
- 1 Fat Quarter of Fabric for Bag Lining
- ¼ yard Shape Flex Interfacing
- ¼ yard Fusible Fleece Interfacing
- 10″ or longer polyester zipper
- Basic Sewing Supplies
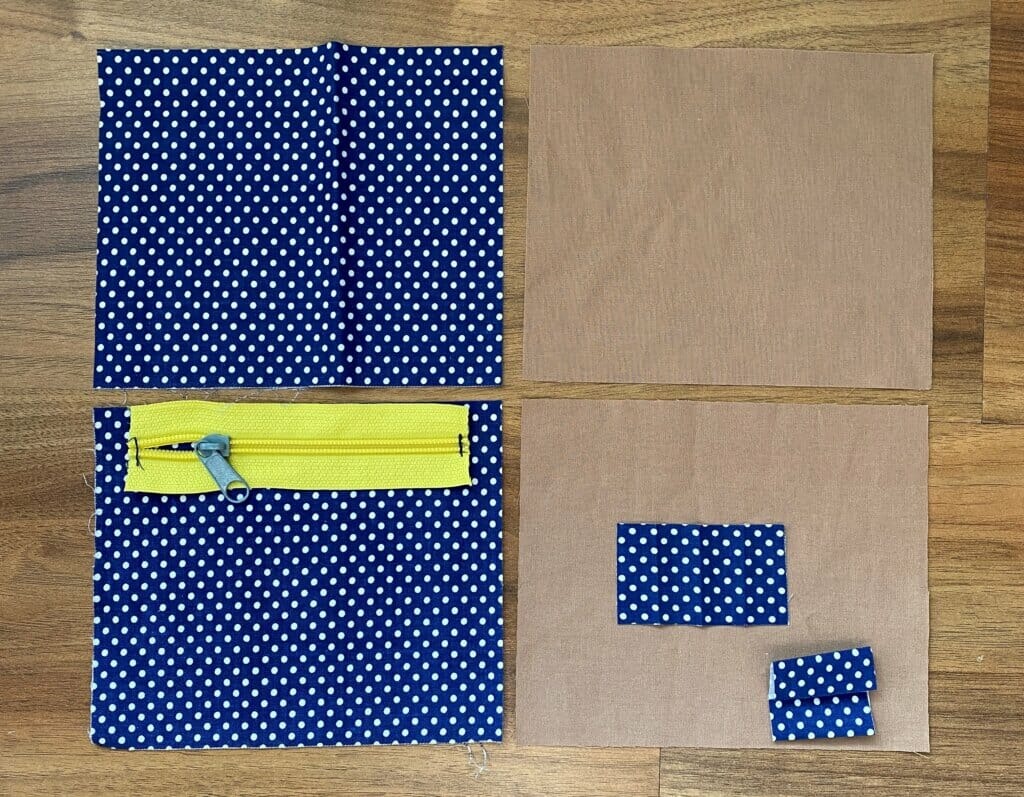
Cutting Directions:
- Prepare the Fabric:
- Cut one piece from the outside fabric and one from the lining fabric, each measuring the desired dimensions of your pouch (e.g., 6″ x 8″).
- Cut two pieces of Shape Flex Interfacing and two pieces of Fusible Fleece Interfacing to match the fabric dimensions.
- Attach Interfacings:
- Iron the Shape Flex onto the back of the outside fabric pieces. This helps the fabric lay smooth and reduces wrinkling during construction.
- Attach the Fusible Fleece to the lining fabric pieces, providing structure to the interior of the pouch. Trim the interfacing from seam allowances to reduce bulk.
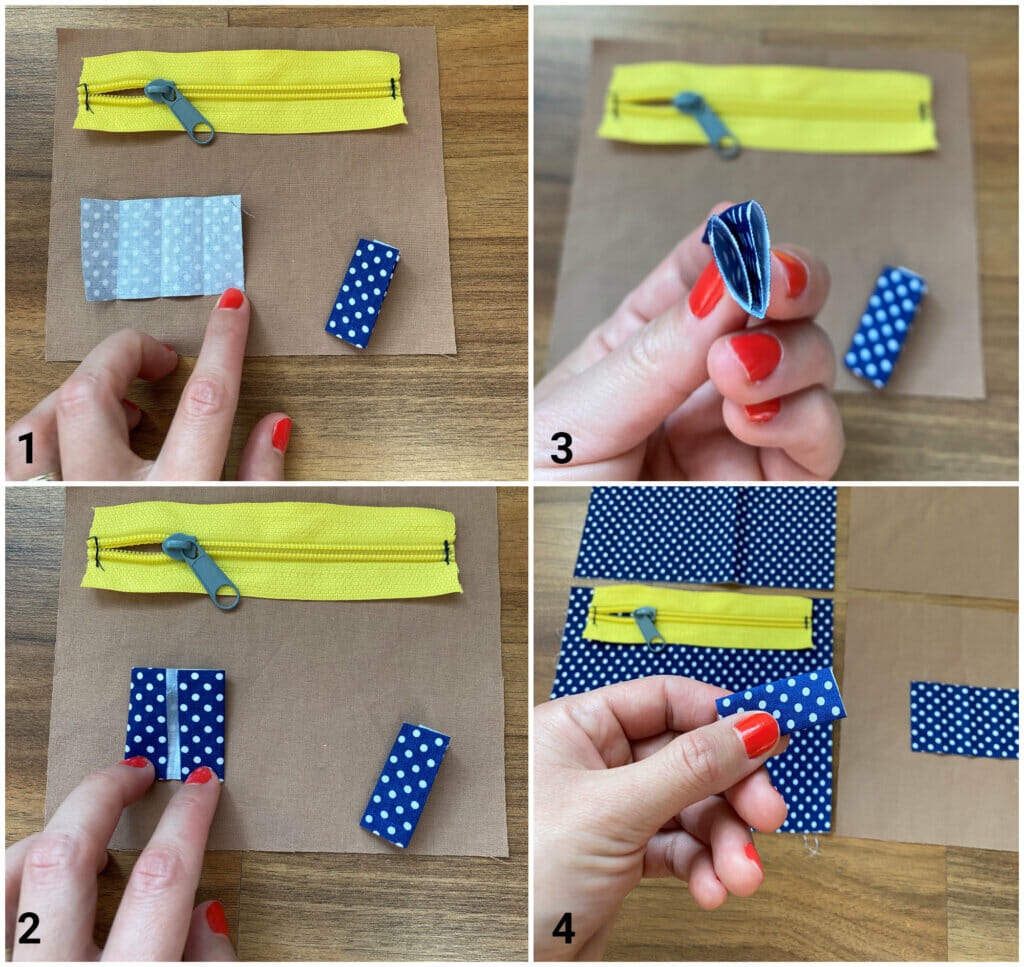
- Prepare the Zipper:
- If your zipper is longer than needed, trim it to match the width of your pouch using sharp scissors. Ensure you are using a polyester zipper suitable for sewing over.
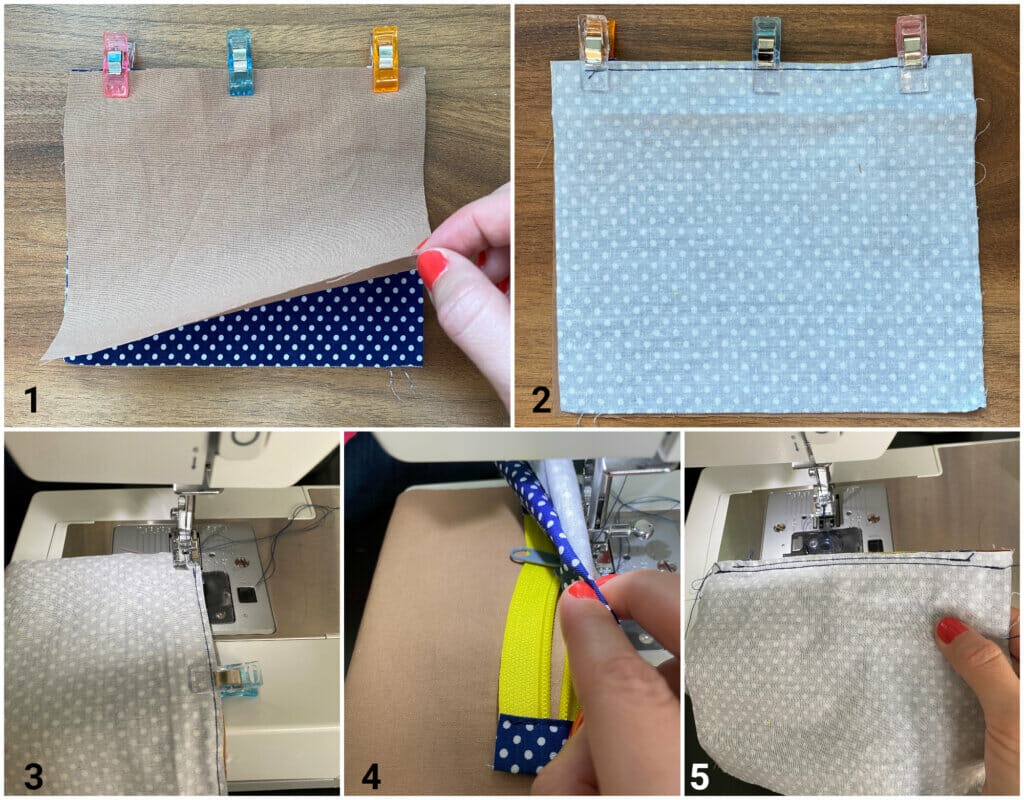
- Align and Pin:
- Place the outside fabric and lining fabric right sides together, aligning one of the short edges. Pin the fabrics in place.
- Sew the First Side:
- Using a ¼” seam allowance, sew along the pinned edge. Backstitch at the beginning and end to secure the stitches.
- Press Seam:
- Press the seam open with an iron to create a smooth finish.
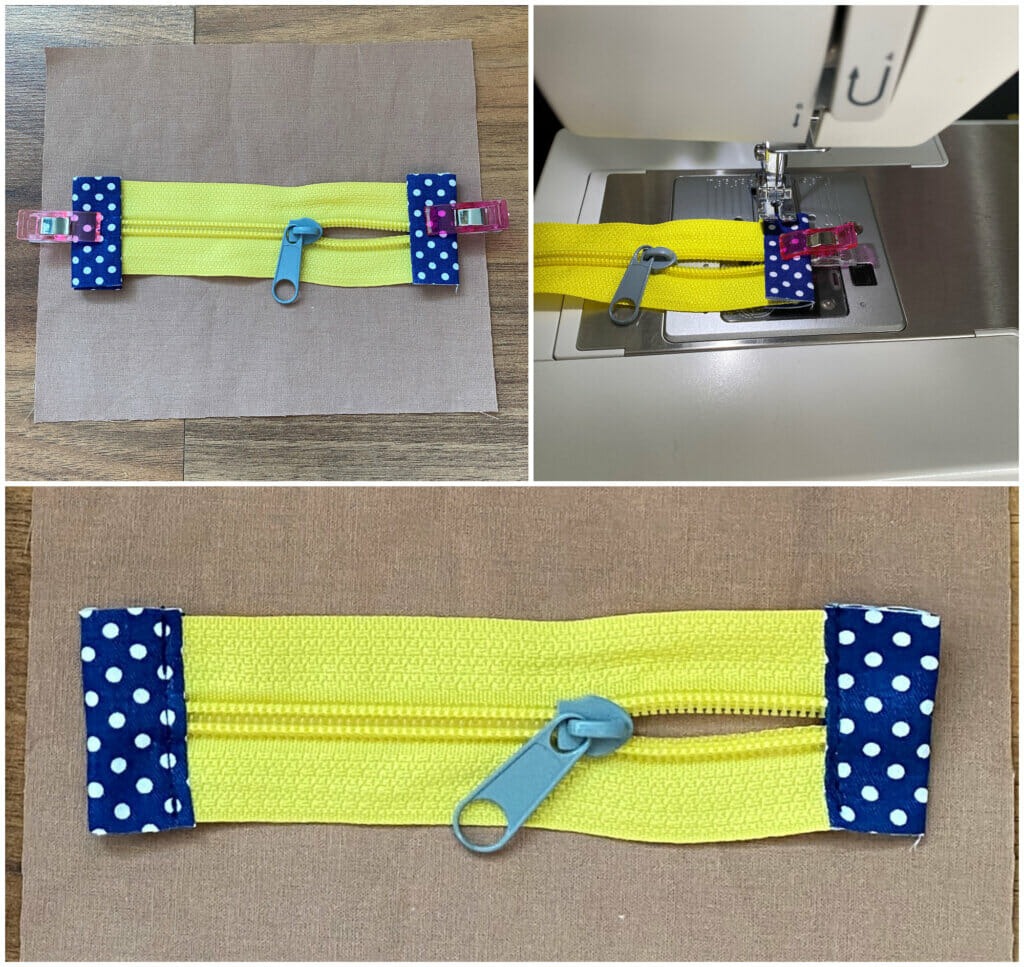
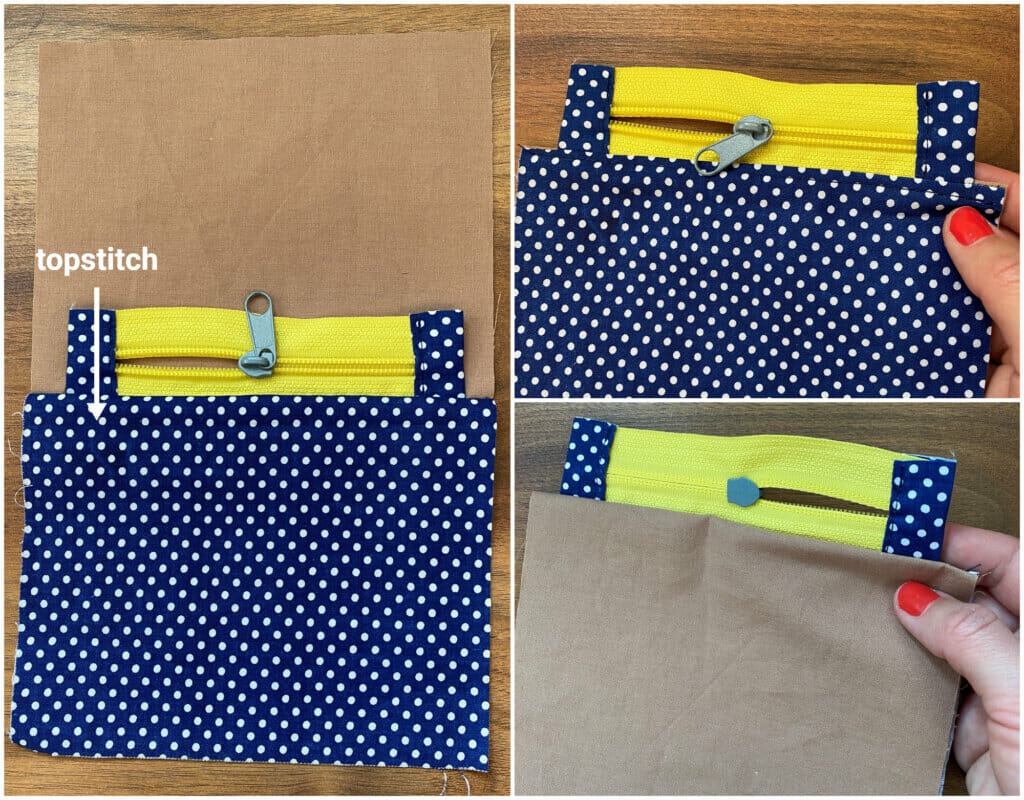
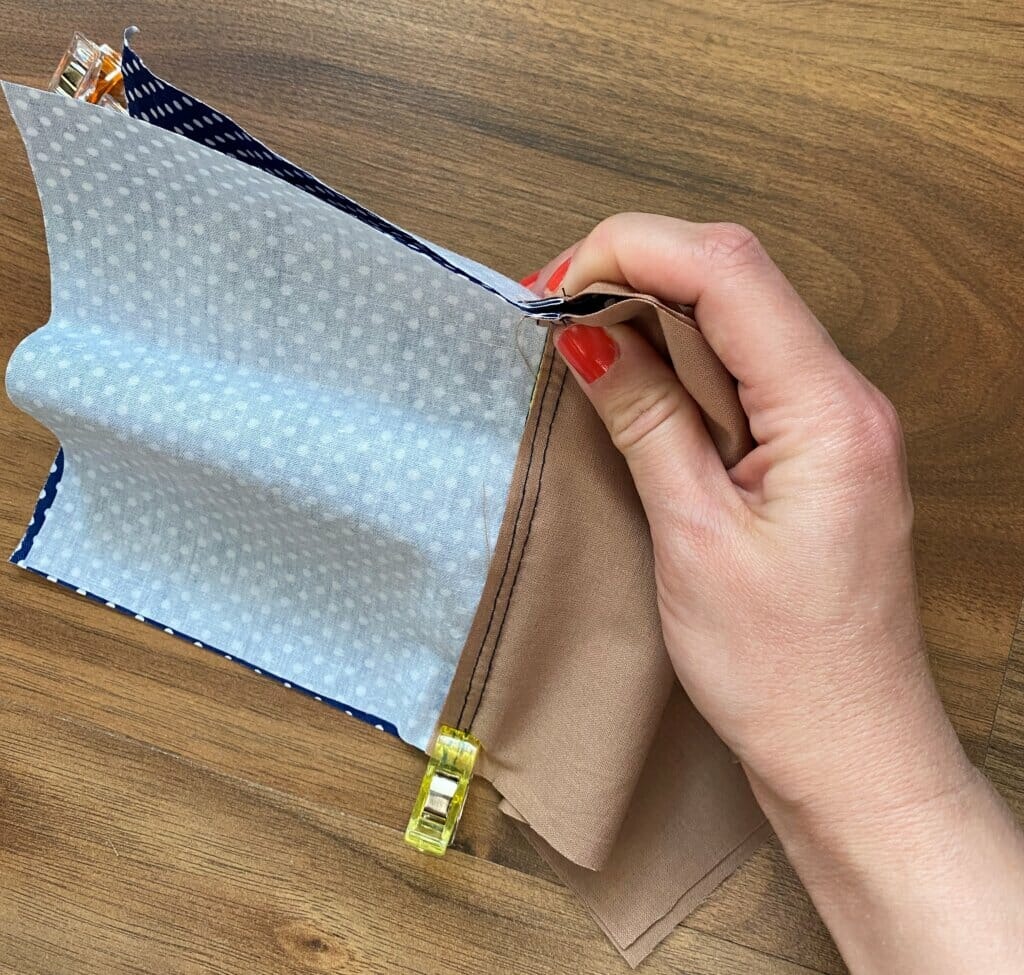
- Attach Zipper:
- Place the zipper face down on the right side of the sewn edge, aligning the zipper tape with the raw edge of the fabric. Pin in place.
- Sew Zipper:
- Using a zipper foot, stitch along the edge of the zipper, securing it to the fabric. Repeat the process for the other side of the zipper.
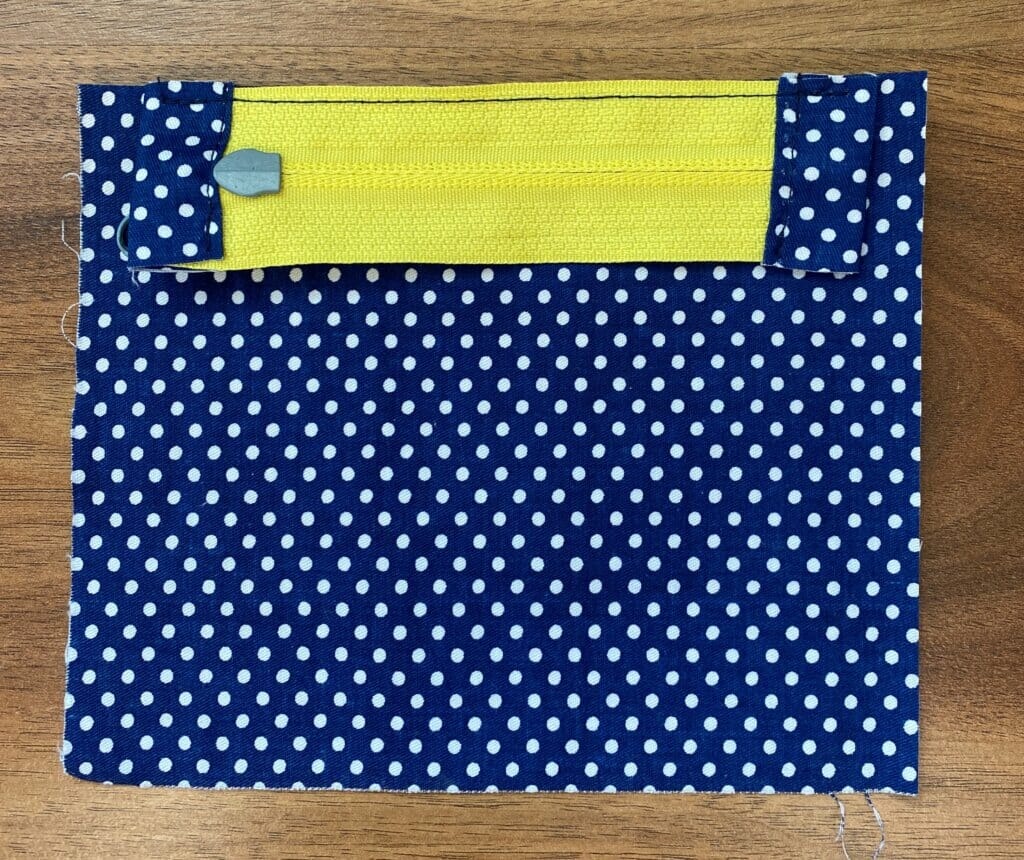
- Topstitch:
- Topstitch along the zipper on both sides, close to the edge, for a polished look.
- Align and Sew Second Side:
- Align the remaining edges of the outside fabric and lining, pin, and sew the second side using a ¼” seam allowance.
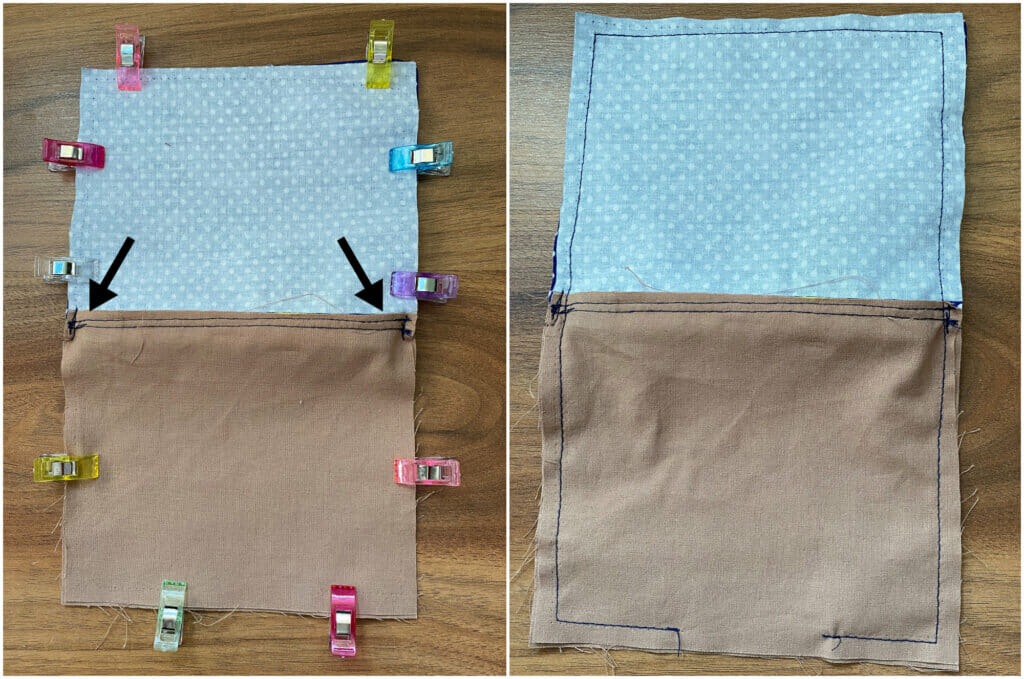
- Box Corners:
- To create a flat bottom for the pouch, pinch each bottom corner, aligning the side seam with the bottom seam. Mark a line approximately 1″ from the corner and sew across. Trim excess fabric.
- Turn Inside Out:
- Turn the pouch inside out through the unsewn section of the lining.
- Hand Stitch Lining:
- Hand stitch the opening in the lining closed using a blind stitch.
- Final Press:
- Give the entire pouch a final press to ensure smooth seams and a professional finish.
Congratulations! You’ve successfully crafted a simple, lined zippered pouch. Experiment with different fabrics, sizes, and zipper colors to create personalized pouches for various purposes. Enjoy your practical and stylish creation!