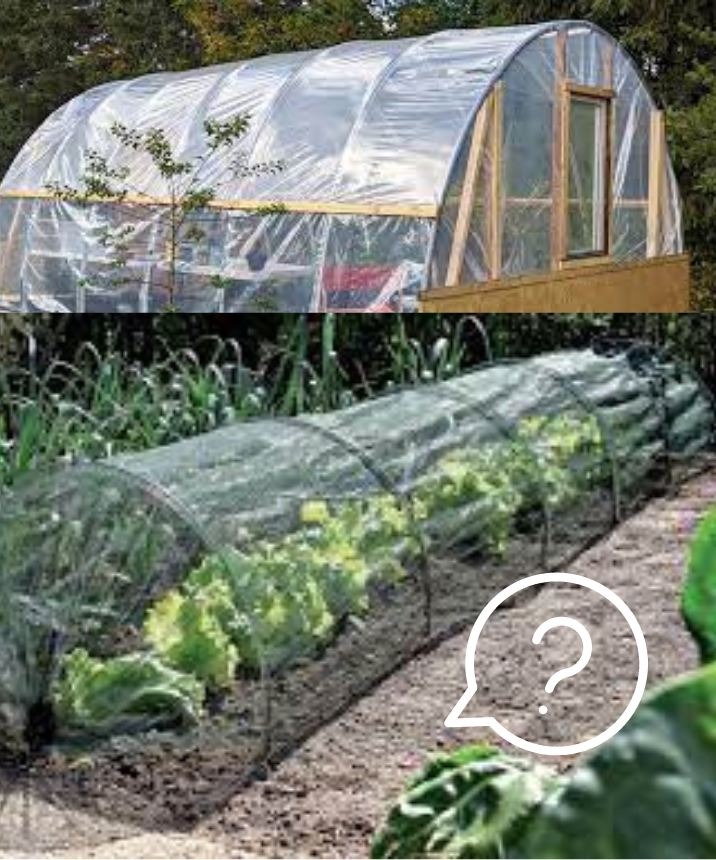
The garden tunnel is an accessory that allows you to protect your crops from the cold. It is used for wintering sensitive crops or for forcing, to advance the start of harvests. Building your own tunnel is relatively simple, as long as you are somewhat handy with DIY, and it allows you to adapt the structure to the dimensions you desire.
MATERIALS NEEDED Here’s what you’ll need to make your tunnel:
- Old slats or boards: 2 of 1 meter (you can lengthen them as needed) and 2 of 80 cm.
- Stakes to support the frame.
- Recycled plastic or garden mesh.
- Flexible tubes (15 mm diameter) 2 meters long.
- 40 cm stakes (2 per arch).
- Screws to secure the frame.
- Nails to fasten the mesh.
MAKING THE TUNNEL Start by forming the frame with the slats or boards, screwing them securely. Place the frame over the crops to be protected and secure it by driving stakes into the ground on each side of the frame.
Place the supporting arches with your flexible tubes, placing a stake at each end to fix them to the ground. The ends of the arches should be next to the frame. If you’ve created a longer structure, space the arches every 1.5 meters.
Cover the structure with the mesh and fasten the mesh to the frame with nails. At the ends, put weight on the mesh to keep the tunnel closed properly.
USAGE TIPS Install your tunnel preferably sheltered from north winds. Keep the tunnel closed at night for optimal protection against the cold, but ventilate it during the day, as condensation could be harmful to the plants. Use it day and night in winter and spring against frost and for crops/seeds, during the day in summer and at night in autumn to protect against rain.