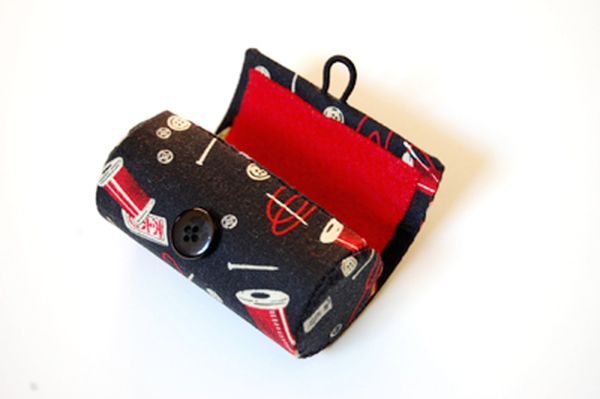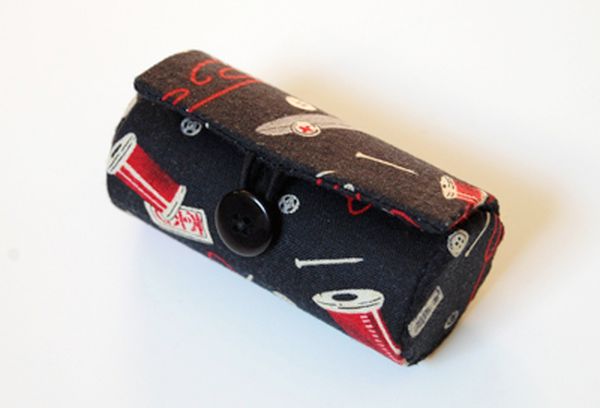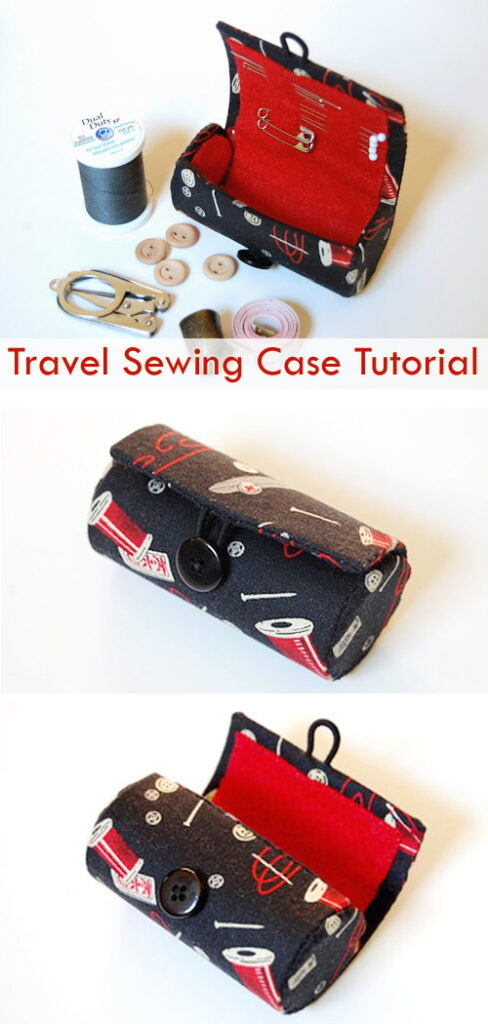
Are you tired of rummaging through your bag for sewing essentials when you’re on the road? Say goodbye to the hassle with our DIY Travel Sewing Case tutorial! Whether you’re a seasoned traveler or just enjoy the occasional adventure, this compact case is perfect for holding all your sewing basics in one convenient place.
Introduction: Picture this: you’re on a trip and suddenly need to mend a tear in your favorite shirt or fix a loose button on your pants. But where are your sewing supplies? With our Travel Sewing Case tutorial, you’ll never have to search for your needles, thread, or scissors again. This compact case is designed to keep all your essentials organized and easily accessible, so you can tackle any sewing emergency with ease.
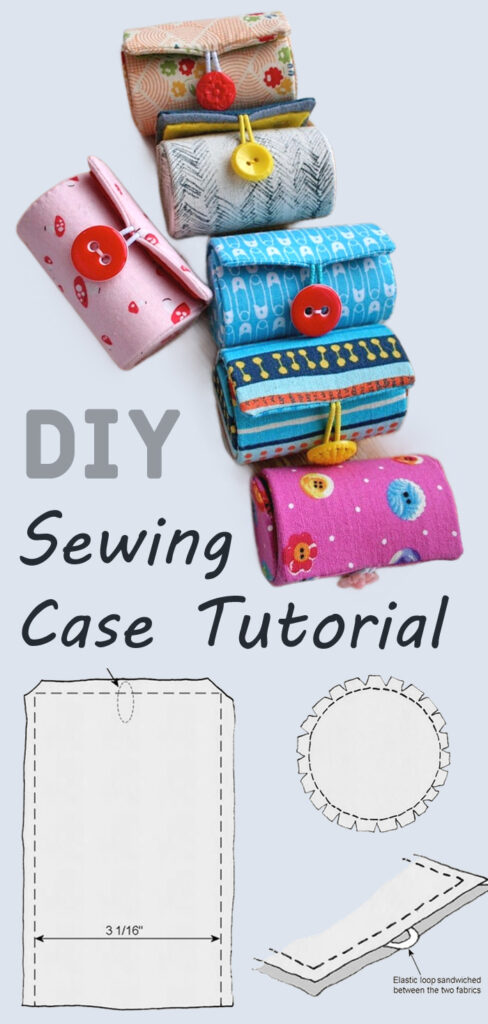
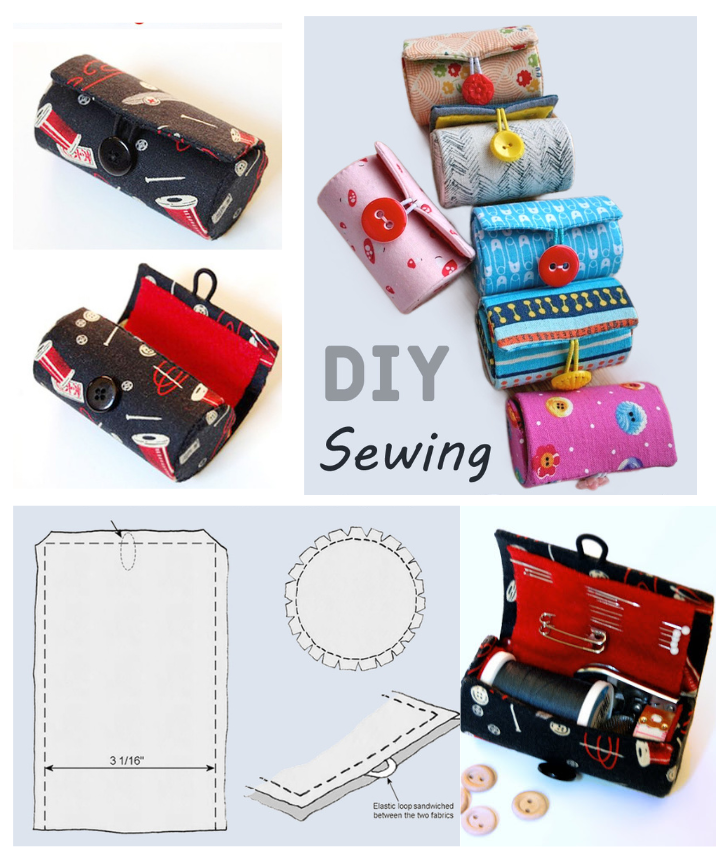
Materials Needed: Before we dive into the tutorial, let’s gather our materials:
- Plastic canvas sheet (3” x 7”)
- Plastic canvas circles (2 pieces)
- Small elastic hairband or loop of elastic
- Button
- Felt (rectangular piece and two circles)
- Exterior fabric (various rectangles)
- Interior fabric (various rectangles)
- Matching thread
- Scissors
Step-by-Step Tutorial:
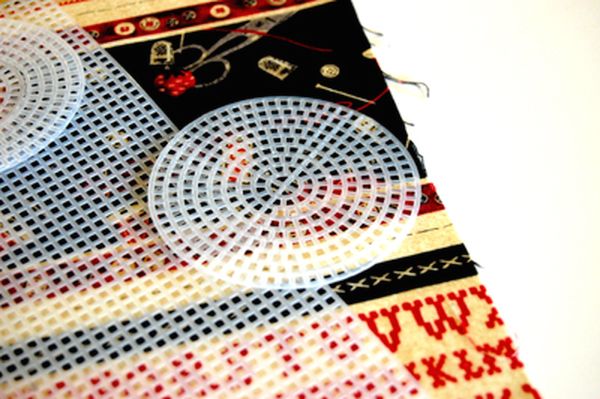
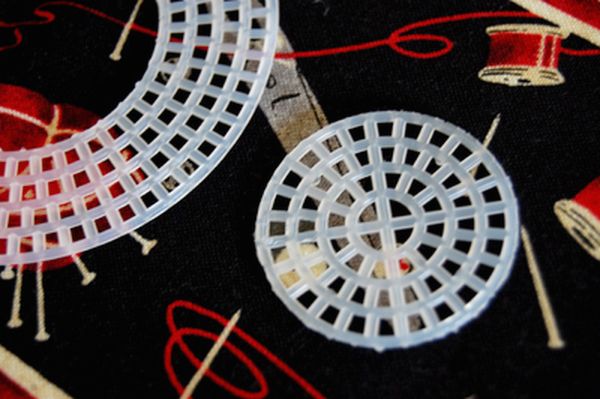
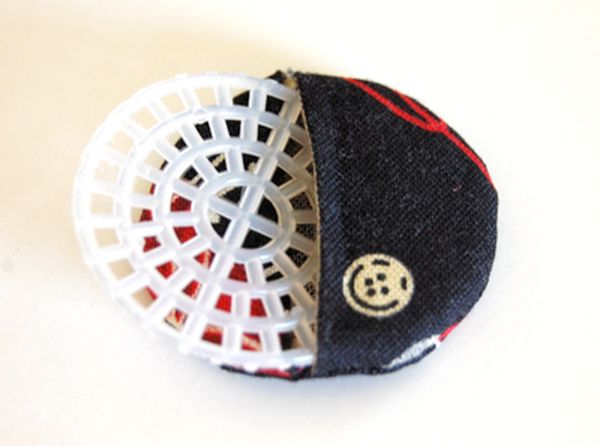
- Prepare the Plastic Canvas: Cut the plastic canvas circles to measure 1½” in diameter.
- Prepare the Interior Fabric: Fold back one edge of each interior fabric rectangle and press.
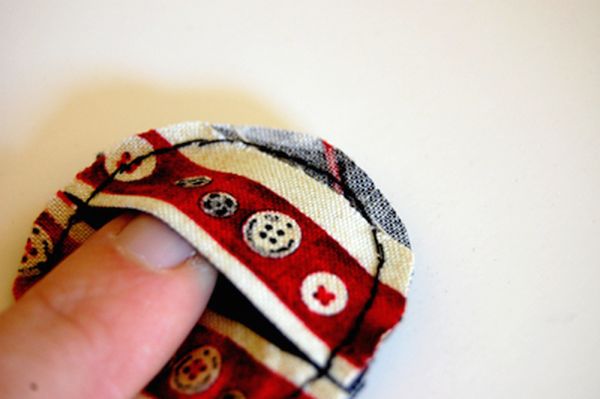
- Create Fabric Circles: Sew a circle on each interior fabric rectangle, leaving an opening for the plastic canvas circle. Trim excess fabric and turn right side out.
- Insert Plastic Canvas: Insert the plastic canvas circle into each fabric circle and hand stitch closed.
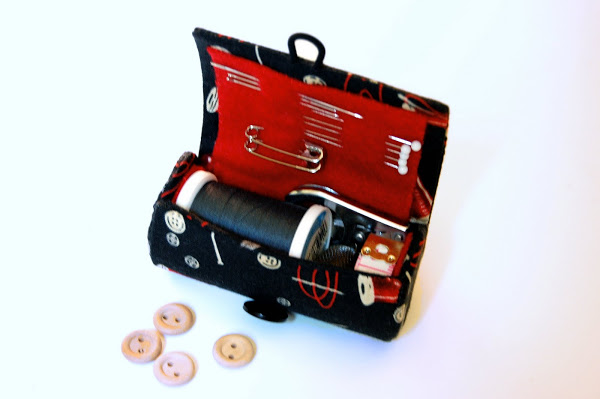
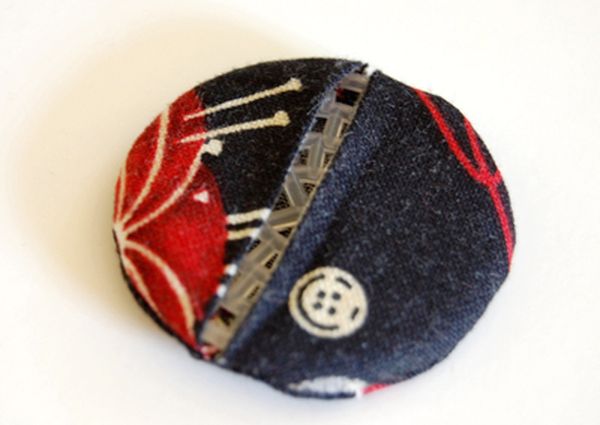
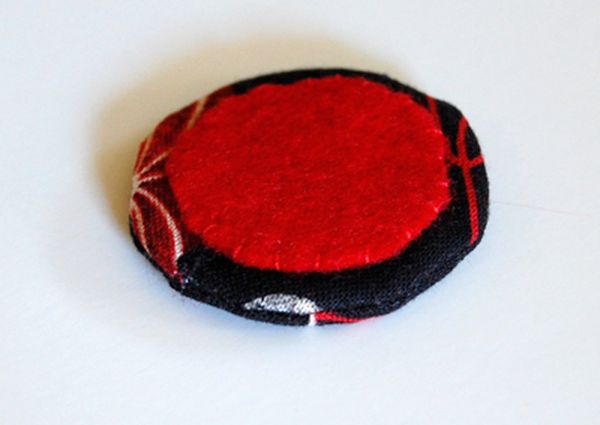
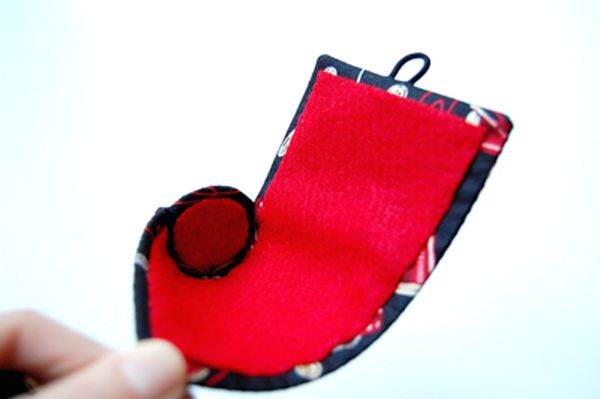
- Attach Felt End: Hand stitch one felt circle to each end of the fabric tubes.
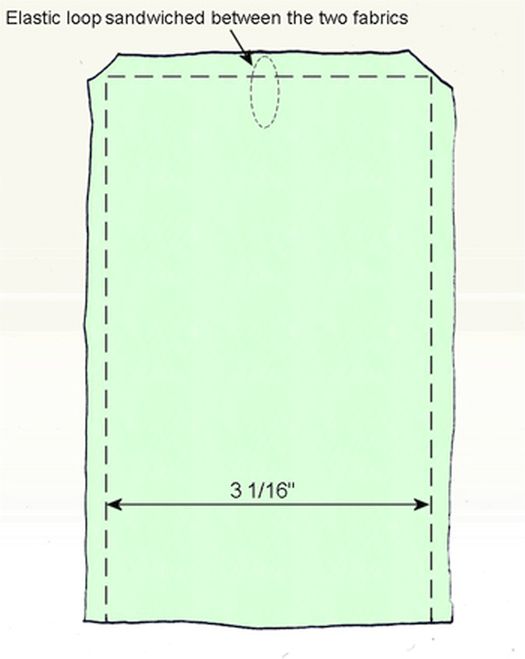
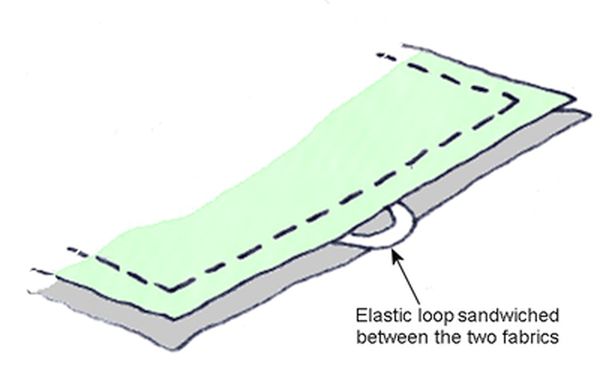
- Assemble the Case: Pin and sew the interior and exterior fabric rectangles together, leaving an opening for turning. Insert the elastic loop and sew the top edge.
- Insert Plastic Canvas Sheet: Slide the plastic canvas sheet into the case and hand stitch the opening closed.
- Attach Button: Sew the button onto the outside of the case for closure.
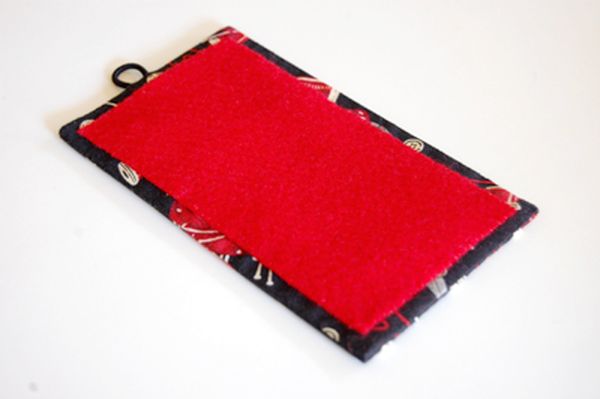
Conclusion: And there you have it! With just a few simple steps, you’ve created your very own Travel Sewing Case that’s perfect for on-the-go organization. Now you can travel with confidence, knowing that all your sewing essentials are right at your fingertips. So why wait? Get started on your own Travel Sewing Case today and take the first step towards stress-free sewing on your next adventure!
Ready to explore more DIY projects and sewing tips? Check out our other articles for inspiration and ideas. Happy sewing!