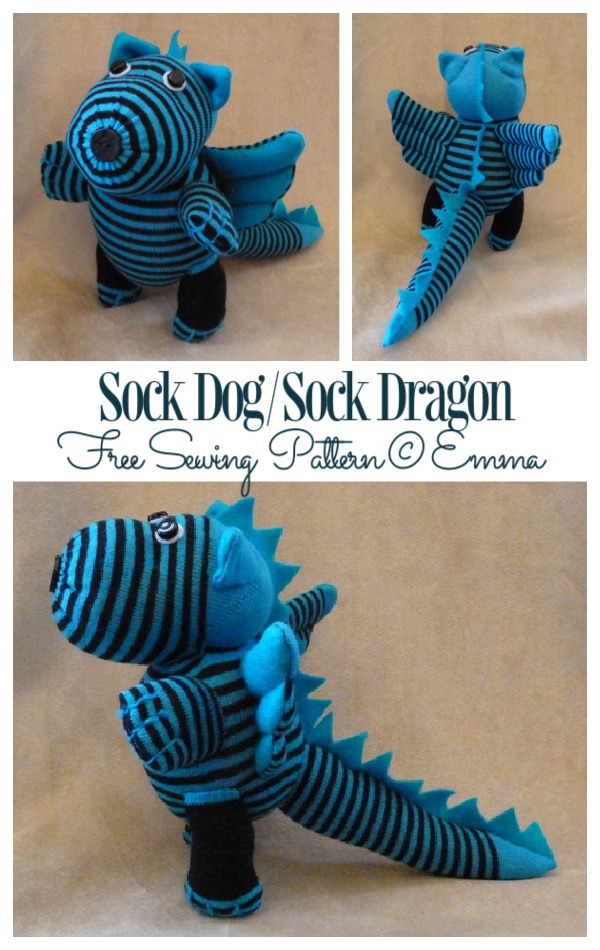
Are you ready to embark on a magical crafting adventure? Let’s dive into creating your very own Sock Dragon! This adorable project will bring whimsy and charm to any room, and the best part is, you can customize it to match your style and personality. So gather your materials and let’s get started!
Materials Needed:
- Two socks (varying colors and patterns for added flair)
- Buttons or beads for eyes
- Small piece of white felt
- Larger piece of felt matching one of the socks (approximately 8 x 10 inches)
- Stuffing material (polyester filling or cotton batting)
- Thick wool or yarn for paws
- Needle and thread
- Scissors
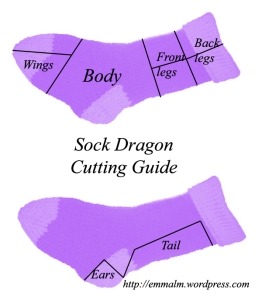
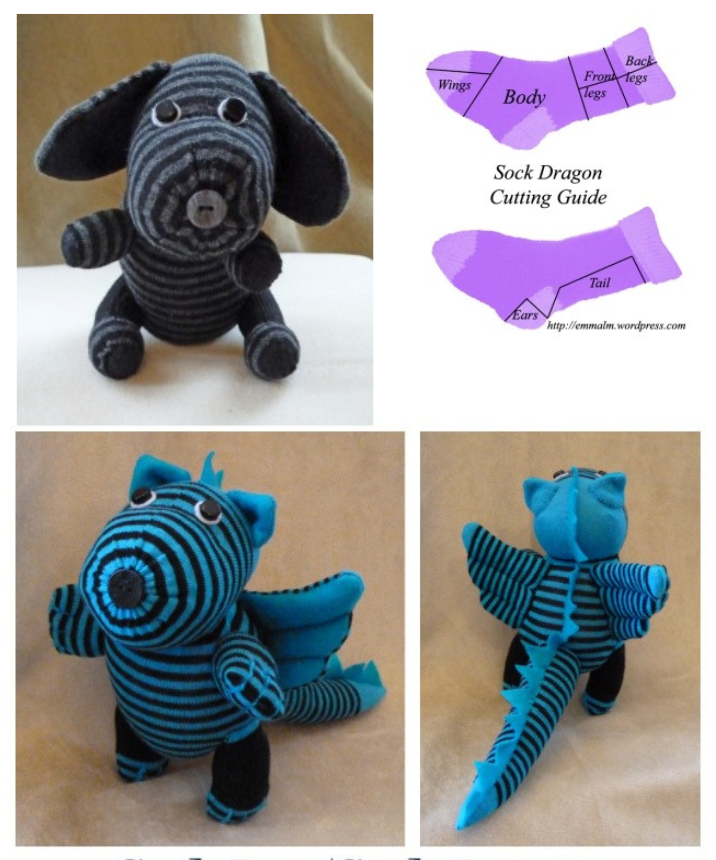
Step 1: Cutting the Socks
Using the cutting guide provided, carefully cut the socks into the following sections:
- Body and Head
- Legs
- Wings
- Tail
- Ears
Step 2: Body and Head
- Take the body section of the sock (which also serves as the head) and turn it inside out.
- Sew a row of running stitches around the end closest to the sock’s toe, leaving a long end of thread.
- Pull the thread tight and knot it off, creating a rounded shape.
- Turn the sock right side out and adjust as needed.
- Stuff the head and body sections separately until soft and squashy.
- Close the end by sewing another line of running stitches, tucking in the raw edges.
Step 3: Adding Details
- Create a neck by sewing a line of running stitches around the neck area and pulling tight.
- Add definition to the head by sewing a short row of running stitches just below the eyes.
Step 4: Legs
- Turn each leg inside out and stitch along the side and bottom.
- Turn the legs right side out and stuff them almost full.
- Use thick wool or yarn to create paws.
- Sew the legs in place on the body, ensuring neat edges.
Step 5: Wings
- Cut wing shapes from the sock as per the cutting guide.
- Cut matching pieces of felt.
- Sew around the edges, leaving one side open for stuffing.
- Turn the wings right side out and lightly stuff them.
- Optionally, sew lines from the tip to the edge for more definition.
- Sew the wings to the back of the dragon, behind the upper legs.
Step 6: Tail
- Turn the tail inside out and sew along the edge.
- Turn it right side out and stuff lightly.
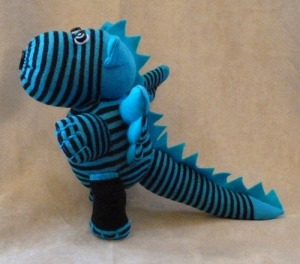
- Sew over the join on the bottom and position it so the dragon stands upright.
- Sew the tail onto the body, turning under the raw edge of the sock as you stitch.
Step 7: Ears
- Cut two ear shapes from the sock, allowing for a slight curve at the bottom edge.
- Cut matching pieces of felt.
- Sew the pieces together, leaving a gap to turn through.
- Turn them right side out and whip stitch the gap closed.
- Sew the ears onto the head, shaping them slightly using the curved edge at the back.
Step 8: Eyes and Nose
- Cut two pieces of white felt slightly larger than your buttons or beads.
- Sew them in place for the eyes, with the buttons or beads just above the line of stitches from earlier.
- Attach a button for the nose across the join at the front.
Step 9: Spikes
- Measure the length from the tip of the tail to the neck and cut a piece of felt to match.
- Cut the felt into spikes and sew them in place along the back.
- For the head spikes, measure the desired length, cut a curved shape to match the contour of the head, and sew them in place.
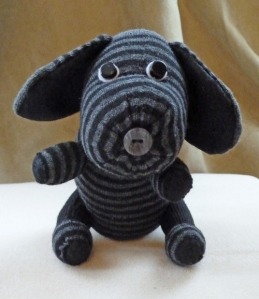
And there you have it – your very own Sock Dragon! Feel free to experiment with colors, patterns, and embellishments to make it uniquely yours. Let your imagination soar as you bring this adorable creature to life!