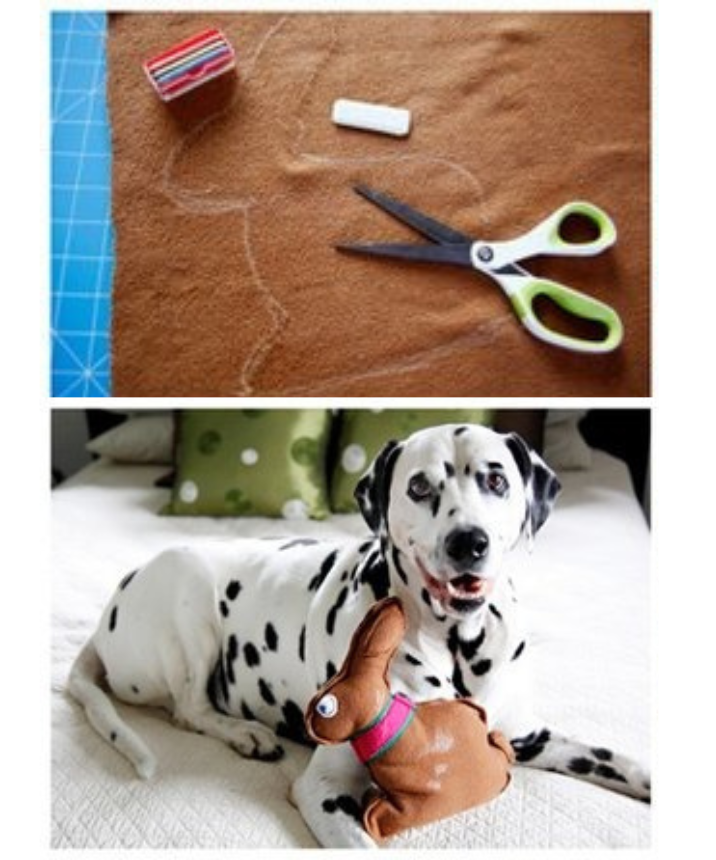
Materials and Supplies To make a toy similar to the Easter bunny shown here, you’ll need a piece of chocolate brown (or another color of your choice) fleece twice the size of your final bunny toy, fleece scraps for embellishments, complementary colored thread, stuffing, squeakers (optional), and basic sewing supplies, including scissors and a sewing machine.
- Fleece or alternative material (bunny body)
- Scraps of fleece (bunny embellishments)
- Stuffing (filling for the stuffed toy)
- Squeakers (optional)
- Complementary colored thread
- Sewing machine and general cutting/sewing supplies
Alternative Materials and Methods The toy shown is machine-sewn (except for the eye) with a straight stitch, hem out. Fleece doesn’t fray, so I opted for an easy exposed edge. Simple, sturdy, and cute! As I mentioned in the intro, this is a very old post. If I was making this toy again for a different dog (like wild Humphrey the ripper), I would likely swap the base fleece for something stronger. Many of our later toys were made with sturdy base fabrics that hold up much better to rough play than fleece. They still use layered fleece as embellishments, though. The DIY instructions below would need to be adjusted to sew with concealed edges instead. Check out some of our other DIY stuffed dog toys for examples.
Making the Easter Bunny Stuffed Dog Toy
- Cut two bunny shapes in the full size for your finished toy. If you aren’t comfortable free-handing, draw it first on paper to make your own template or download a free template.
- Cut any embellishments you wish to add. I used a round white circle for the eye, two strips of fleece for a collar, and an extra bit of brown fleece to accent the ear and tail.
- Using complementary thread colors, securely sew your embellishments onto the front of one bunny. For bunny embellishments like the ones shown here on my toy:
- Sew your tail and ear embellishments into place.
- Pin and sew your collar. The ends can be left to tuck-in during joining.
- Sew your eye securely into place around the edge. Add an iris and/or pupil using a little extra stitching if you wish, mimicking the candy eyes of chocolate bunnies.
- Repeat if double-siding.
- Sew the two bunnies together, embellished side(s) out. Pause sewing with a large enough gap to add your stuffing and squeakers before fully closing the toy.
- Stuff and add (optional) squeakers. I included a squeaker near the ears and the bum.
- Sew the toy closed, trim any threads if/as needed, and enjoy!
I hope these steps help you create a delightful toy for your four-legged friend!
