Introduction: It’s time for another episode of Reduce, Reuse, REFASHION! That means it’s the last Tuesday of the month and I get to share with you my latest refashion fun. Today, I’m taking a pair of thrifted sweaters and making a DIY dog coat fit for a dog… well… my dog, Teddy. Yay!
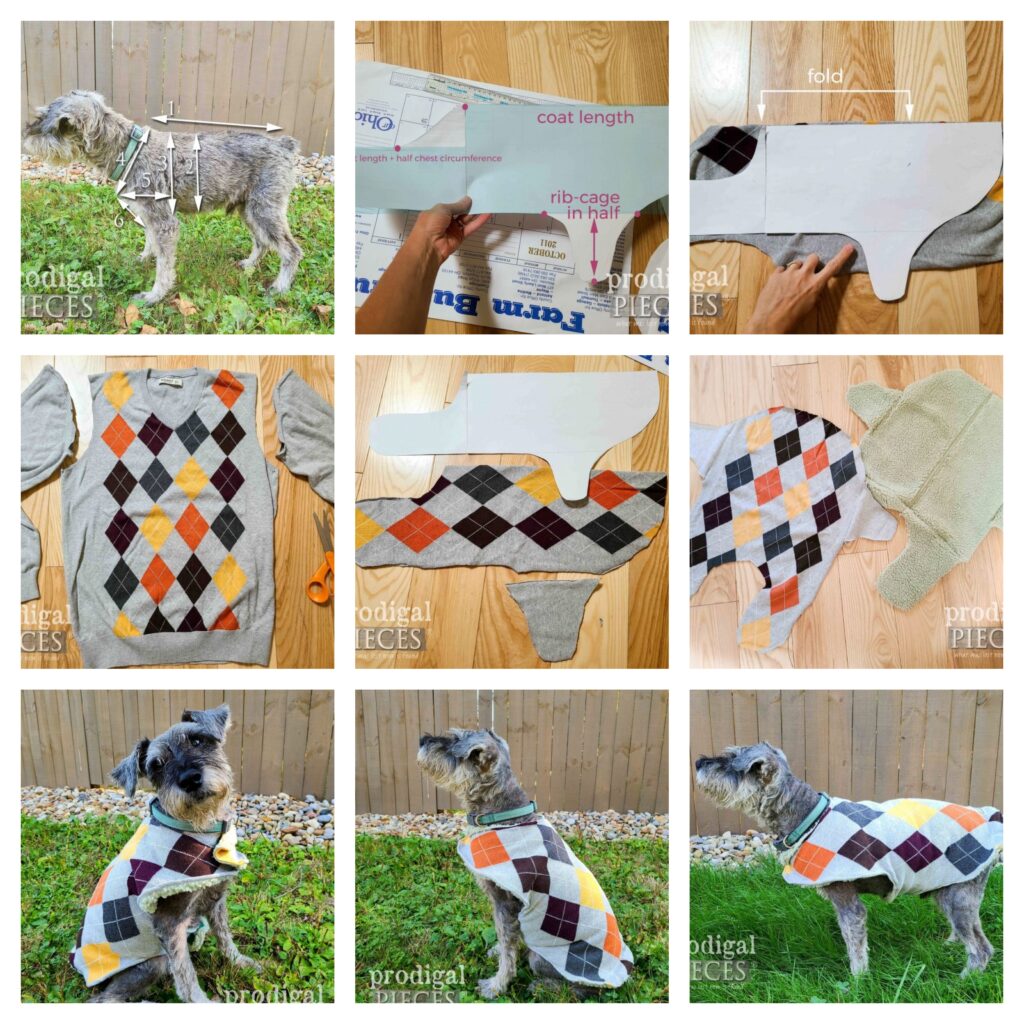
Step 1: Taking Measurements First off, I’m measuring Teddy to create a pattern. You’ll need to measure:
- Coat length – from collar to tail
- Coat depth – from shoulder to bottom of rib-cage
- Circumference of rib-cage
- Circumference of chest – measure around the neck just under collar
- Chest length – from chest to rib-cage
- Chest depth – from collar to bottom of chest
Step 2: Creating the Pattern I’m tracing out two rectangles for the pattern, using the coat and chest measurements. Then, I’m adding two sloping points for the neck and belly. Don’t worry, it’s not too hard. Just measure, make a draft, and tweak it to fit.
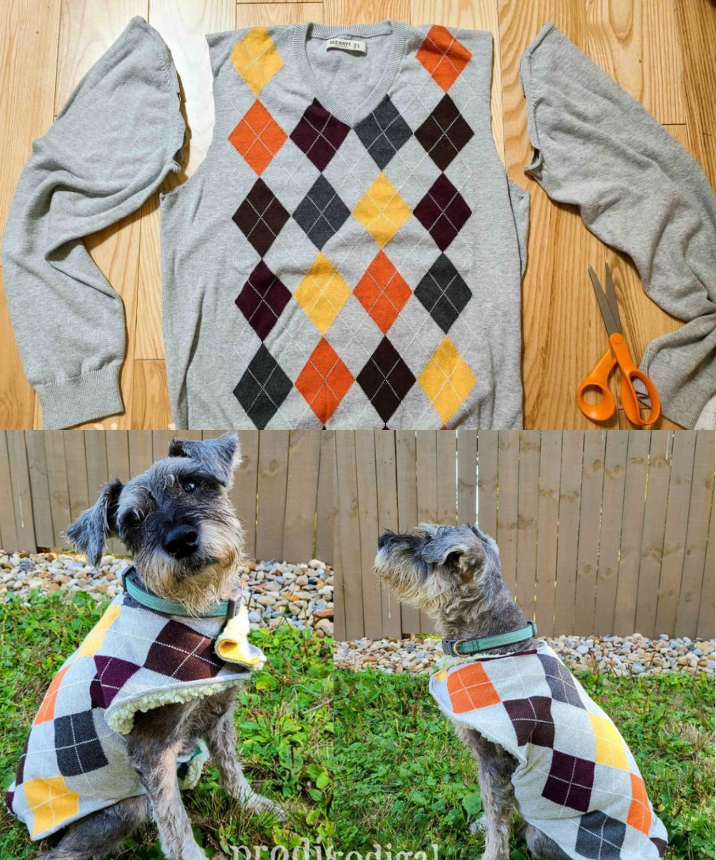
Step 3: Cutting Out I’m cutting off the sleeves of the sweaters and then cutting along the sides and shoulders of the torso. Next, I fold the front of the sweater in half lengthwise and place the pattern on it. I cut around the pattern, leaving a seam allowance.
Step 4: Assembly I place the two sweater layers right sides together and pin them, leaving an opening near the tail. Then, I sew the pieces together using a sewing machine or serger. After sewing, I turn the coat right side out and top-stitch around the edge.
Step 5: Adding Closures I attach hook and loop strips to the chest and belly pieces to close the coat. This is also where you can add a hole for the harness if needed.
Conclusion: And there you have it! Teddy now has a new coat made with love. It’s so much fun to create for our pets. I hope this tutorial inspires you to do the same for your furry friends!