Self-watering planters are a practical solution to ensure your plants receive the right amount of water without the need for constant watering. Here’s how to make your own self-watering planters using plastic bottles:
Materials Needed:
- Plastic bottles (1 per planter)
- Cotton or fiberglass wick
- Growing medium
- Water reservoir
Steps for Assembly:
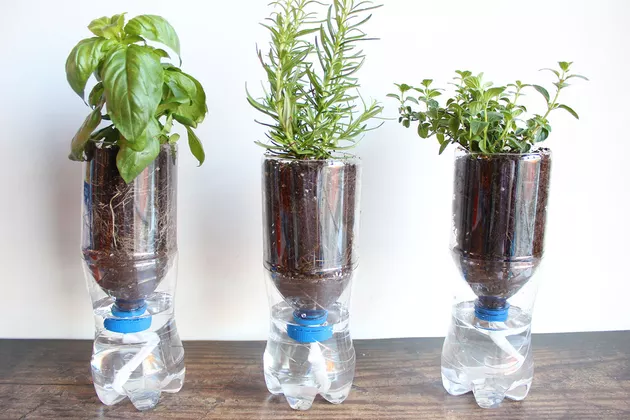
- Prepare the Bottle: Cut the plastic bottle in half, keeping the bottom part. This part will serve as the planter.
- Prepare the Wick: Cut a cotton or fiberglass wick to the length of the planter. The wick will act as a conduit for watering.
- Insert the Wick: Insert one end of the wick into the bottom of the bottle, allowing it to protrude downwards.
- Fill the Planter: Fill the bottle with the growing medium, ensuring not to obstruct the wick.
- Fill the Reservoir: Fill the cut part of the bottle with water. The wick will absorb the necessary water for watering.
- Transplant the Plant: Plant your desired plant in the improvised planter as usual.
How the System Works:
The wick acts as a capillary conduit, transporting water from the cut part of the bottle to the growing medium. This way, the plant can absorb water at its own pace, ensuring regular watering.
Advantages of Self-Watering Planters with Plastic Bottles:
- Time-saving: Less effort for daily watering.
- Moisture control: Plants receive the right amount of water.
- Recycling: Creative use of plastic bottles for gardening.
By creating these self-watering planters, you provide your plants with a convenient and cost-effective watering system. Enjoy a flourishing garden with less effort! 🌿💧