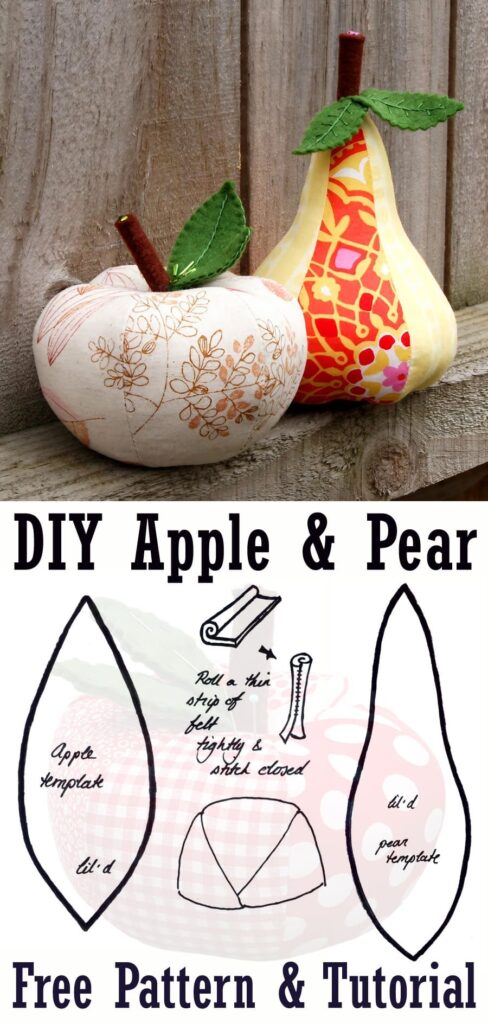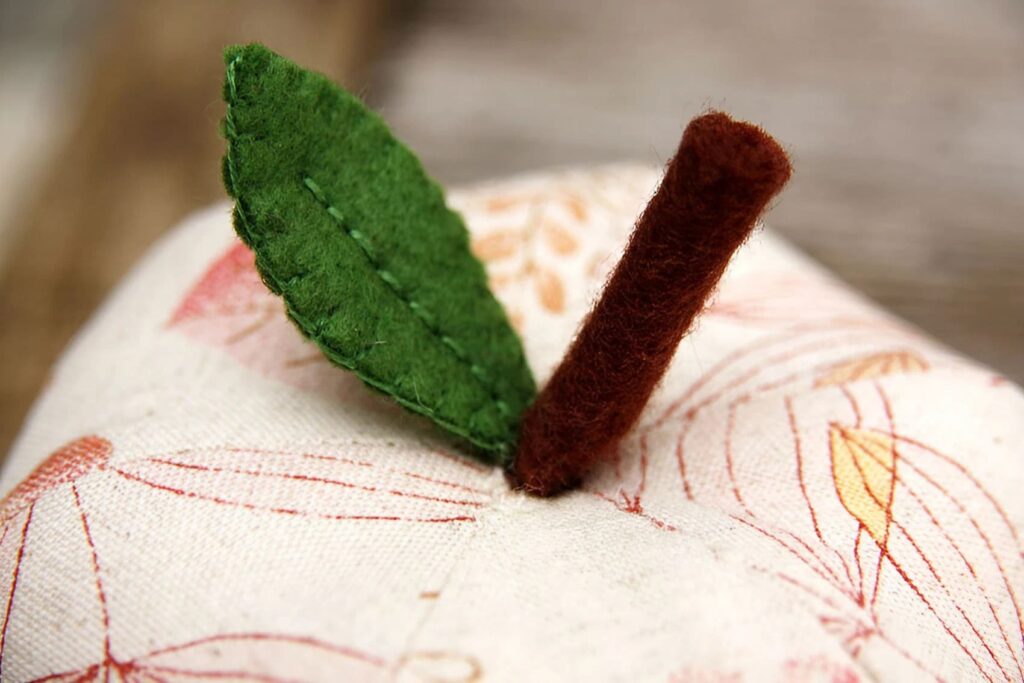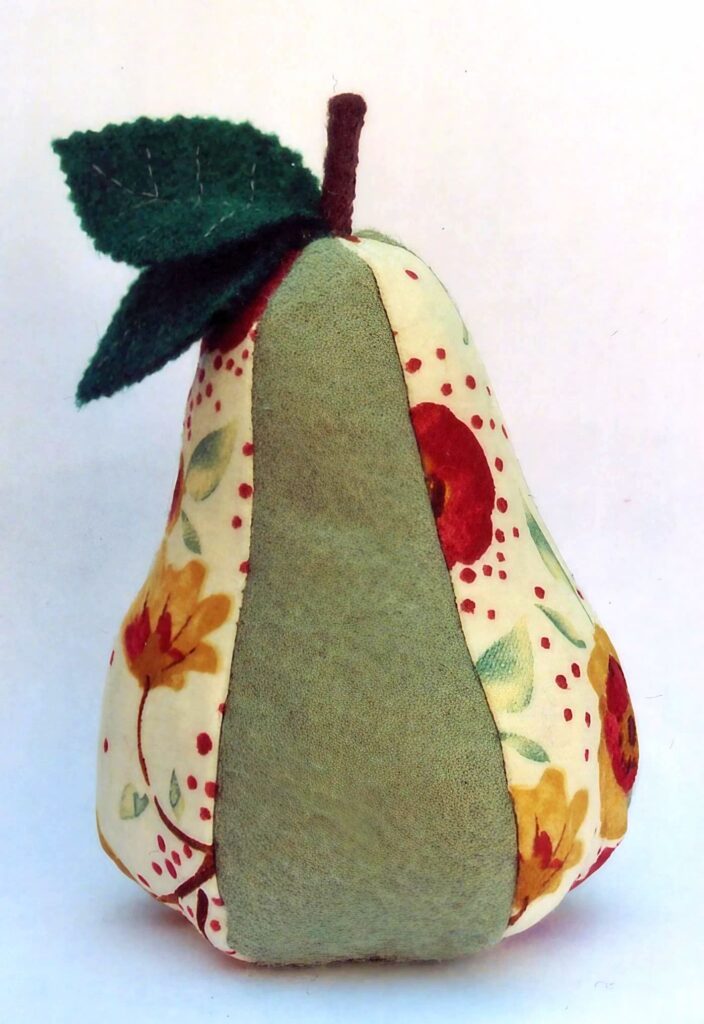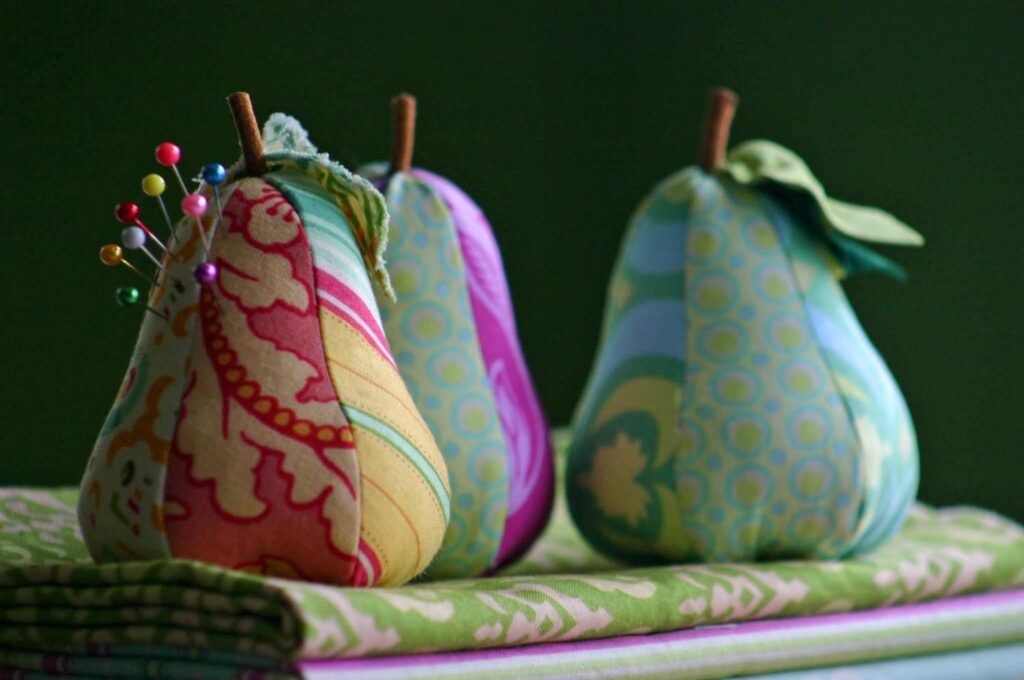
Introduction: Are you ready to infuse your sewing space with a dash of charm? Dive into the delightful world of DIY with our step-by-step guide to creating your very own Apple and Pear Pincushions! These adorable accessories not only keep your pins organized but also add a whimsical touch to your crafting corner. Let’s embark on this creative journey together and bring these fruity pincushions to life!
Step 1: Gather Your Materials Before we begin, gather the following materials:
- Fabric scraps in your favorite colors
- Brown felt for the stalk
- Sewing machine or needle and thread
- Scissors
- Pins
- Pincushion filling
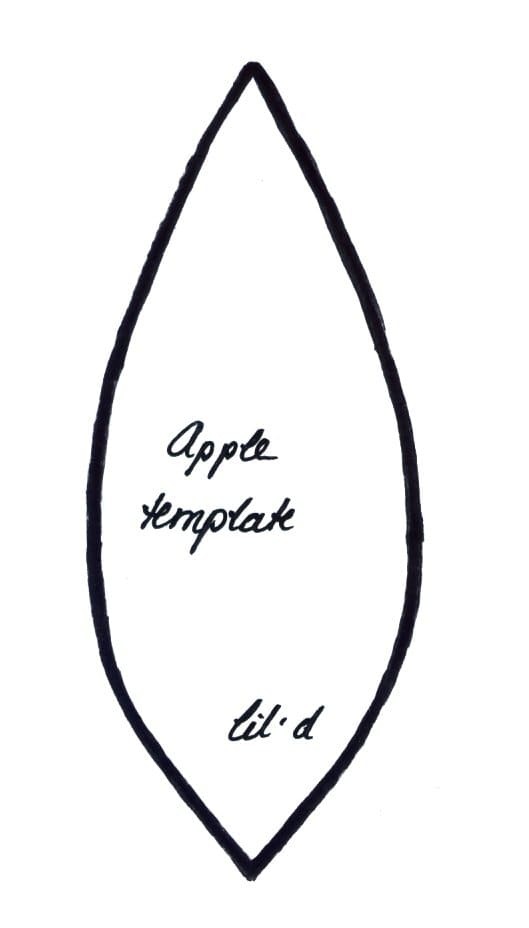
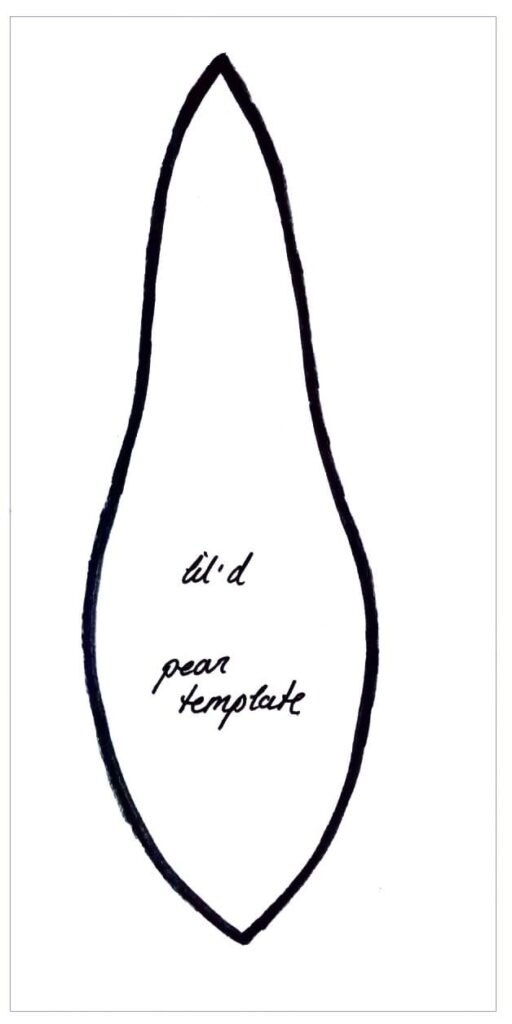
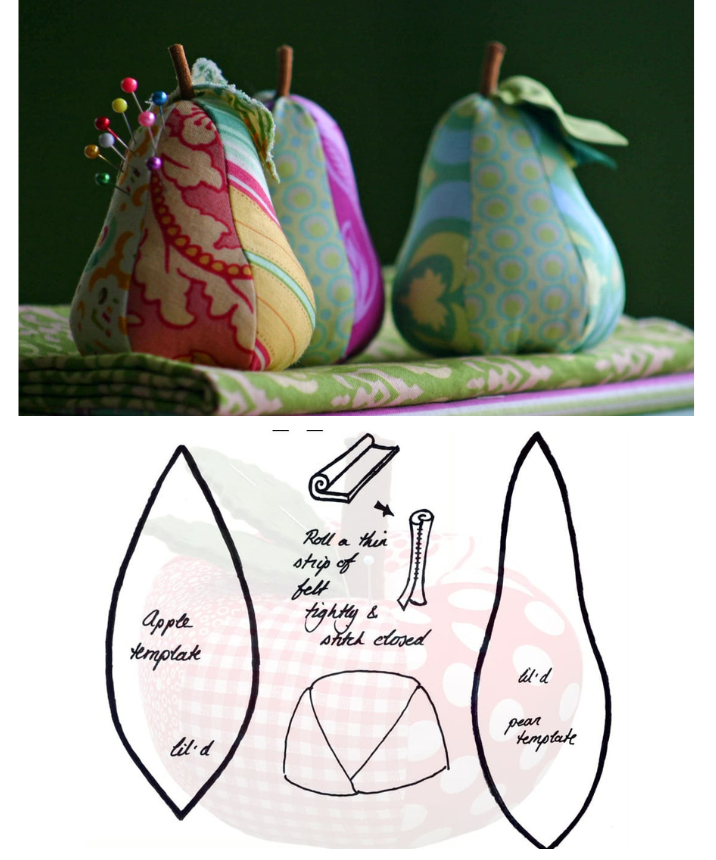
Step 2: Print and Prepare the Template Print off the provided template and adjust the size to your preference. Once printed, cut out the template and trace it onto your fabric scraps. Remember to leave a small seam allowance around the edges.
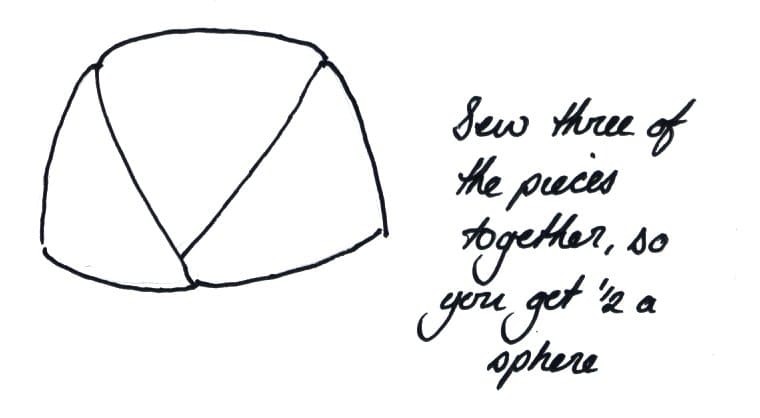
Step 3: Sew the Fabric Pieces Together With the right sides of the fabric facing each other, sew the pieces together according to the template instructions. Take care to maintain the correct orientation, ensuring that the wider end is towards the top.
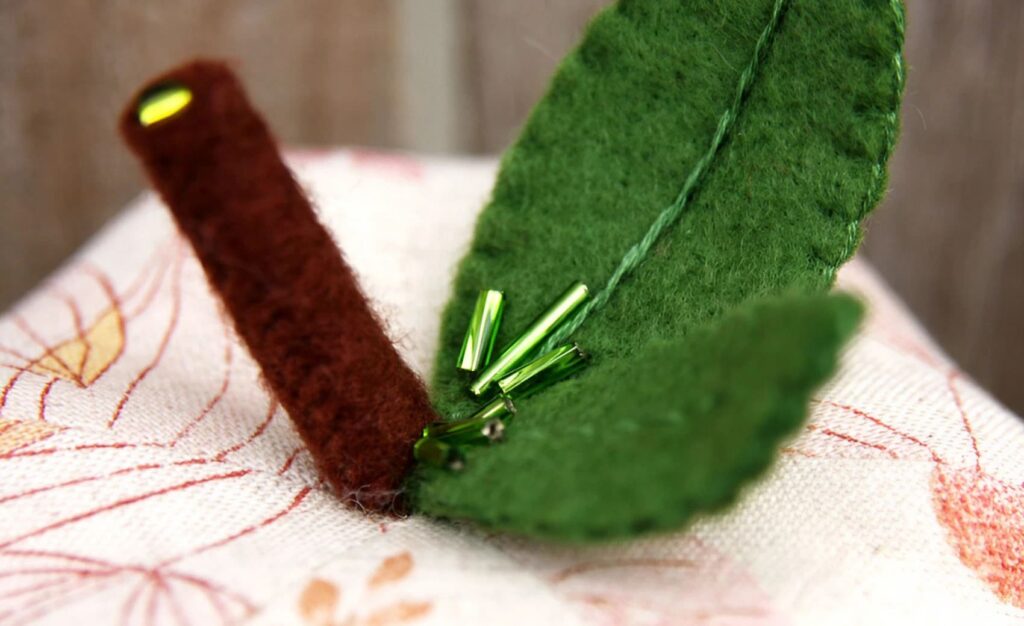
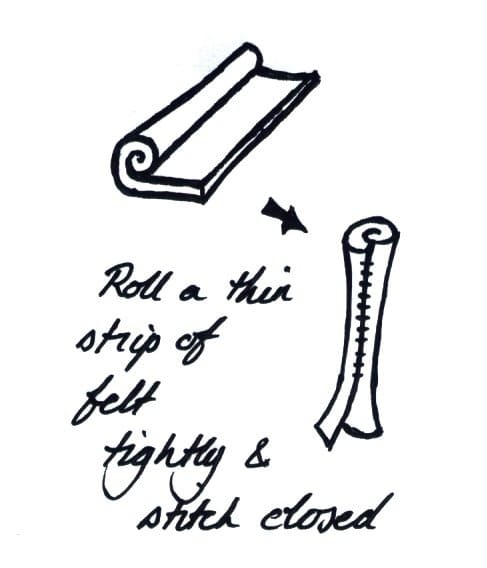
Step 4: Create the Stalk Cut a narrow strip of brown felt for the stalk and roll it tightly. Secure it with small stitches to prevent it from unraveling. Leave a small part unsewn at the base for easier attachment to the main part of the pincushion.
Step 5: Assemble the Pincushion Attach the felt stalk to one of the fabric half spheres, leaving a long loose thread trailing out the bottom. Sew the two half spheres together, leaving a small gap for turning. Once turned right side out, stuff the pincushion with filling.
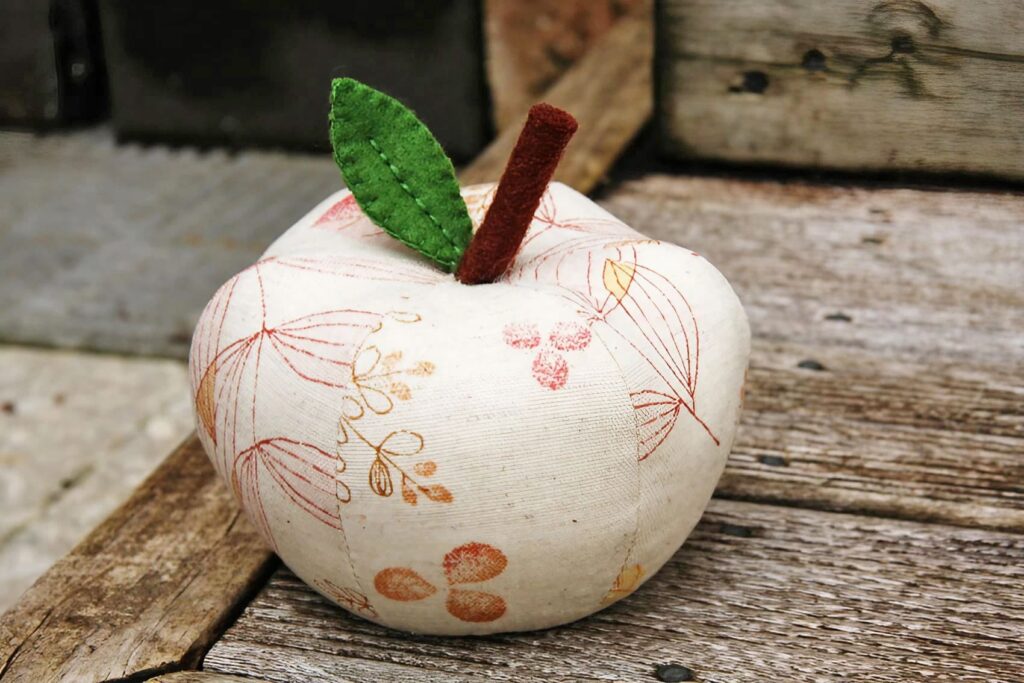
Step 6: Final Touches Hand sew the gap closed and adjust the loose thread to create an indent in the sphere, mimicking the shape of an apple or pear. Add a tiny scrap of felt to the bottom to cover any knots and create a polished finish.
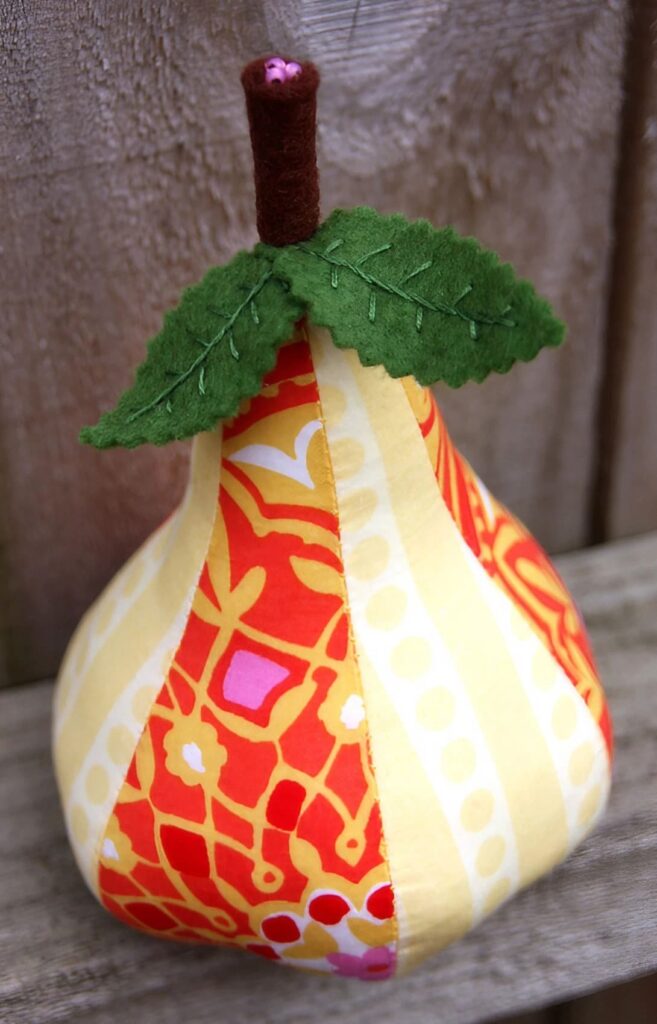
Step 7: Crafting the Pear (Optional) For the pear pincushion, follow the same steps as the apple but omit creating the indent at the top. Ensure symmetry in the template for the best results.
Conclusion: Voila! You’ve successfully crafted your own charming Apple and Pear Pincushions. Embrace the wonky charm of these handmade creations, knowing that each stitch was made with love. Display them proudly in your sewing space or gift them to fellow crafters. Stay tuned for more exciting DIY projects and unleash your creativity with each stitch!
Ready to explore more crafting adventures? Check out our other tutorials for inspiration and discover endless possibilities to ignite your creativity! Happy crafting!