Are you looking for a delightful DIY sewing project that will bring warmth and joy to your child’s room? Look no further than the charming Cozy Cloud Cushion! This adorable plushie not only adds a whimsical touch to any space but also serves as a snuggly companion perfect for hugging. Let’s dive into how to create your own fluffy cloud!
Project Overview
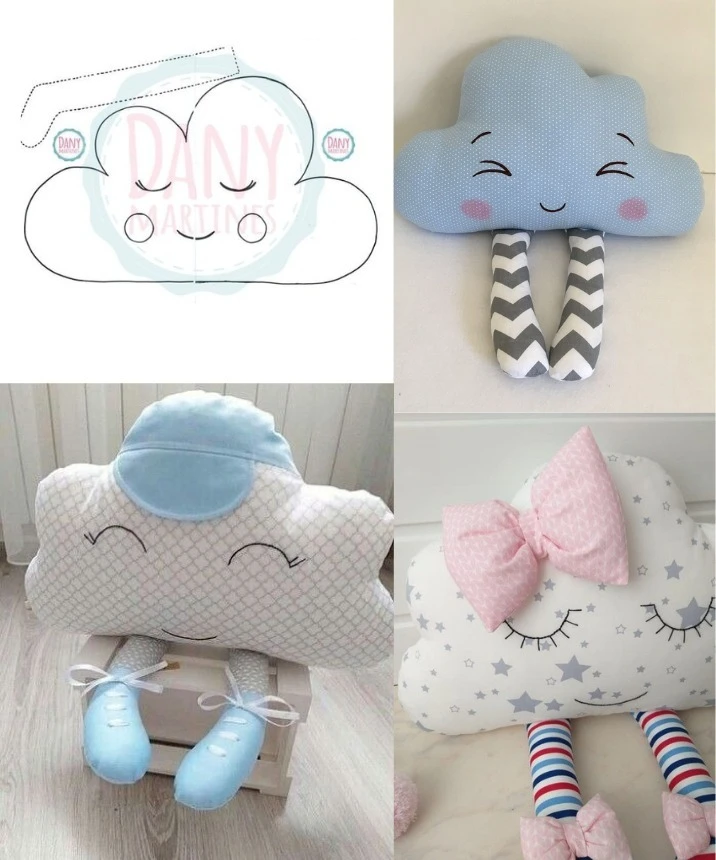
Dimensions and Pattern Pieces
The Cozy Cloud Cushion is a straightforward project suitable for beginners and experienced sewists alike. Here’s what you’ll need:
Cloud Body: 2 pieces, each measuring 40 cm wide and 25 cm tall.
Legs (Optional): 4 pieces, each measuring 15 cm long and 5 cm wide.
Cheeks (Optional): 2 pieces, each a round shape with a diameter of 4 cm.
Decorations: Add various details like a bow according to your desired size and creativity.
Materials Needed
To start crafting your Cozy Cloud Cushion, gather the following materials:
- Soft cotton or linen fabric for the cloud’s body.
- Contrast fabric for the optional legs (consider fun patterns like stripes or polka dots).
- Felt for the cheeks and facial details.
- Hypoallergenic stuffing for a fluffy finish.
- Basic sewing supplies: scissors, sewing machine, thread, pins, and needle.
Step-by-Step Instructions
Step 1: Prepare the Pieces
Cut the Cloud: Begin by cutting two identical cloud shapes from your main fabric.
Cut the Legs: If you’re adding legs, cut the leg pieces from your contrasting fabric.
Prepare the Cheeks: Cut out two round cheeks from the felt.
Step 2: Assemble the Face
- Take one of the cloud pieces and apply the facial features. You can use simple embroidery stitches (like back stitch) for the eyes and mouth to create a charming expression.
- Attach the felt cheeks either by sewing or using fusible interfacing for easy application.
Step 3: Create the Legs (Optional)
- For each leg piece, fold the fabric right sides together and sew along the long edge.
- Turn the legs inside out and lightly stuff them. You can finish off by closing the ends with a ribbon for a cute touch.
Step 4: Assemble the Cloud Body
- Place the two cloud pieces together, right sides facing each other. If you’re using legs, place them inside the cloud before sewing, aligning them properly.
- Sew around the edges, leaving an opening at the bottom for turning and stuffing.
Step 5: Finish the Cushion
- Turn the cloud right side out and fill it generously with hypoallergenic stuffing.
- Hand-sew the opening closed with an invisible stitch for a neat finish.
- Add decorative elements like a bow or star appliqués to personalize your cloud!
Final Thoughts
With just a few simple steps, you’ll have a delightful Cozy Cloud Cushion ready to bring a smile to your child’s face! This project not only enhances any room’s decor but also allows for creative expression through fabric choices and embellishments. Plus, it’s a wonderful opportunity to bond with your little ones as you craft together!
So, gather your materials, unleash your imagination, and let the sewing adventure begin! Happy sewing! ☁️💖