Today, we’re going to embark on a delightful journey into the world of teddy bear crafting. If you’ve ever wanted to create your very own cuddly companion, now’s your chance! In this step-by-step guide, I’ll walk you through the process of making a tiny bear from scratch. So, gather your materials and let’s get started!
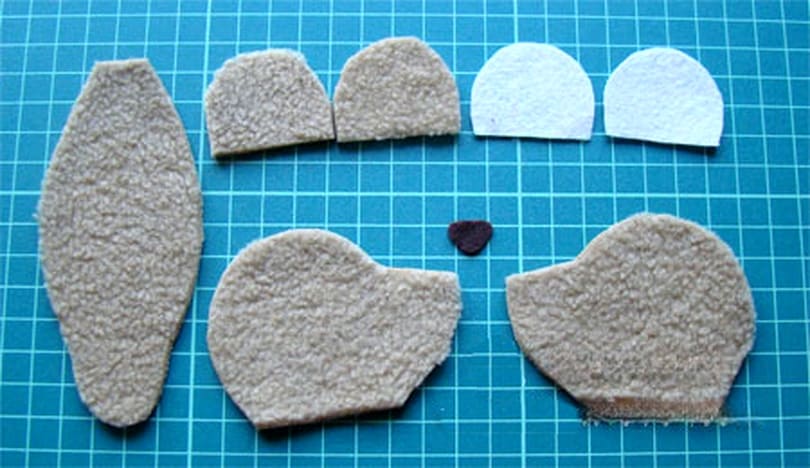
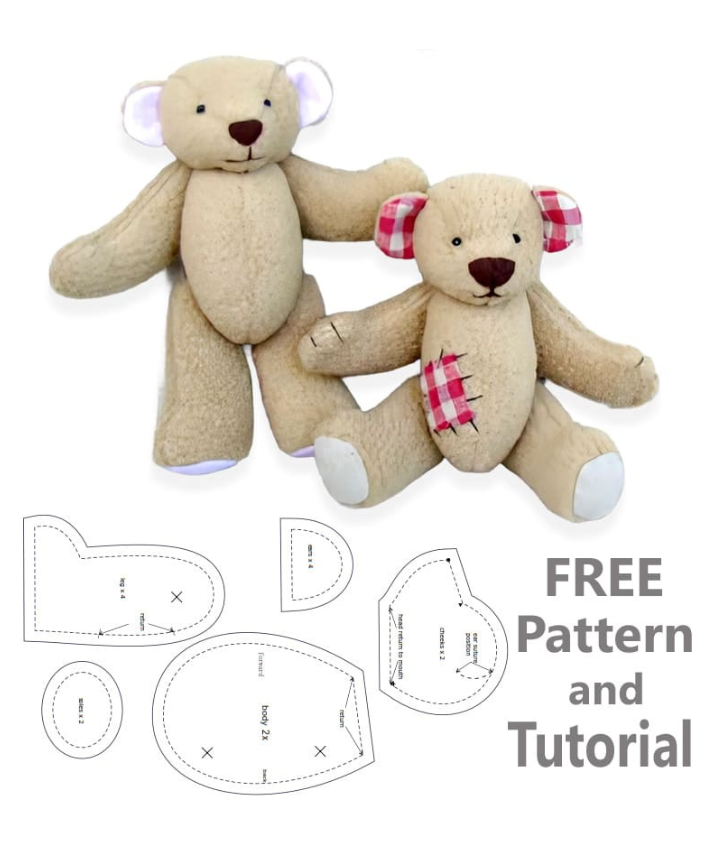
1. Download the Teddy Bear Paper Pattern
Before we dive in, make sure to download and print out the paper pattern for the 12cm teddy bear. This pattern will serve as your template for cutting out the fabric pieces needed for your bear.
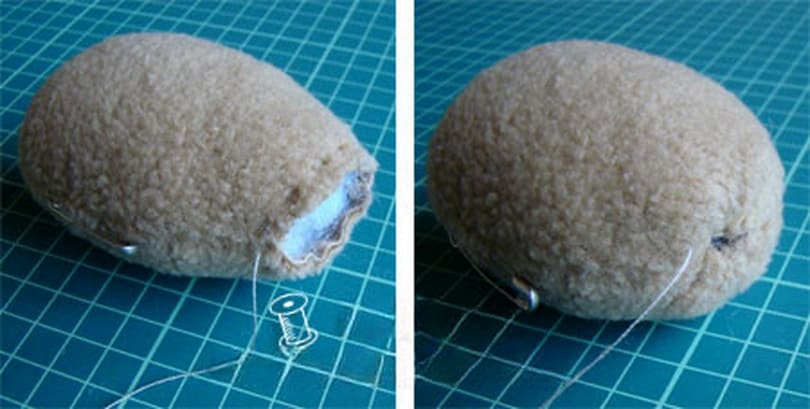
2. Making the Body
The body of the teddy bear is where we’ll begin. It’s the simplest part of the process, consisting of just two symmetrical pieces. Cut out the fabric according to the pattern, then sew the pieces together with the U-shaped part facing inward. Be sure to leave an opening for stuffing!
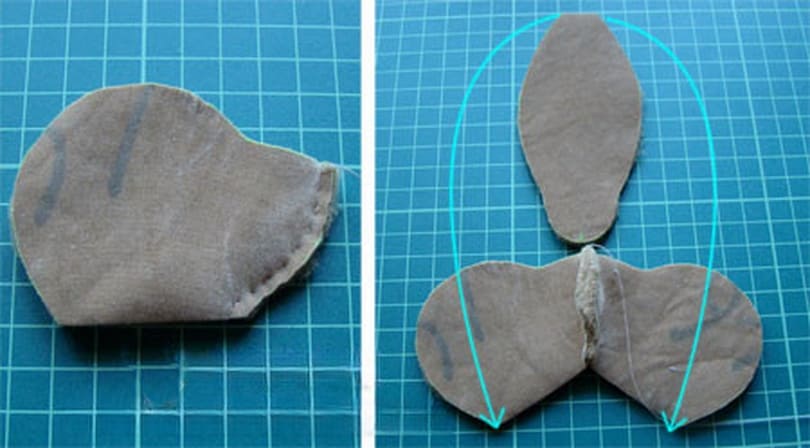
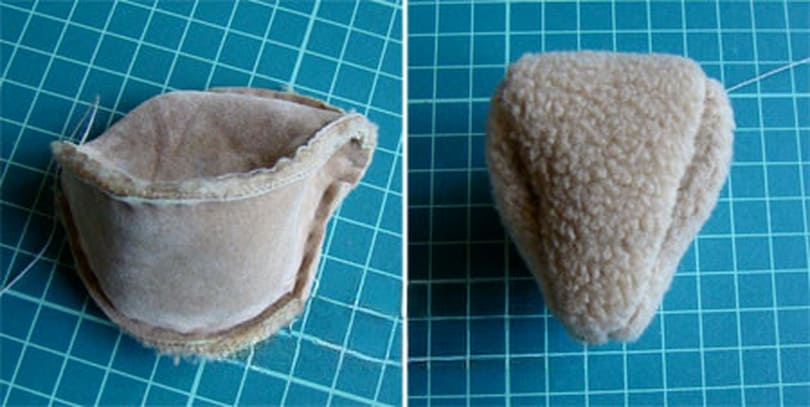
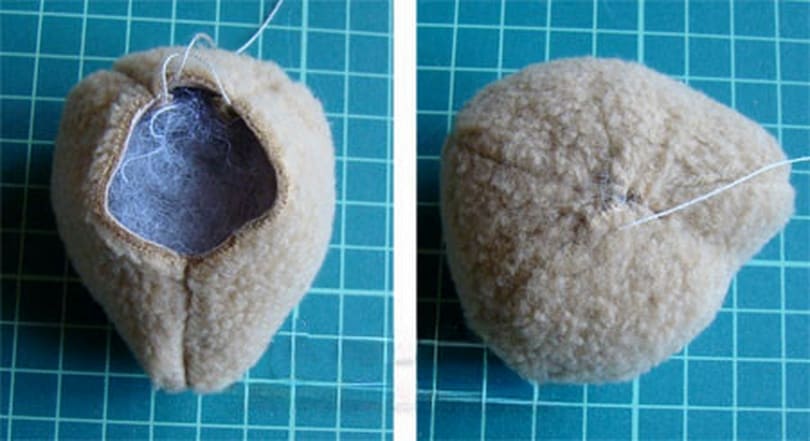
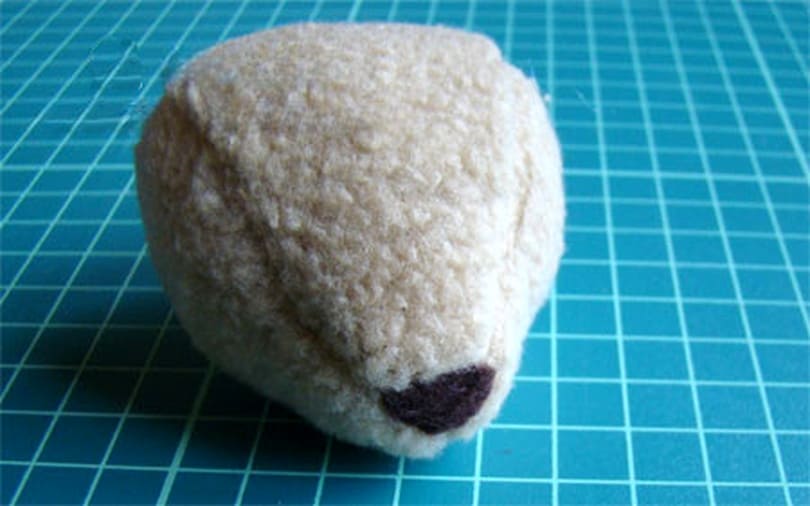
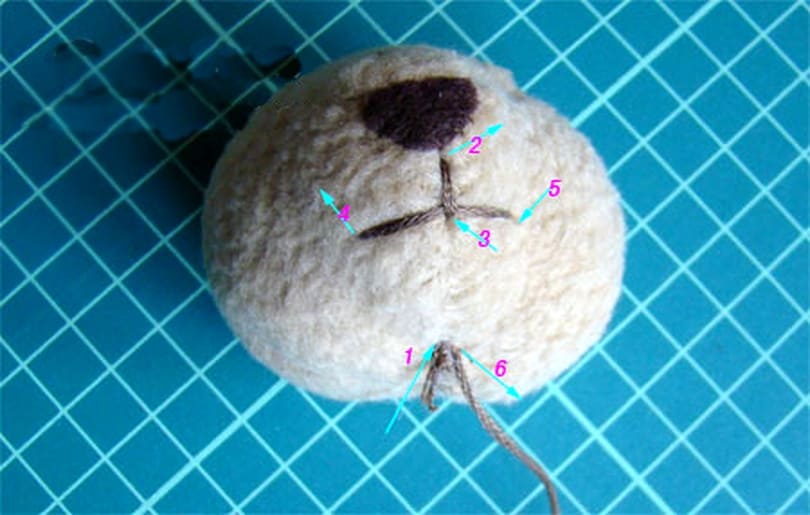
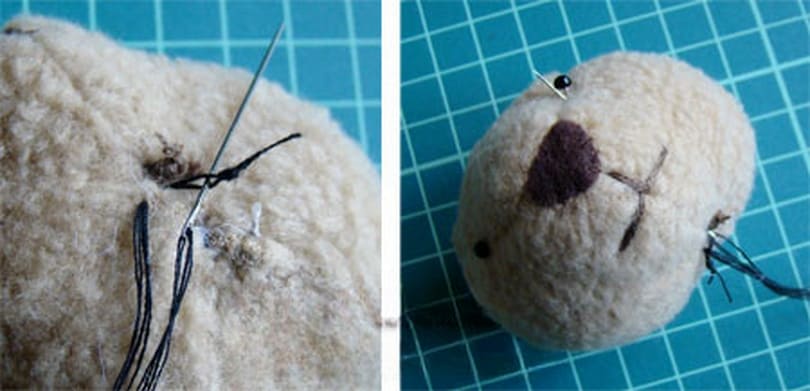
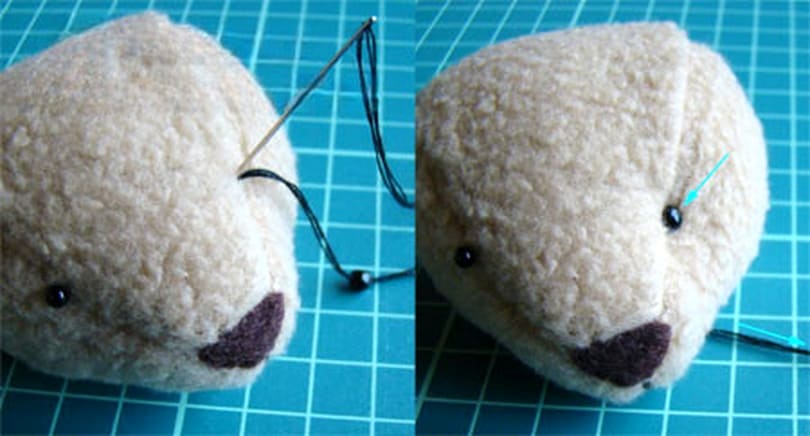
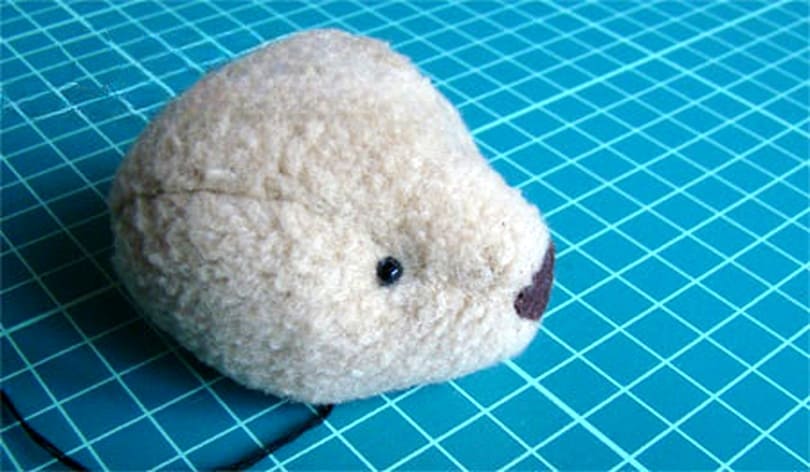
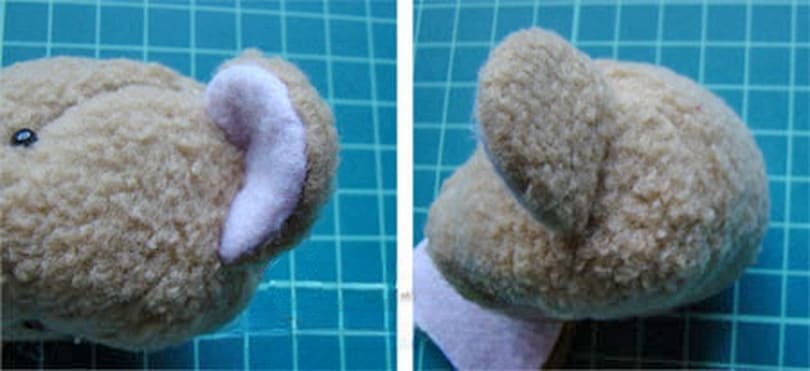
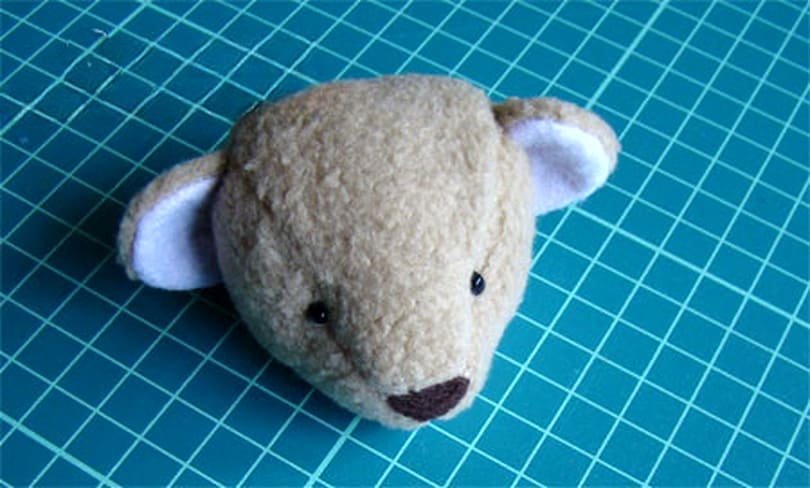
3. Crafting the Head
Next up is the head, which is a bit more complex. Cut out all the pieces for the head, including the cheeks, chin, and nose. Sew the pieces together, starting with the cheeks and working your way up to the top of the head. Stuff the head firmly with cotton and sew on the nose and mouth details.
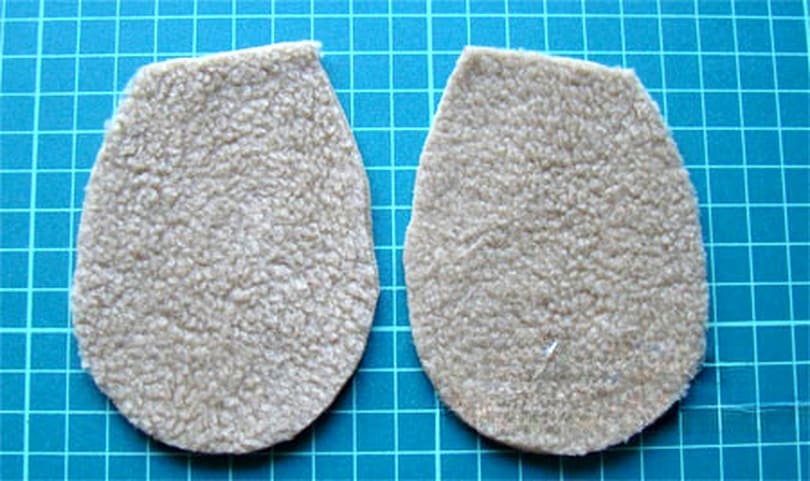
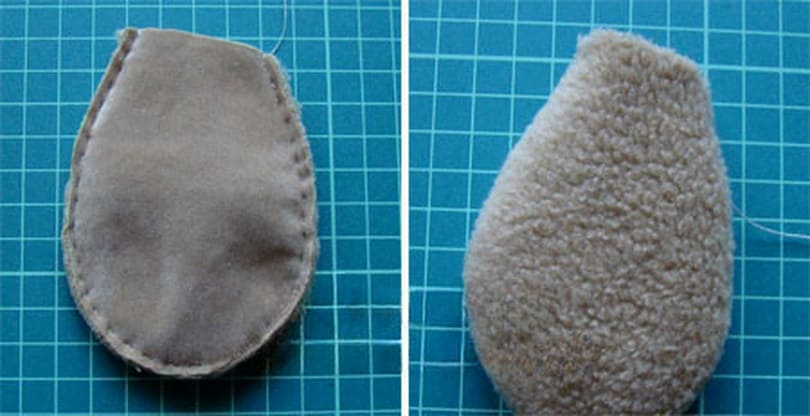
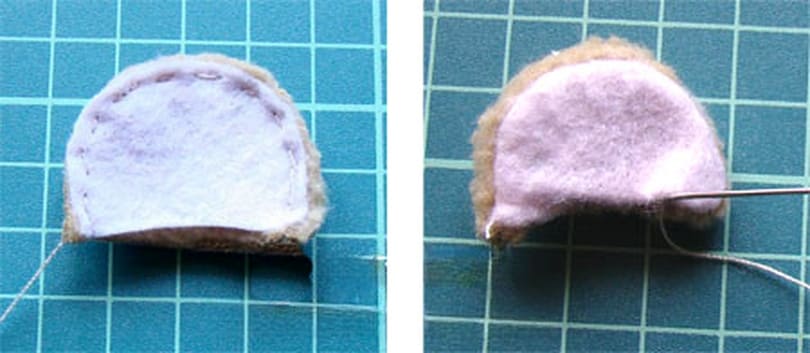
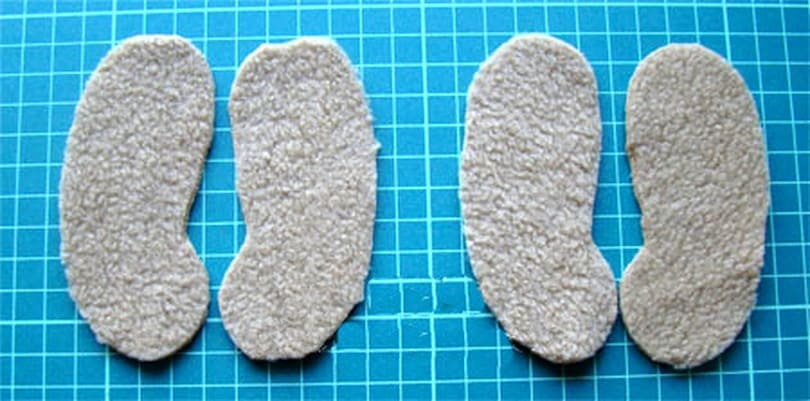
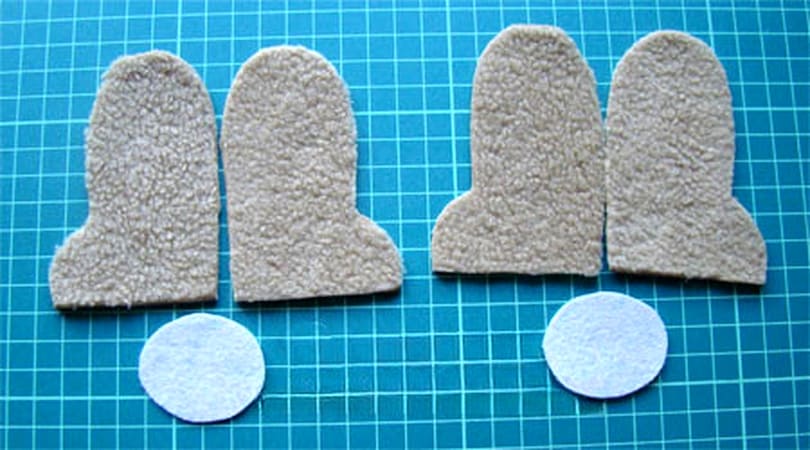
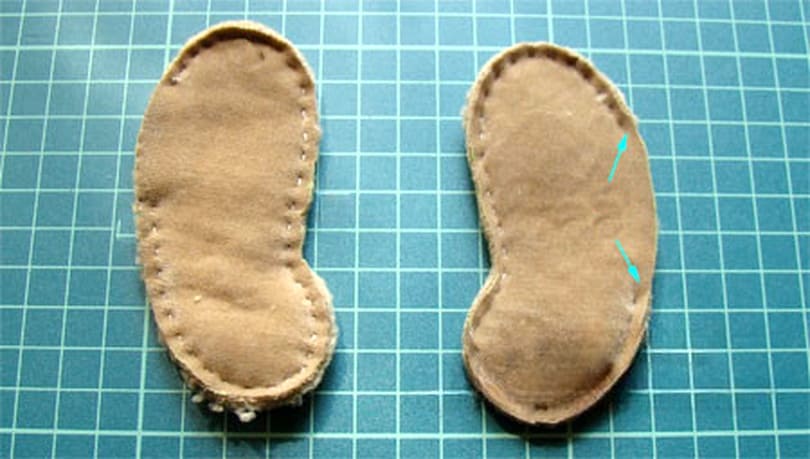
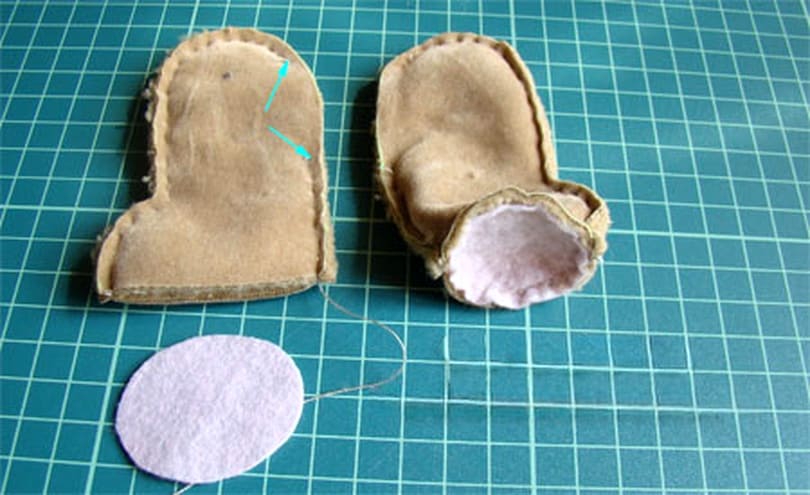
4. Making the Limbs
Now it’s time to create the arms and legs of your teddy bear. Cut out the fabric pieces for the limbs, then sew them together and stuff them with cotton. Be sure to leave openings for attaching the limbs to the body later on.
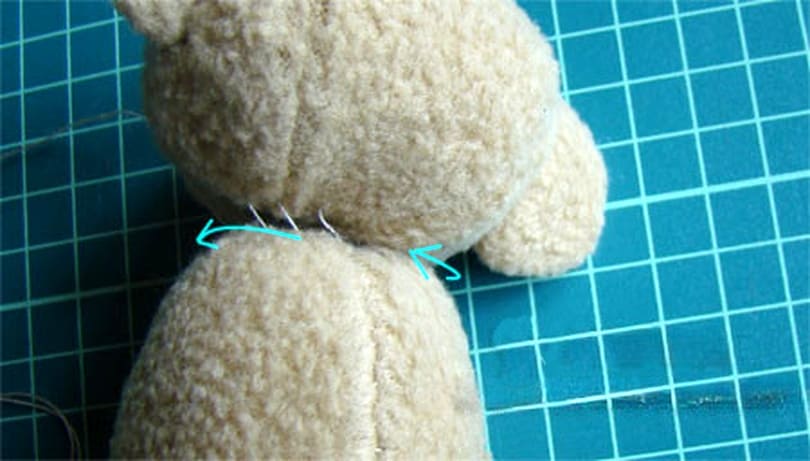
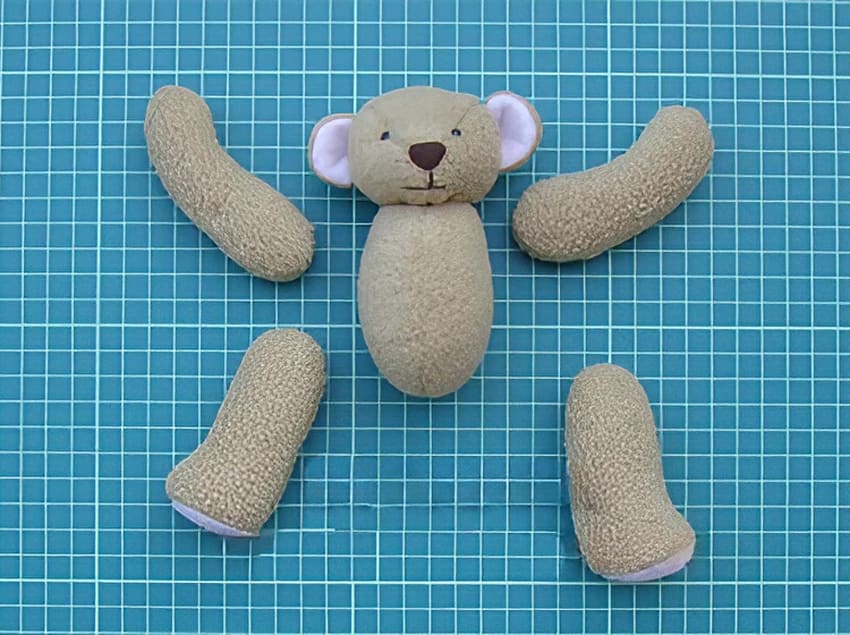
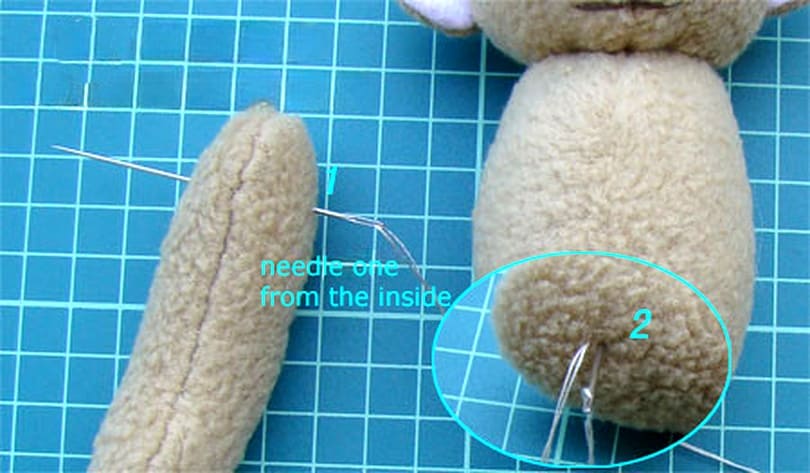
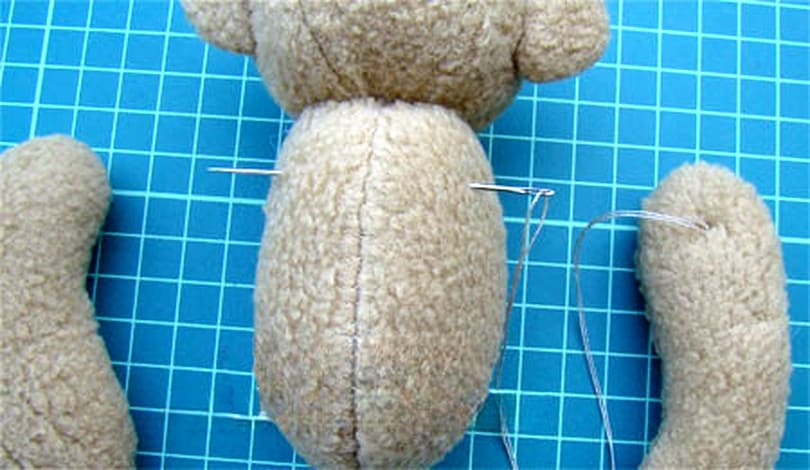
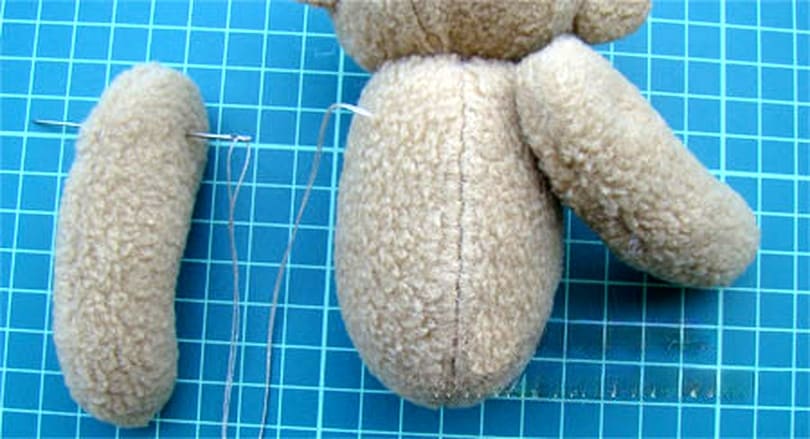
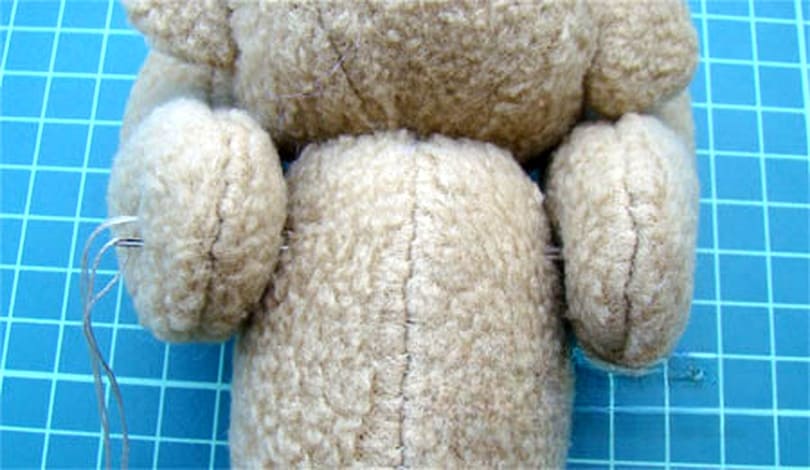
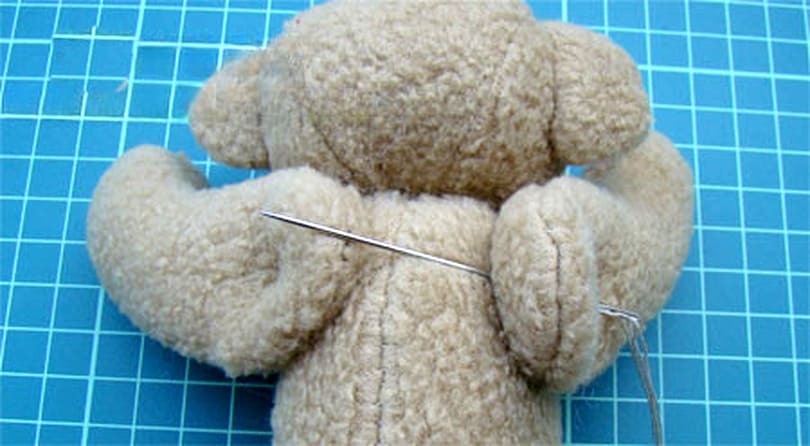
5. Assembling Your Teddy Bear
With all the individual parts made, it’s time to assemble your teddy bear! Sew the head onto the body, making sure to conceal the stitches for a seamless finish. Then, attach the arms and legs using a similar technique, ensuring they’re secure but still movable.
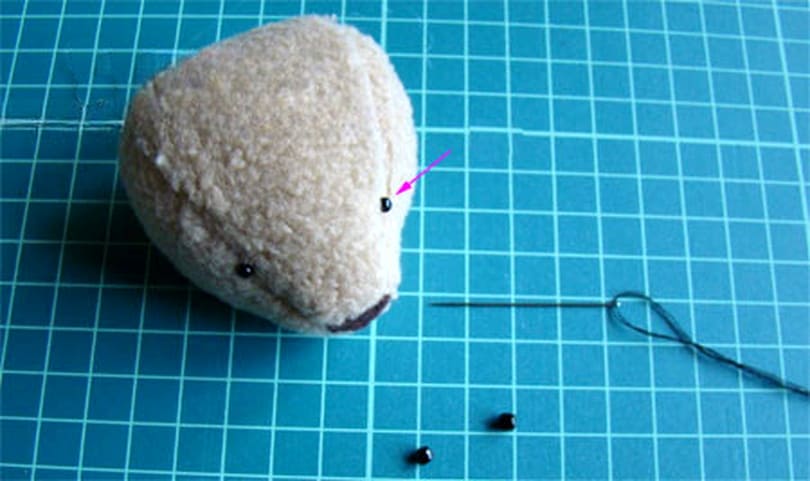
6. Adding the Finishing Touches
Once your teddy bear is fully assembled, it’s time to add the final touches. Sew on the eyes and any other embellishments you desire, such as a cute little nose or embroidered mouth. Feel free to get creative and personalize your bear however you like!
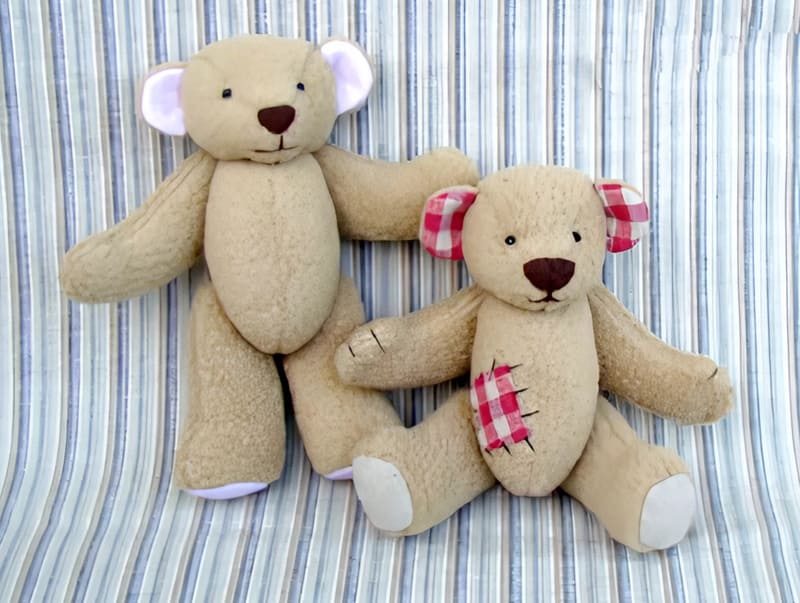
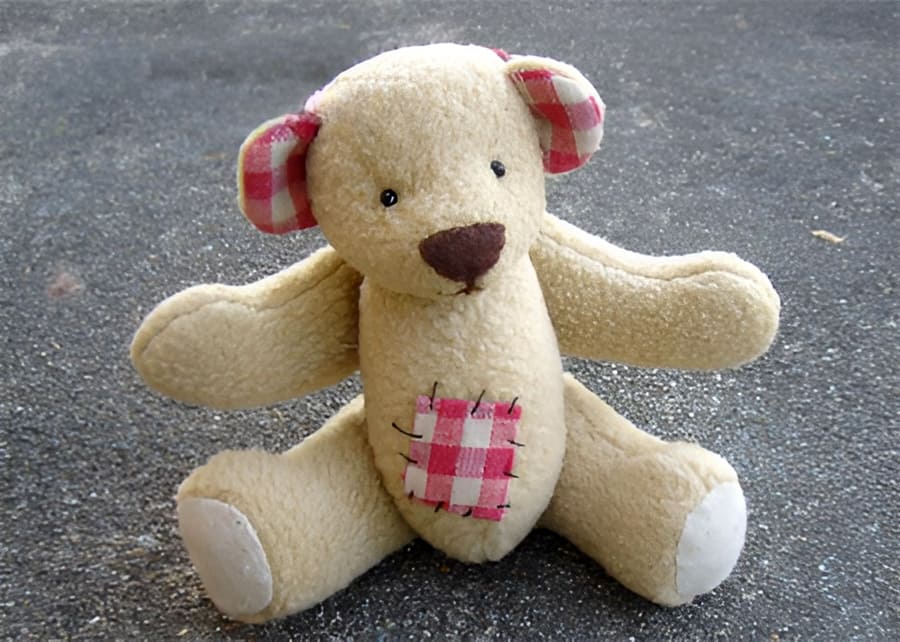
7. Enjoy Your New Furry Friend
Congratulations, you’ve successfully made your very own teddy bear from scratch! Whether you choose to keep it for yourself or give it as a heartfelt gift to someone special, your handmade creation is sure to bring joy and warmth wherever it goes.
Tips for Teddy Bear Crafting Success
- Take your time and pay attention to detail.
- Experiment with different fabrics and colors to customize your bear.
- Don’t be afraid to get creative and add your own unique flair to the design.
- Have fun and enjoy the process of bringing your teddy bear to life!
Now that you’ve completed your teddy bear, why not share your creation with us? We’d love to see photos of your handmade masterpiece. Happy crafting!