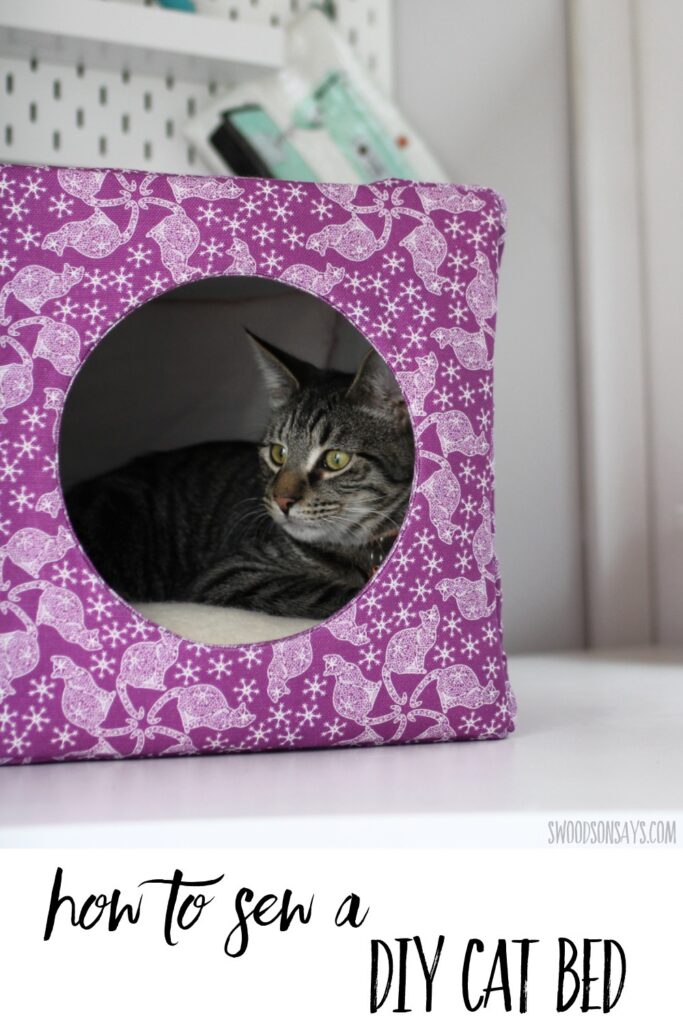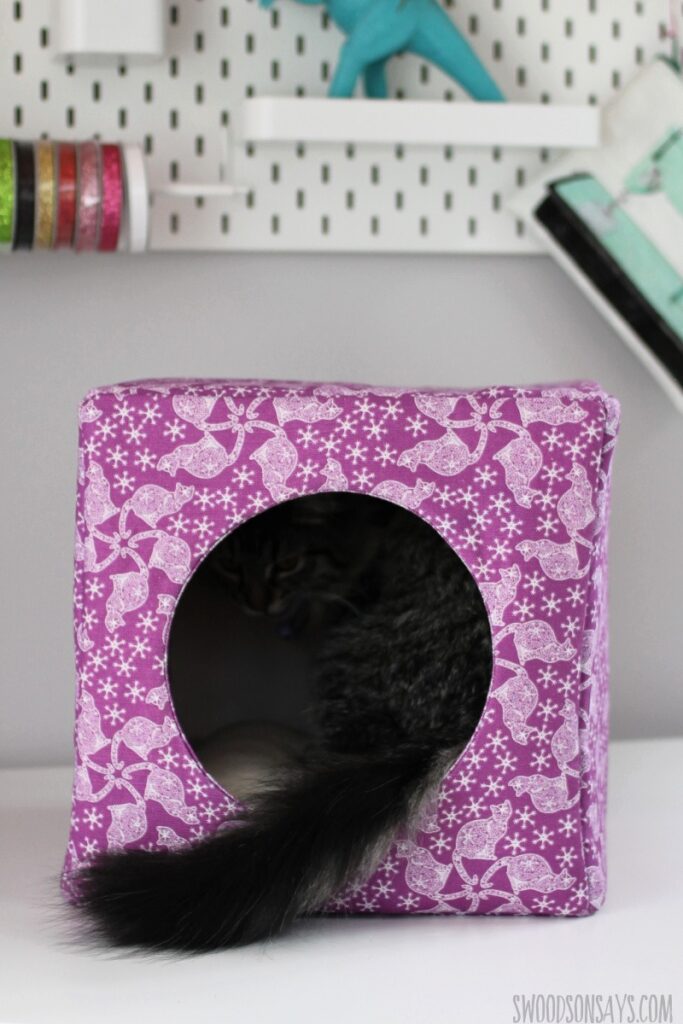
If you’re looking for a fun and creative project to spoil your feline friend, making a cozy cat bed is a purr-fect choice! With just a few materials and some basic sewing skills, you can create a comfortable retreat that your cat will love to curl up in. Follow these step-by-step instructions to craft your own custom cat bed:
Materials You’ll Need:
- 1 yard of customizable fabric (midweight linen blend works well)
- 1 yard of lining fabric (woven cotton like Kona cotton)
- About 8 padded mailers (or 2 yards of fusible fleece)
- Coordinating thread
- Rotary cutter
- Quilt ruler
- Quilting clips
- Iron
- Small bowl & pencil
Step 1: Cutting the Fabric Begin by cutting 12.5-inch squares from both the fashion fabric and the lining fabric. You’ll need 7 squares of fashion fabric and 5 squares of lining fabric. If your fabric is wrinkled, consider using starch spray and ironing each piece.
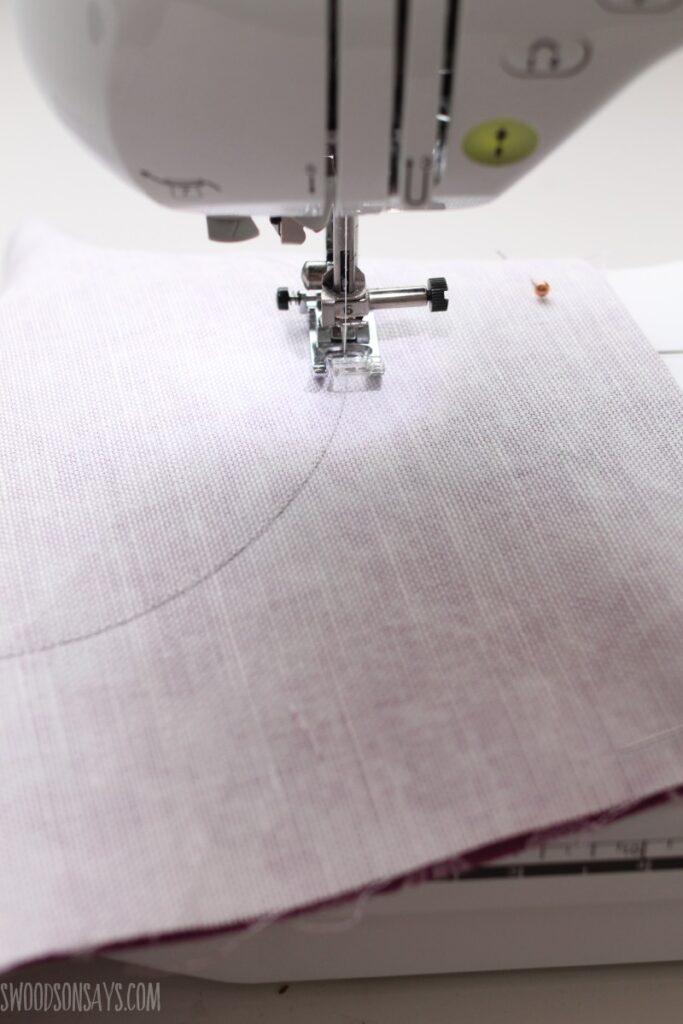
Step 2: Marking the Circle Layer two fashion fabric squares with right sides together and pin or clip around the edges. Place a bowl with a 7-inch diameter in the center and trace around it.
Step 3: Sewing the Circle Sew along the circle you traced in the previous step.
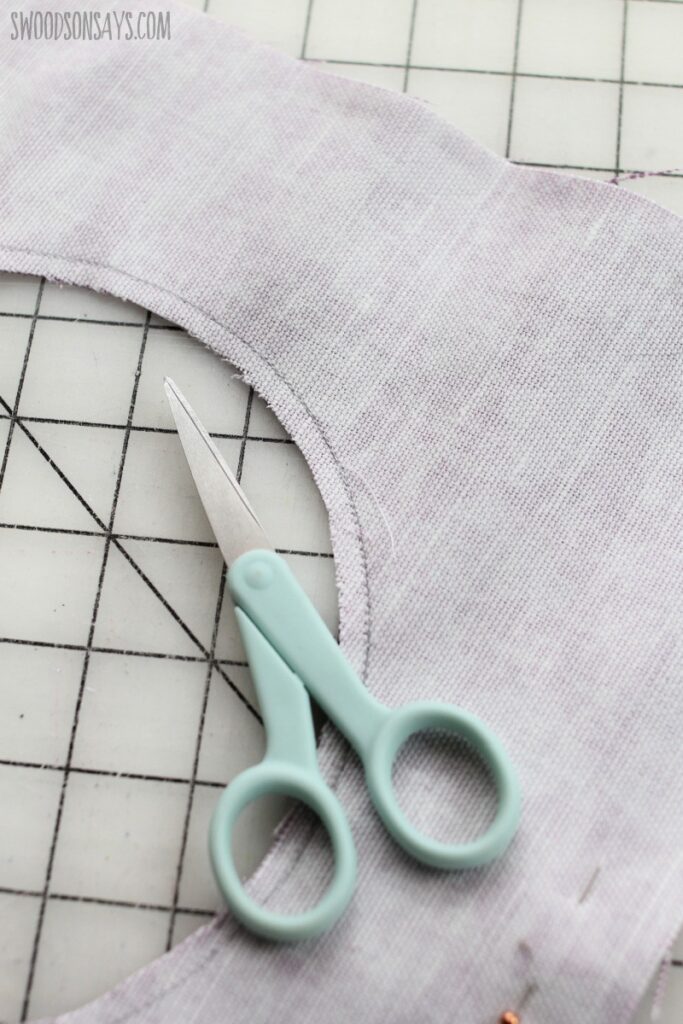
Step 4: Trimming Carefully trim around the inside of the circle, leaving a gradual curve.
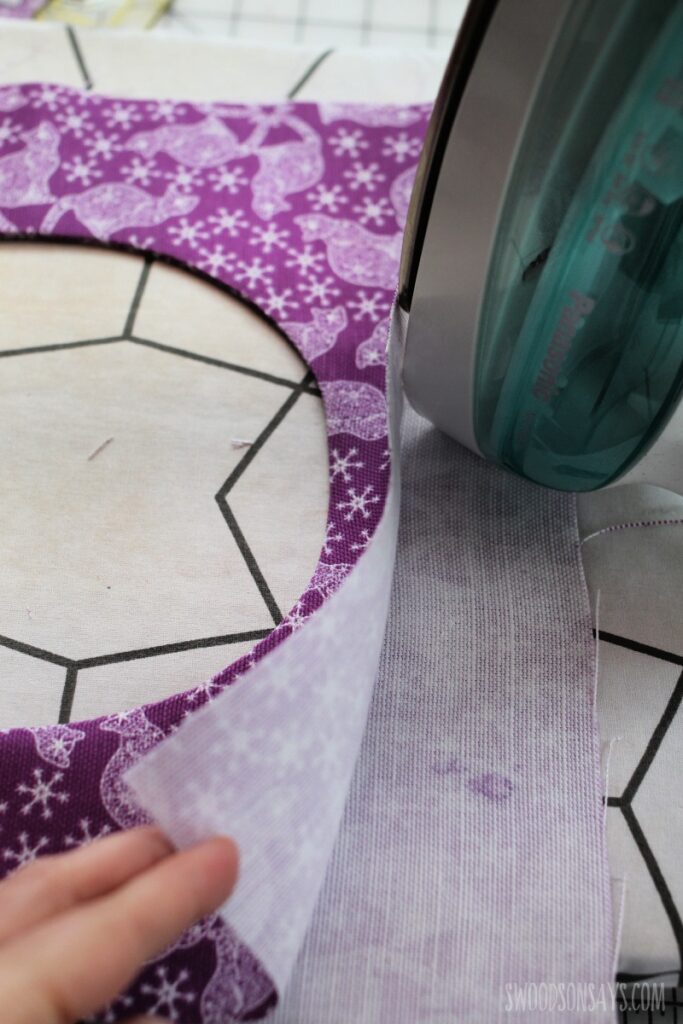
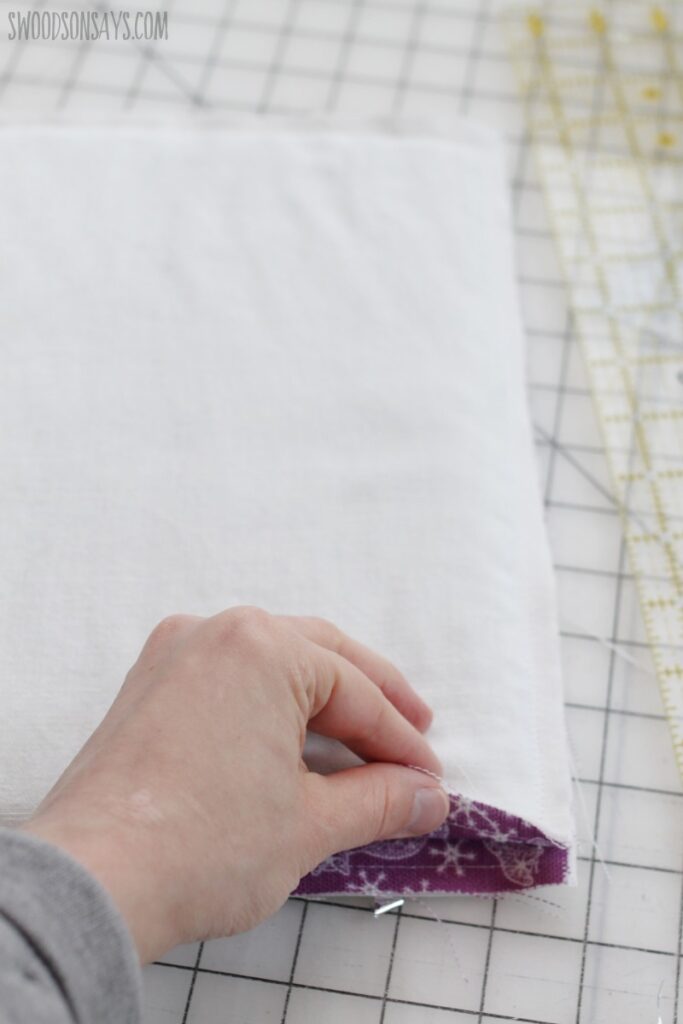
Step 5: Turning Inside Out Gently pull one of the squares through the hole until wrong sides are together. Finger press the seam and then use an iron to press the entire piece.
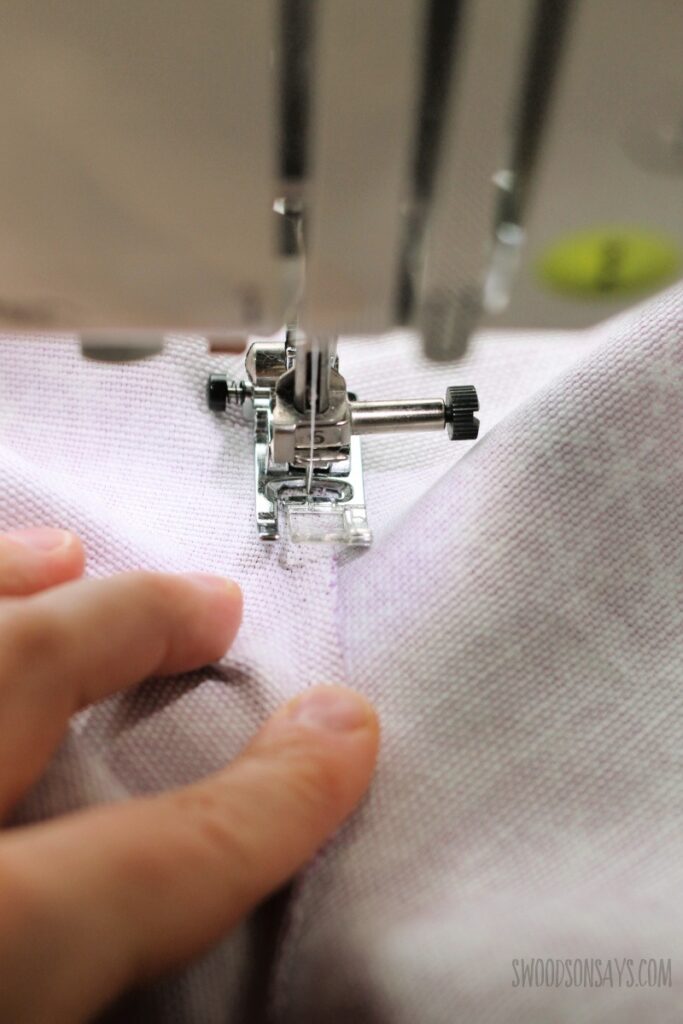
Step 6: Optional Stitching If desired, stitch the seam allowance down to one side to prevent the lining from rolling to the front.
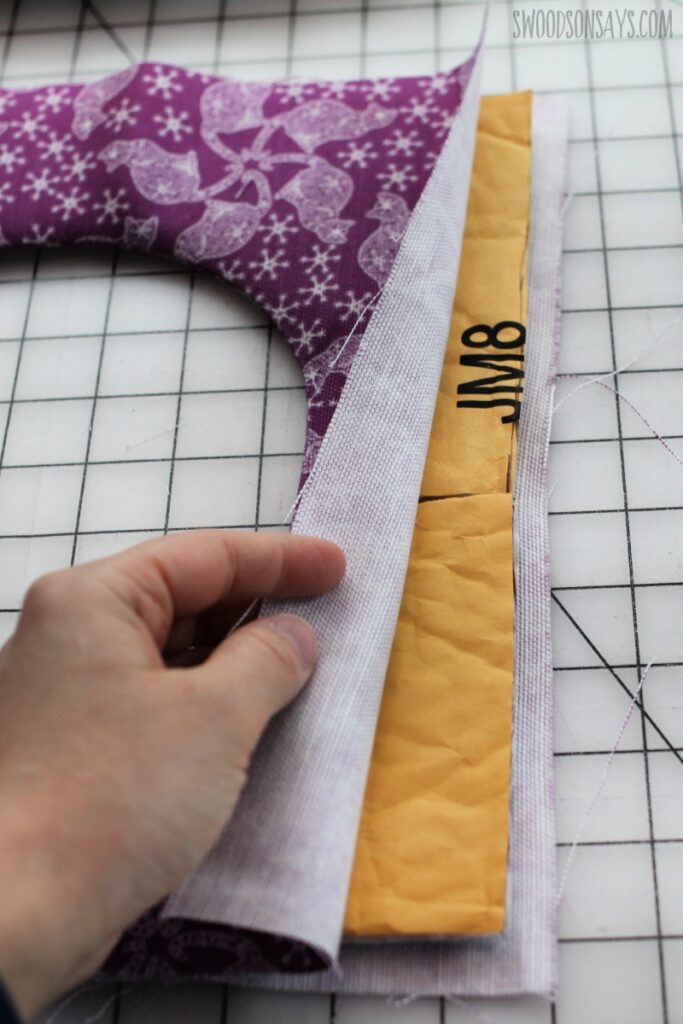
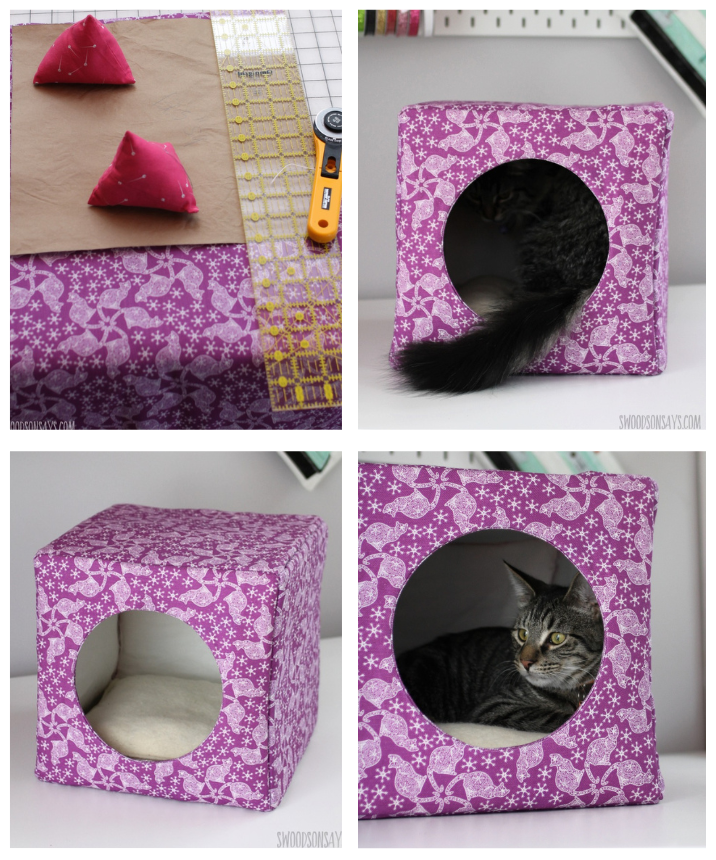
Step 7: Creating the Padding Pattern Fold the padded mailer in half and trace the shape to create a pattern for the stuffing around the circle.
Step 8: Cutting the Padding Cut the padded mailer layer to fit with a 3/4-inch seam allowance around the edges.
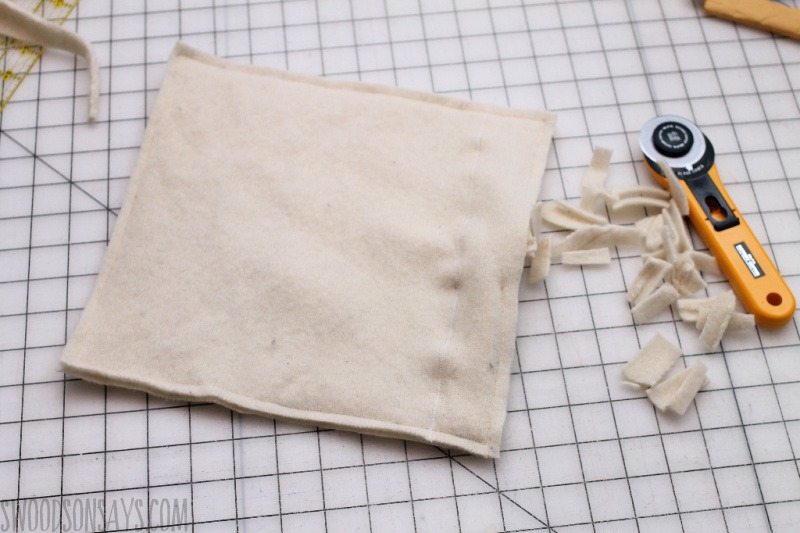
Step 9: Cutting Additional Squares Cut 10 squares measuring 11.5 inches from padded mailers.
Step 10: Assembling the Padded Squares Layer each fashion fabric square with a lining square, wrong sides together. Sew around the edges, leaving one side open. Insert the double layer of padded mailer square and sew the remaining side.
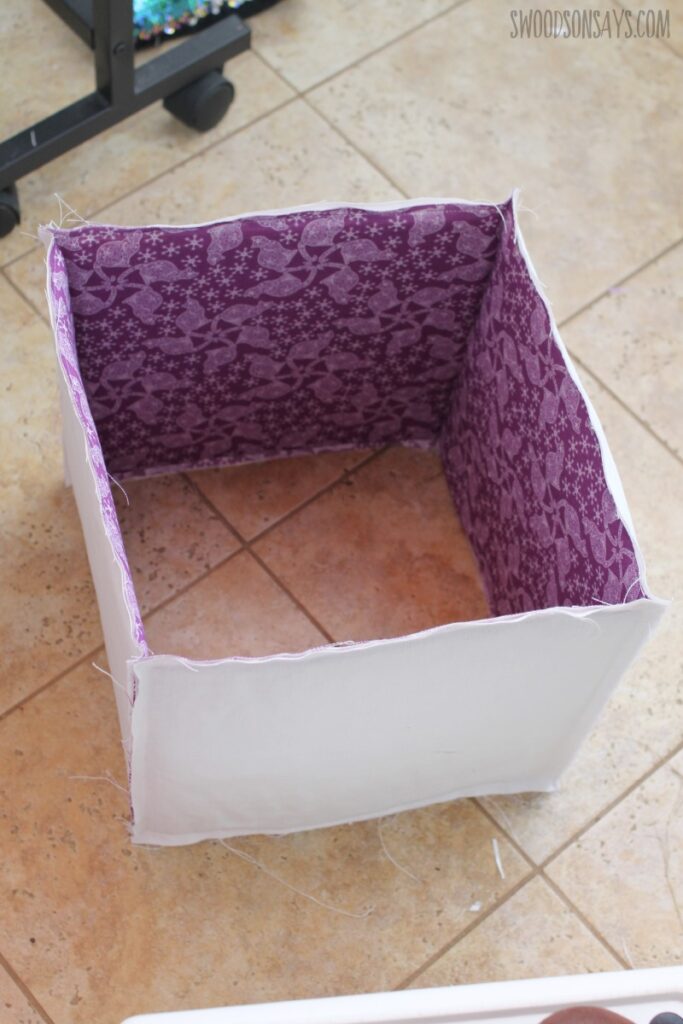
Step 11: Sewing the Cube Sew 4 of the padded squares, right sides together, to make a cube, leaving a 3/4-inch gap from the bottom of each seam.
Step 12: Completing the Cube The cube should now be assembled with 4 sides.
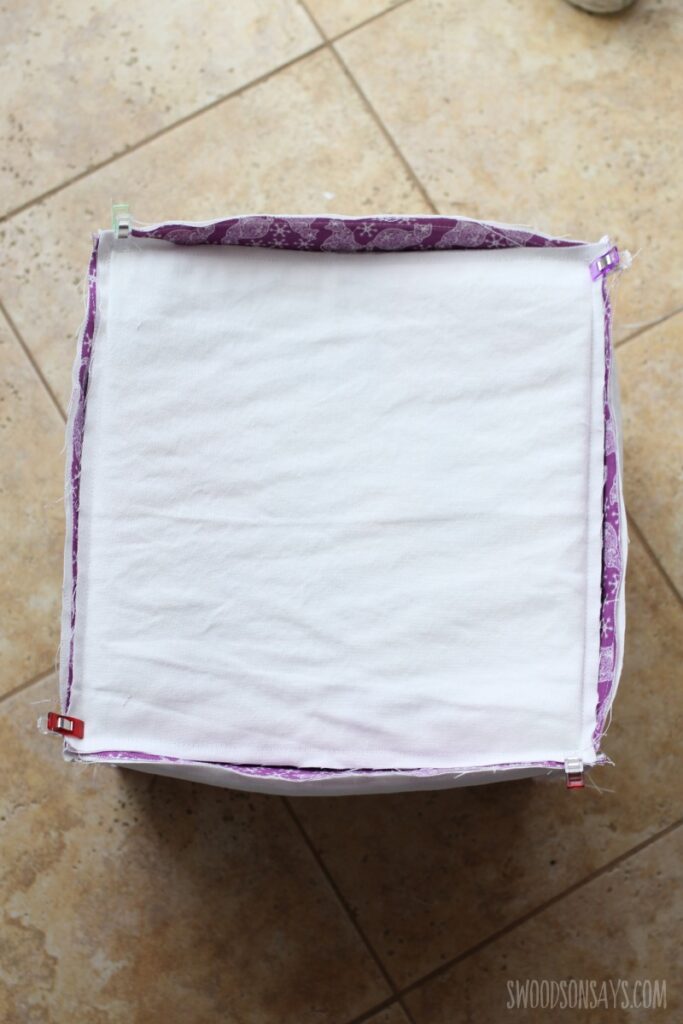
Step 13: Adding the Last Square Sew the last plain square face down to the cube, with all the right sides facing each other, one side at a time.
Step 14: Closing the Opening Sew the opening square onto the cube, ensuring that any visible stitching from previous steps faces outwards.
Step 15: Optional Pillow Make an optional pillow for inside by sewing together two 11.5-inch squares of fabric. Leave the edges raw for a cozy look.
And there you have it – a homemade cat bed that’s sure to delight your furry friend! Feel free to customize the fabric and add any extra embellishments to make it uniquely yours. Happy crafting!