Hey there, fellow pet lovers! Welcome to the second part of our DIY pet coat tutorial. If you missed out on the pattern pieces, don’t worry – you can find them in our previous post.
As avid recyclers, we decided to upcycle an old wool shirt into a stylish coat for our furry friends. And since the shirt came with pockets and a collar, we couldn’t resist incorporating those features into the design (because, let’s face it, they add extra charm!). But don’t fret if you prefer a simpler look – this coat can be just as cute without the pocket and collar.
Let’s dive into the sewing process:
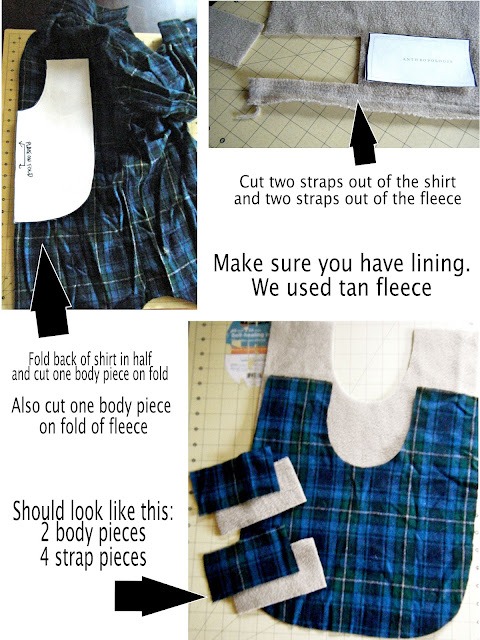
Step 1: Cut Out Your Pattern Pieces Gather your materials and carefully cut out all the pattern pieces according to the instructions provided in our previous tutorial.
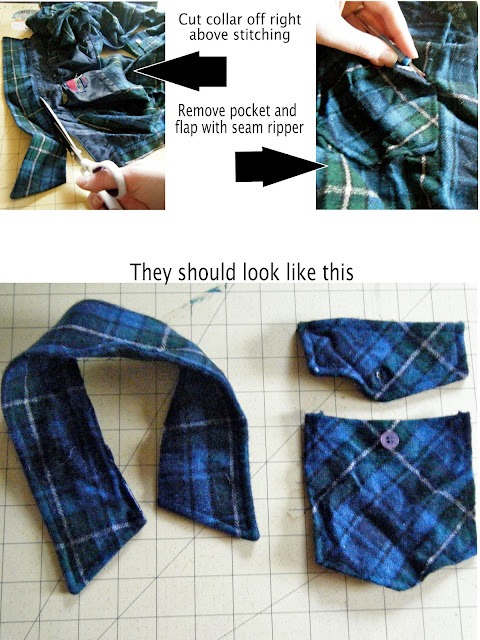
Step 2: Incorporate the Shirt Details (Optional) If you’re using the shirt pockets and collar, follow along with the next steps. Otherwise, feel free to skip ahead.
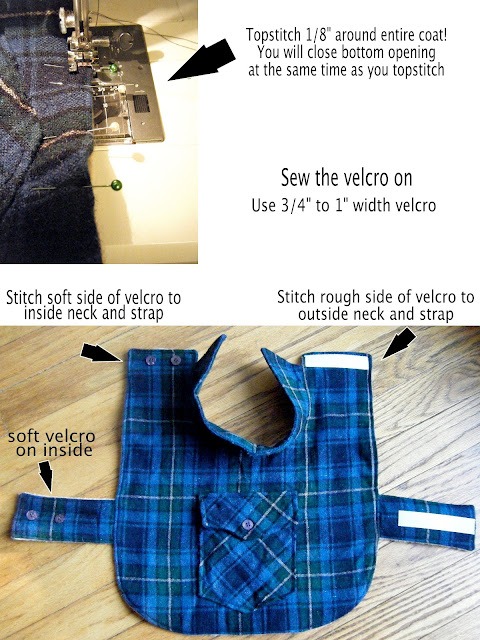
Step 3: Sew on Any Additional Details Before assembling the coat, sew on any extra details you’d like to add, such as the pockets and collar. This ensures they’re securely attached to the coat.
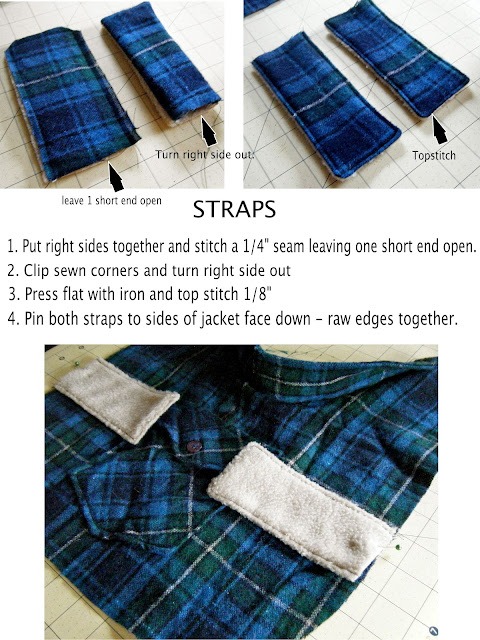
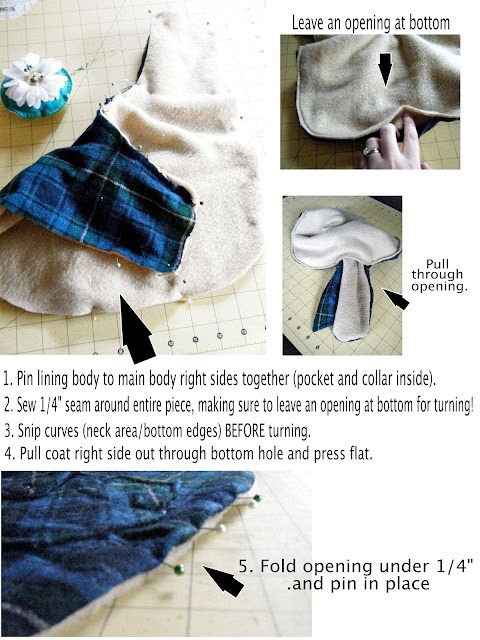
Step 4: Start Sewing the Coat Together Now it’s time to bring your coat to life! Begin by sewing the various pieces together according to the pattern instructions. Take your time and ensure each seam is neat and secure.
Step 5: Final Touches You’re almost there! Once the coat is fully assembled, add any final touches to personalize it. How about adding some buttons from the shirt for a unique touch?
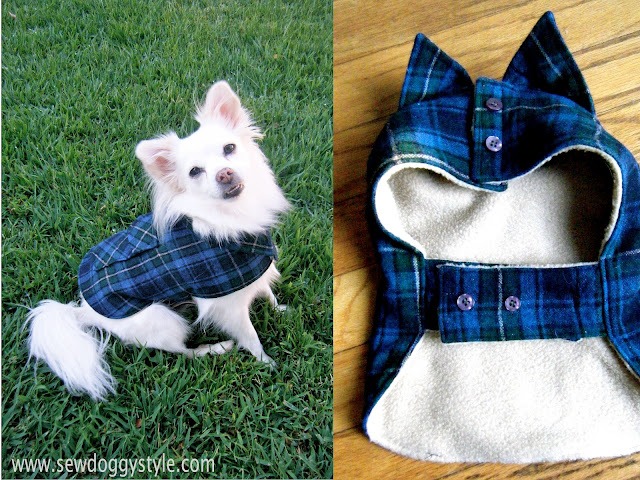
Step 6: Admire Your Handiwork Look at your furry friend rocking their stylish new coat! They’re sure to turn heads on their daily walks.
Step 7: Strike a Pose Finally, flip that collar up and get ready to strut your stuff together. Your pet is about to look like the ultimate fashionista!
There you have it – a step-by-step guide to creating a DIY pet coat that’s both stylish and sustainable!